Wednesday, January 20, 2021

Chicken Pastilla (or Something Like It)


I have had filo dough in my freezer FOR EVER. Sometime back in August, our fridge died, so we took everything we had to a neighbor's, bought a smallish temporary replacement fridge, moved everything back into it, then had a week long power outage so moved everything back to the neighbor's, then moved everything back to the smallish fridge, then FINALLY got our new fridge and the filo dough made every one of those journeys. 

It took months, but I finally found a recipe worthy of it. Chicken pastilla can be Moroccan, but I sort of mixed up a few recipes and that was that. I'm an absolute mess working with filo but as I kept telling the kids, it's going to taste delicious, who care how it looks.

CHICKEN PASTILLA (more or less)
inspired by:  the Zahav cookbook, The Delicious Crescent and From the Grapevine both of whom have much more authentic recipes but I made do with what I had on hand, definitely look at Delicious Crescent for a proper how-to with the filo.

INGREDIENTS:

1lb ground turkey
1 onion sliced
.5 t turmeric
1 t cumin
1 t coriander
.5 t ground black pepper
1 t cinnamon
1.5 t grated fresh ginger
1 T brown sugar
.25 C almonds, roasted, roughly chopped
.25 C dates, chopped finely
3 eggs (at least? I might try 4 next time) whisked well
1 package filo dough (approximately 20 sheets)
6 + T olive oil (for the filo!)
confectioner's sugar for dusting

DIRECTIONS:
Thaw the filo dough on the counter, but don't let it go too far, if you take it from the plastic and leave it out too long it will dry out.

Preheat your oven to 350F. In a large pan, heat a small amount of olive oil (1T) and cook the onions until just soft and translucent (5-10min).  Add the ground turkey and brown it. Once all the pink is gone, add all the spices and the brown sugar. Cook until done, adding a T or two of chicken stock or water if it appears dry. When the turkey is fully cooked, remove from heat to a separate bowl and mix in the almonds, dates and eggs.  I made the turkey ahead and added the eggs right before I was ready to assemble the pie.

Grab a cast iron pan or large ovenproof skillet. Paint the bottom and sides with olive oil. Begin assembling the pie. You'll use 9 sheets on this first section. Paint your first sheet of filo with olive oil and then place it in the pan, so that one edge is pulled to the bottom inside of the pan and the other hangs over the side of the pan. Continue placing the sheets like this, after basting with oil, overlapping so they go all the way around. It may be a complete mess, mine certainly once. Dump half the chicken mixture in and fold all of those outside sections back over the pie like you're tucking it in. Start again and repeat the process with the next 9 sheets of filo. Really please go to Delicious Crescent and see how she does it. Dump the rest of the chicken mixture in. Fold the filo over again and add the final two sheets to the top. Make sure it's all nice and olive oily. 

Pop it in the oven for 25-30 minutes until the filo is golden brown and crispy. Remove from oven and very carefully cover the pan with a plate and flip the whole thing onto the plate. Dust the top with confectioner's sugar. Slice and serve!


Sunday, April 5, 2020

Apple Yogurt Coffee Cake in the Time of Coronavirus


We've all been trapped inside for weeks now. Only neighborhood walks and essential store visits are allowed, and even those only when absolutely necessary. Obviously I'm baking. Cakes and pizza doughs, biscuits and cookies. I get worried when my flour runs low and I get worried when I buy flour that I might be taking it from someone else who needs it.

This was meant to use up product. Just to try to save the very last of the Northern Spy apples slowly wrinkling in the back of the fridge. To use some of the containers of plain yogurt I'd bought knowing they could help stretch my milk since you can bake with yogurt sometimes. And so I sort of Frankensteined this recipe together. Googled a recipe for Apple Sour Cream Coffee Cake, stared at my own recipe for coffee cake and improvised a bit. I didn't take notes. I never do any more now that I never blog anymore.

But it turned out incredible. Like, I'd pay good money for that at a bakery and go back and order it often incredible. So I'm making an attempt to record what I did before I forget it entirely, in the hopes that I can make it again someday. Why is it so good? The secret is the spice blend from La Boîte (linked below). It is out of this world.

APPLE YOGURT COFFEE CAKE
inspired by: Love & Olive Oil and Mrs. Krantz's Coffee Cake

Ingredients:

For the cake:

1/2 C butter softened (1 stick)
1 C granulated sugar
2 eggs (or was it 3 eggs? I CAN'T REMEMBER)
1 C plain Greek Yogurt (I used non-fat)
1 t baking soda
1 3/4 C all purpose flour (plus extra for the apples)
1 1/2 t baking powder
pinch salt
1.5 T vanilla extract (do you measure your vanilla? I never measure vanilla, I just pour it in)
2 apples, peeled, cored and diced. I did not do a fine dice, I made it reasonably chunky.

For the streusel:
1/2 C brown sugar tightly packed, plus extra for sprinkling
1/2 C chopped walnuts
3 T butter
1 t cinnamon
1 t Reims N.39 Spice Blend from La Boîte NY

Directions:
Preheat your oven to 350 F. Butter and flour a springform pan. Love and Olive Oil recommended a parchment at the bottom too but mine came out well with the butter and flour combo.

Cream the butter and sugar together in your stand mixer (or a large bowl). Add the eggs one at a time, mixing between each addition. Add the vanilla.

Add the baking soda to the Greek Yogurt, mix and set aside.
Combine the flour, baking powder and salt in a bowl and mix well.

Add the flour mixture and the yogurt mixture alternately to the creamed butter mixture.
When it is all combined, toss the apples in a bit of flour - maybe 2-3 T, then gently fold into the batter.

Make the streusel: Combine all streusel ingredients. Use your fingers to work the butter through.

Pour half of the batter in the pan. Distribute half the streusel over the batter. It will be a bit clumpy and it won't cover the whole layer of batter. Just try to make sure it's evenly dotted. Pour the rest of the batter. Distribute the remaining streusel over the top. Then use extra brown sugar, gently sprinkled over the top to make sure the top is completely covered.

Pop it in the oven and bake for 45-55 min. Mine was done around 50ish I think. It will be done when a skewer inserted in the center comes out clean of batter. It may have some moisture on it because of the apples, but it shouldn't have batter. Cool in pan on a cookie sheet for 5-10 min. Then run a knife along the edge and gently open the springform. Remove the metal collar. Using an offset spatula gently separate the bottom of the cake from the pan. You can then transfer it to a plate or cake stand.


Saturday, February 18, 2017

Welcome to the Weekend


It's the beginning of February vacation in these parts. We have no plans to decamp to warmer climes, not for a weekend, not for a week. So instead I baked up a little sunshine: lemon poppyseed cake. I was way too lazy to whip up the glaze so I just dusted the top with confectioner's sugar. 

Recipe from Cooking Light


Friday, February 17, 2017

We Now Interrupt Your Regularly Scheduled Ranting...


I'm on Twitter these days a lot. In theory because of my book blog, but bookish twitter doesn't talk books much anymore because well, the world is burning. So my Twitter feed is largely news articles and calls to action and when it is talking about books, it's talking about which of the latest bestselling authors is defending their latest racist book rather than apologizing and taking notes. So it's awfully nice when something wonderful pops up there. This time it was a Guardian article by The Little Library Cafe* with a beautiful picture of these breakfast rolls which are filled with jam. And in an instant I knew exactly what I would be baking next. They are soft and delicious, like a challah or sweet bread and inside is whatever sweet jam your heart desires. 

*OMG HAVE YOU SEEN THIS COOKING BLOG? She is amazing! It's like the perfect intersection of book loving and delicious food and [insert more gushing here]!


BUCHTELN
adapted from Food in Books: breakfast rolls from the School at the Chalet
I strongly recommend you follow her recipe, but as it's written using metric measurement,  I've written the substitutions and equivalencies I used below, just in case it helps you.


INGREDIENTS:
~2/3 C of whole milk (150 mL)
~ 7 T total of butter  - split into a teensy bit over 5 T for the recipe and 2 for brushing the tops of the buns ( Recipe calls for 110g total, weighing of 8 sticks revealed most sticks were between 114/115 g)
scant 1/4 C of white sugar
7 g active dry yeast (this is 3 tsp, which is easier to measure if you are using a jar as it's more than just one packet but less than 2)
1 egg
1 egg yolk
175 g white flour
150 g bread flour (I tried to measure the flour out for you in cups, but honestly, it's really hard, because it's so variable based on how tightly packed the cups are. It would take a lot of recipe testing to be absolutely sure what the best cup measurement is.) If at all possible weigh your flour. My entirely unscientific measurement yielded 1.5 C of loosely packed white flour and somewhere between 3/4 C and 1 C bread flour (tightly packed) but yeah, just weigh your flour.
8 t jam (I couldn't find the plum she calls for so I used Four Fruits instead)
1 T confectioner's sugar.

DIRECTIONS: Please see her recipe - but OVEN TEMP should be 355 F.

Believe me. Making and eating these may only take your mind of politics for a few minutes, but it will certainly give you something sweet to look forward to.

Sunday, February 5, 2017

Stress Baking the Presidency

In times of trouble, we all have our coping mechanisms.  As it would turn out, mine is baking.  And also, eating the things I bake. Most of my days are spent watching my two adorable boys.  But it's also spent calling Senators and my Representative, trying to refresh my knowledge of how the US Government is supposed to work, and basically doing what I can to #Resist.  I don't know if I would have guessed that I'd be a political person, but here we are.

As many of you know, I am also an anxious person. The kind of person who lies awake in the middle of the night turning over worst case scenarios and wondering if one day my completely teensy-in-the-grand-scheme-of-things social media rabble-rousing will bring jackboots to my door. So like many others I've been trying to balance my craving for information with some self care. Self-care in the form of deliciousness.

I can't promise new recipes or even high quality photos, but I am going to try to document how I'm using flour, chocolate, nuts, sugar, WHATEVER to get through this.*


*Please note, I am incredibly privileged that the current presidency has marked an uptick in my concerns about my immediate family. I am aware that many have been struggling for much longer (um, centuries?) to try to achieve the rights and comforts that my family is able to enjoy even with the country in crisis.

Just to bring you up to date, in the past 16 days:


SNICKERDOODLES - such a comfort food cookie


RASPBERRY WALNUT BARS - these are IDEAL for making with kids, they can grease the pan, pat the shortbread down, spread the jam on (incidentally, I used up the ends of about 3 different jams by mixing strawberry, cherry and raspberry) and whisk together the final topping.

CHALLAH -  That's my 3 year old helper finishing up the braid and painting on the egg wash.


POPOVERS - Yum.

What about you? Any stress related baking going on in your kitchen?

Monday, June 15, 2015

Chive Talkin'


These are not my actual chives. Mine were flattened in the last driving rain.  I got the pic off Wikimedia Commons.
 It's by Jerzy Opiola.

You need to get some chives.  Don't buy them from the grocery store.  Go to a nursery or farmer's market or farm stand that sells that sort of thing and buy an actual chive plant.  They're listed as zones 3-9 which basically means you've got a shot at growing them pretty much anywhere in the continental US.  Also they're annuals which means basically, you ignore them when they unceremoniously die in winter, because come spring, they will come right back up and you will have fresh new chives. 

But this is not a plant blog.  I most definitely do not have the gardening skills for that.  This is a food blog.  Which means the main reason I am urging to go out and get some chives is because they are delicious.  I have been eating them nonstop for the past week and I have no intention of stopping anytime soon.

So far I have made:
Scrambled eggs with cheddar and chives (also a cheddar and chive omelette) - Amazing
A salad dressing with chives, chervil and dill - So fresh and delicious
Mashed potatoes with cheddar and chives - MMMMMPHGRRR GIVE ME ALL OF THEM
Egg salad with chives - chives+eggs 4eva

Next on the agenda:
Chive biscuits - Ina Garten's got a recipe I'm eyeing
Chive butter  - when the season starts to wrap up, I'm going to make sure I make a ton of chive butter and freeze it.  Making an herb butter is actually pretty simple. You just soften the butter (in this heat that can't be too hard), fold in your snipped herbs, roll the whole thing into a log (basically, put the blob on plastic wrap and use the plastic wrap to roll it), pop it in the fridge.  Here, Martha will explain: Compound Butter

What do you do with chives?  


Friday, June 12, 2015

What to Make for EVERY BBQ This Summer


If you have a grill, there is a very good likelihood that at some point this summer, you will be called upon to cook things on it.  For other people.  Now, you can go with hot dogs, or your standard pre-formed burger patties or maybe even some soon to be dried out sausages.  Or you could make these incredible wings.  They are spicy, crispy and will have people quite literally licking their fingers.  The rub is easy and versatile, you can use it on thighs or a whole cut up chicken if you prefer.  It hasn't failed me yet and I've been making these nonstop for the past year.

BEST CHICKEN RUB EVER
enough for 40 wings

INGREDIENTS:
40 wings
1 T +  t kosher salt
1.5 T paprika
1 T brown sugar

1 T cayenne

DIRECTIONS:
I have a gas grill, so I preheat it and make sure the grate is clear.  I like the temp to be between 400 and 450, but I keep an eye on it.

Inspect your wings.  Make sure they are cut up as it will only be messier once you add the spices.  Wings will either have one or two joints.  If they have two joints, the scrawny little end is a wing tip and can be thrown in a plastic bag and tossed in your freezer for later use making chicken stock. If there is only one joint, just cut there.  Many wings are sold already cut, so that makes life easier.  If they're cut, just trim off any weird ook or feathers and you're good to go.  Pop them in a large bowl (give yourself enough room to toss them).

In a small bowl, mix together the kosher salt, paprika, brown sugar and cayenne.  Sprinkle this over the wings while tossing them to coat completely.  Pop the wings on the grill and leave them there for 7 minutes.  Flip them and leave them there for about 5.  Do a quick temperature check, I look for around 165, but you can check poultry standards elsewhere if you like.  When they are done (juices run clear, temp is correct), pull them off the grill and serve.  

Tuesday, January 20, 2015

Nana turns 90

Only a few days after Christmas, my grandmother celebrated her 90th birthday.  It was lovely having her for the holidays and for her special day.  You would never ever guess she is 90; she spent the visit watching and playing with the little one and hopefully, eating well.

My mother was kind enough to cook the main course, steak, since I have such limited experience with it.  I'm pretty sure we had mashed potatoes (there you go, it's been less than a month and already I have no memory) with it.  And I provided the brussels sprouts.


BRUSSELS SPROUTS
altered only slightly from the amazing Balaboosta cookbook - I can't wait to use more recipes from it!

INGREDIENTS:
1 lb Brussels sprouts
1/4 C honey
1 clove garlic, finely chopped
1 gala apple, peeled cored and grated
2 T olive oil
sprinkle of kosher salt

DIRECTIONS:
Preheat your oven to 425.  The original recipe calls for 400 but my oven needed to be hotter.
Cut the bottoms off the brussels sprouts and then peel off the outer leaves.  This takes a reasonable amount of time and also reduces the amount of brussels sprouts you have by a lot.  I gave them a good rinse too.  Then I patted them dry, laid them on a sheet pan and tossed with the garlic, honey, olive oil and then sprinkled them with salt.  I added the apple last because you really don't want the fruit on the pan, if you do it that way, it will just burn on the pan.  If it's on the sprouts, it drips down its juices which is much better.

Pop the tray in the oven and roast until tender.  The outside will get a nice crisp on it, but they shouldn't be super crunchy throughout.  I tossed them a few times to get more of a crisp on the outside and to make sure the apple-y parts were okay.  The recipe called for a shorter cooking time than I used. Mine needed at least 40-45 minutes to be finished, so watch yours and taste test frequently.

Sunday, January 4, 2015

Christmas Dinner (belatedly)

I very much meant to keep up with my posting but I'm afraid I got buried under and avalanche of hosting and cooking duties.  And toys, never forget the toys. I even neglected my photography, so you're getting recycled everything here.

Our menu was:

Duck Breasts
Scalloped Potatoes 
Roasted Carrots, Turnips and Fennel (with Bonus Parsnips)

It sounds fancy.  It tastes fancy.  But it was actually very simple to make.  The potatoes and roast veggies tend to themselves in the oven while you make the duck breasts so you really don't have to
split your focus.

Recipe Alterations:
I added an extra potato to the scalloped potatoes and therefore it needed to cook longer.
I didn't check the carrot and turnip recipe before going to the store and remember it as carrots and parsnips instead.  So I had to go back out for turnips and fennel and then just added the parsnips anyway.  It was still delicious.

What did you serve on Christmas (or eat, if you're not the chef)?  Also, do you have a traditional menu that you have every year or do you change things up?

Saturday, December 27, 2014

Christmas Morning Coffee Cake


 Given the collective cooking skills of my mother's side of the family, it should not be terribly surprising that our "family recipe" for our traditional Christmas morning sour cream coffee cake came from one of my mother's neighbors, Mrs. Krantz.  My mother made this coffee cake every year until I was 16.  I have made it every year since.  But it just isn't Christmas without our coffee cake.

MRS. KRANTZ'S COFFEE CAKE

INGREDIENTS
for the cake 
1 1/2 sticks unsalted butter
2 C sugar
1 1/2 C sour cream
4 eggs
pinch salt
1 T baking powder
2 t baking soda
1 t vanilla extract
3 C flour
for the streusel
3 T butter
1/2 C packed brown sugar
2 t cinnamon
1 C chopped nuts (we usually use walnuts, but sometimes use pecans)

DIRECTIONS
I often make the streusel ahead since I make the cake on Christmas Eve, so I'll do the streusel that morning and then do the cake at night, just to save a bit of work.  So basically you just put it in a bowl and mix it together (I use my fingers) until everything is evenly distributed throughout.  Then I set it aside.

Preheat your oven to 350 F.

Cream the butter and sugar together in a stand mixer (or using a hand mixer) until light and fluffy.  Add the eggs mixing after each one, then add the vanilla.

Sift together the dry ingredients; the flour, salt, baking soda and baking powder.

Add the dry ingredients to the creamed sugar mixture alternately with the sour cream and mix to make it a batter.

Spray or butter a bundt pan thoroughly.  Sprinkle the bottom of the bundt pan with some of the streusel (maybe a third of it?).  Then add half the batter, sprinkle the rest of the streusel to create an even layer over the batter in the bundt.  Add the rest of the batter.  Bake for 60-70 minutes or until a skewer or toothpick comes back clean and the cake springs back a bit at the touch.  When you cut into it, the streusel should make a nice sugar swirl through the cake.


Thursday, December 25, 2014

Merry Christmas!


Dinner last night came off beautifully. I'm afraid the pictures will have to wait though...

5pm
  • Heated the empanaditas at 400 for 25 minutes and then transferred them to the toaster oven to keep warm.  They hold up very well.
  • Took the puff pastry for the chorizo puffs out of the freezer to thaw.
  • Rounded up serving dishes, covered baking sheets with foil to ease clean up afterwards and made sure the table was set.
  • Started to layer the strata for Christmas morning.

5:30ish
  • Transferred the empanaditas to the toaster oven.
  • Put the pork pie and the cheese and spinach pie in the oven at 3:25 to heat for about an hour.
  • Spooned the hummus into a serving bowl, took the green beans out of the fridge and prepare a saucepan for boiling them in.  
  • Finished making the strata and popped it back in the fridge so it only needs to bake tomorrow.
6:00ish

  • Began making chorizo puffs (recipe below).
  • Took the grape leaves out and put them in a serving dish
  • Took the plastic wrap off the eggplant
6:30ish

  • Kept making chorizo puffs
  • Set out the deviled eggs
  • Warmed the flour tortillas and corn tortillas by putting them in the toaster oven (at 140F) 
  • Put the hoisin sauce into a bowl
  • Set out serving spoons
6:45ish

  • Took the pork pie and cheese and spinach pie out of the oven
  • Heated up the asian chicken
  • Set out the dipping sauce for the empanaditas
  • Put the chorizo puffs in the oven
7pm - DINNER AT LAST!!

We serve buffet style, with platters all around my kitchen/dining room counters.  Everything turned out wonderfully.  The best part was knowing that I can do it faster and better next time.  Honestly the chorizo puffs were the most work of the evening and I was supposed to make them on the weekend and freeze them but I'd had a bad cold so I had to do them last minute.  But everything else was simply warming up or cooked quickly. 

CHORIZO PUFFS

INGREDIENTS:
1 package chourico or linguica, if you can get the Portuguese kind, that's what we use
1 package puff pastry
1 egg, well-beaten (egg substitute would be fine here)

DIRECTIONS:
Take the puff pastry out to thaw according to the package directions.  Mine (Pepperidge Farms) needed 40 minutes to thaw.  Prepare a rolling area with a decent amount of flour, the puff pastry tends to release some water as it thaws so you'll want to make sure it doesn't stick.

We are usually using frozen chourico because you can't get the Portuguese kind locally, and it's what we prefer.  If you are doing it from frozen too, you'll need to have thawed it earlier.  The puffs are a little bit better if you remove the sausage casing and this is very hard to do with fresh sausage, but with cold/thawed, you can usually slit it with a knife and just peel back.  If you can do it, it keeps you from needing to eat the puffs in one bite.  If you can't, consider chopping up the chourico into bits rather than in rounds.  Anyway, once you've removed the casing, slice rounds of the chourico, probably 1/4" thick.  Roll out your puff pastry till quite thin.  Lay out a single row of chourico along one edge.  You want to fold the puff pastry over that row, so guess how much you'll need to cover the chourico and then slice down the puff pastry so you have one big piece set aside for use later and then a narrow strip that's just twice as wide as the chourico.  Paint the half of the narrow strip that doesn't have the chourico on it with eggwash.  Then fold over the pastry and using a knife, cut in between each round of chourico to make a square packet.  I then use an extra dab of egg and fold down the corners so it is round and pop it on a waiting sheet pan.  Once you've done one strip of chourico filled pastry, go back to your big piece of pastry and then repeat the process until you are done.  It is not particularly fast work and your fingers get gross, so wipe and wash when needed.

When all your puffs are done, put them in a 450 oven for 8 minutes or until puffed and golden.  

Wednesday, December 24, 2014

Halftime?

Can you call it that on Christmas Eve?  We're halfway through!

This morning after my post, I finished making the eggplant and it's marinating on the counter until dinner.

We took a break to eat some sandwiches with sweet soppressata, tavern ham, hot capicola, prosciutto and provolone.


We had some turkey on hand for Ryan as well.


Then after lunch I finished layering the streusel and the batter in the coffee cake (for tomorrow morning) and then popped it in the oven.


Christmas Eve Countdown

Again, I collapsed into bed last night before managing a post.

Yesterday at 5pm

The bolognese sauce is bubbling away on the stove for that night's dinner.

Chicken sausages are warming on the stove and cheese is being grated for the Christmas morning strata

Yesterday at 5:02
We decide to heat up the roast half duck to begin preparing the faux peking duck for Christmas Eve (we toss out the orange sauce packet).

Yesterday at 5:03 pm

My mother explains that she assumed I had bought the duck.  I explain that it is not readily available up here and therefore I could not have possibly bought the duck.

Yesterday at 5:08 pm

We call Uncle John and explain we are a protein short for our meal and need a replacement dish that will not involve going to the store.  After learning I have over 5lbs of chicken drumsticks available (Shout out to Costco!) he explains that I should confit my drumsticks and use them to make little asian chicken pancakes.

Yesterday at 7pm

The chicken drumsticks come out of the pot, shedding luscious moist chicken meat as they do.

Today…
8:30 am

The streusel is made for the coffee cake I'll be baking for tomorrow and the dry ingredients are sifted together and set aside.  I'll do the wet and bake it later so it's fresh.

The dipping sauce (far right) for the empanaditas is mixed up and popped back in the fridge.


Need to cook some eggplant right after breakfast, but then I'm pretty sure the rest of the cooking will be done right before dinner.  Hoping it's not too much!

Full Menu for Tonight
Cheese and Spinach pie - in the freezer -  (heat up in the oven)
Empanaditas and Dipping sauce - in the fridge and freezer - (heat up in the oven)
Traditional Pork Pie - in the fridge - (heat up in the oven)
Asian Chicken - in the fridge - (heat up on stove)
Hummus and Pita - in the fridge and on the counter - (cut up pita and put hummus in a bowl)
Grape leaves -
    Two kinds, traditional Greek and Turkish with currents, pine nuts onions (purchased) - in the fridge 
    (plate and serve)
Deviled eggs - in the fridge - (put plate on counter)
Asian duck - in the fridge - (heat stovetop and prepare pancakes)
Eggplant - not made!  Will start it after breakfast.
Green beans - not made!  Made on stove top, right before dinner
Chorizo in puff pastry - not made!  At this point it needs to be done right before dinner.  Boo.

Tuesday, December 23, 2014

T minus 2 Part 2

Around 1pm

The deviled eggs are done, if a bit salty.  Maybe don't use the full 1/2 tsp?  

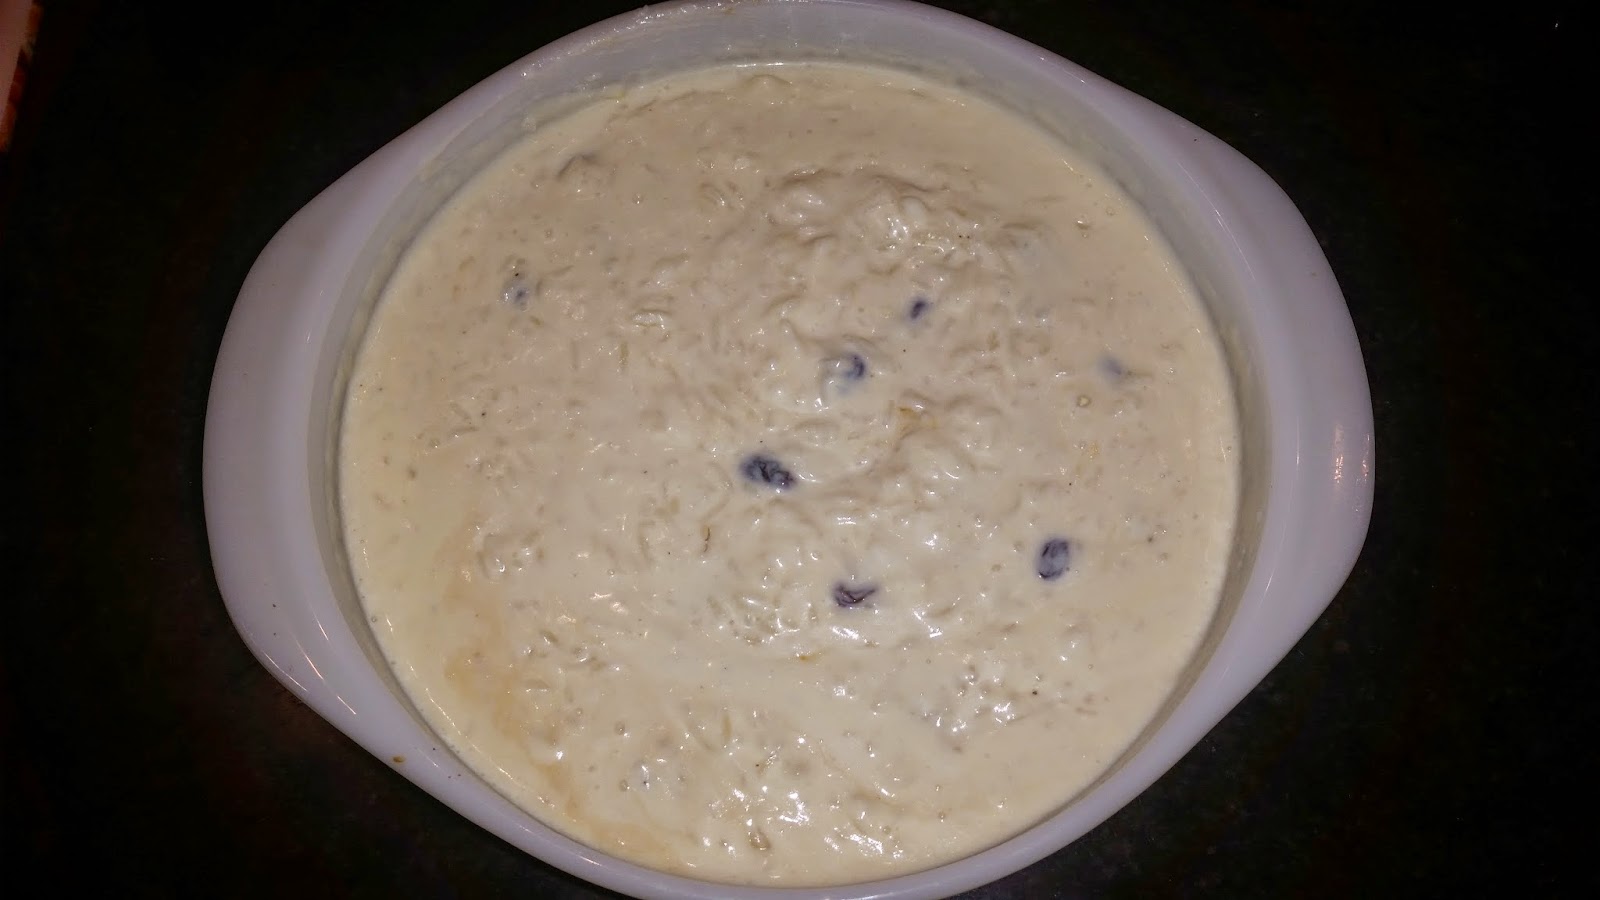
The rice pudding is on the stove.


1:30 pm

The rice pudding is still on the stove despite Ina Garten having said it would be done at 1.

Ina Garten's Rice Pudding
(my version)

INGREDIENTS:
3/4 cup raisins
2 tablespoons dark rum
3/4 cup white basmati rice
1/2 tsp kosher salt
4 cups milk 
1 cup cream
1 1/2 cup water
1/2 cup sugar
1 extra-large egg beaten
1 1/2 tsp pure vanilla extract

DIRECTIONS:
Put the raisin in a bowl and pour in the rum.  Put the rice in a pan with the 1 1/2 cups of water.  Bring to a bowl, then reduce to a simmer, and simmer covered 8-9 minutes, or until the liquid is absorbed. Stir in the milk and the sugar, bring to a boil and then reduce to a simmer again.  Simmer 25 minutes uncovered until the rice is soft.  Well, my rice was not soft and my pudding was really just milk with rice grains floating in it, so I can't sign off on this.  Maybe my simmer was too low, because I have a legit simmer burner?  At any rate, after 25 minutes of nothing, I moved the rice to the hotter burner, gave it another 15-20 minutes and it started to seem more like rice pudding.  Then add the beaten egg and cook for one more minute.  Remove from the heat; add the vanilla, the cup of cream and the raisins and any rum they may not have absorbed. I forgot to add the raisins.  No worries.  I stirred them in once I poured it into the bowl.  If I hadn't told you, you'd never have known.  Pour it into a bowl and pop it in the fridge.  Cover with plastic (right up against the pudding, to prevent a skin).


I

T minus 2

I took the pictures needed to update you last night, but then I went to bed instead of updating you.

Last night…7pm
I had rolled out and baked the sugar cookies and then set about icing them. I was working with dried egg whites rather than meringue powder and so I made up the recipe for the royal icing which maybe wasn't my finest culinary moment.  It ended up too drippy and I fixed it, but by then I was tired and did an unimpressive job icing the cookies.

Moral: If at all possible, bake then take a break before doing the icing.

2 days until Christmas…9am

A dozen eggs have been hardboiled and popped in the fridge ready to become deviled eggs.

I finished icing the Christmas trees!

The rugelach pinwheels are coming out of the oven in batches.


Monday, December 22, 2014

Happy Holidays!

I know, I know, I've been a long time gone.  But I am hosting this Christmas for the first time ever!  I ran into an acquaintance at the library and she asked if I'd be cooking brunch or dinner.  I laughed.  One meal is for wimps.  I am hosting from today straight through to next Monday.

I figured I'd give you all the blow-by-blow in case you felt like living vicariously (or having a guide on how to host people for 8 days without going insane).

3 days until Christmas

Current status (8:30 am)

Cookies:
One batch of ginger crinkles in the oven and one on the counter.  I made the dough, rolled the balls in sugar and froze them a week ago.  This morning I just spread them in parchment and baked them.

Sugar cookie dough is in the fridge, waiting to be rolled out and cut.

Rugelach pinwheels are in the freezer, ready to pop in the oven.  As much as I claimed this recipe was a pain when I made it before, it's actually perfect if you've got to work in small batches.  I made the filling and the sugar dip while the baby ate his breakfast.  I mixed the dough while he ran around the house with the mower like a wild man.  I rolled out the dough and added the filling (the hardest step) while he napped.  Then I sliced it and dipped it in cinnamon sugar while he ate his dinner.

Christmas Eve Buffet:
The empanaditas are in the freezer, ready to bake.
The hummus is in the fridge.
My mother is bringing more today!

Fridge supplies:
Between the baby and the baking I have an epic amount of milk on hand.  I also have pounds and pounds of butter.


To be continued...


Sunday, July 13, 2014

First Ever Birthday Weekend!


Not for me of course, I have long believed that having a birthday entitles one to having a full weekend celebration, but this was the very first birthday for my little one.  And I cooked up a storm.

The most complicated thing I made the whole weekend, was the birthday cake.  I wanted to make it gluten-free, so that my father would be able to join in the festivities.  I also had a mini-crisis in which I decided my baby was way too little for chocolate.  In the end, I baked this lemon layer cake from Annalise Roberts* with some minor adjustments.

1.  I did not make homemade lemon curd.  I am lucky I managed to bake a cake, the lemon curd was beyond me.  I bought and used one whole jar of Dickinson's Lemond Curd.

2.  I made Ina Garten's cream cheese icing because I'm not really a buttercream person.  The recipe is here.  I substituted lemon extract for the vanilla extract and vanilla extract for the almond extract.  It was heavenly.

Now, I may be a decent baker, but I am generally not a cake baker and despite my three cake stands, I own nearly nothing in the way of cake paraphernalia.  No piping bag, no offset spatula, nothing.  So what you see above was achieved through hyperventilation, hand-wringing, a knife, some water and a ziploc bag.

This particular layer cake required cutting the layers in half, so I did that with a bread knife, holding my breath, while my father said "up, down, no - hold steady".

Gluten-free cakes are even crummier than regular cakes, so I did a crumb coat.  I popped it back in the fridge, then pulled it for a final layer of frosting.   It was a warm day so whenever things got a bit too squishy I popped everything back in the fridge and walked away.  I used a knife wet with a titch of water to smooth the coat of icing, then piped on the dots with a ziploc baggie. High class I tell you, high class.

Absolutely everyone thought the cake was ridiculously delicious, except the birthday boy, who spat out any morsel of cake or frosting that we managed to sneak past his lips.  It wasn't exactly the reaction a mother could hope for, but I'm sure by next year he will be more into the whole idea of cake.

*I have mentioned elsewhere on this blog that her baking recipes are divine - her cookbook is Gluten-Free Baking Classics and I highly recommend it if you do any amount of gluten-free baking.

Monday, June 2, 2014

What's Really For Dinner

I have been honest I hope, about exactly how basic and low-frills my cooking has been post-baby. I basically consider it a victory every time a meal goes down on the table that does not include chicken apple sausages.  One of my new staples is what I call "Mexican Bowl" which is likely not Mexican at all, but is delicious and easy.

Basic concept: Cook rice, add toppings, add dressing, eat dinner.
Easy to execute: So much of this can be prepped ahead.  Grate the cheese, chop the lettuce and tomatoes, rinse and drain the beans, mix the dressing, thaw the corn.  Come dinner, all I need to do is press start on the rice cooker, go up to put the baby to bed, come back down, cut the avocado, toss together and serve.
Versatile: I made it vegetarian this time, because it means less work, but if you had leftover chicken or rotisserie chicken on hand, that would go well too.  Also, the way I prepare it, Ryan and I both just add our toppings ourselves to the rice base.  This is great for guests, or kids, who might not want all the choices (or want to keep them separate).
Forgiving:  I wrote you a recipe, but I never use one.  I eyeball everything.  You can too!

"MEXICAN" RICE BOWL
serves 2ish hungry people

INGREDIENTS:
3/4 C raw rice/ brown rice/ rice quinoa blend
1 can black beans, rinsed and drained
1 clove garlic
1 t cumin
pinch salt
olive oil
1 C shredded cheese (cheddar? monterey jack? habanero jack?)
1 C chopped tomato
1 C chopped lettuce
1 C corn (frozen is fine, ideal even)
1 1/2 avocados, chopped
optional: shredded chicken

DRESSING:
2.5 T red wine vinegar
1 T lemon or lime juice
4 T olive oil
1/4 t cayenne
1 t cumin
1/2 t salt

DIRECTIONS:
Do ahead if you like: Get some bowls ready.  Fill a bowl with your chicken, another with your cheese, another with your tomato, another with the lettuce. Measure your rice product and put it in the rice cooker or pan.  Mix up the dressing in a separate bowl and set aside.
Game time: Cook the rice. I use a rice cooker, but you can use a pan.  I just always opt for the easiest way.   If you're using frozen corn, you might want it to be warm for the meal, so you can microwave it or heat it on the stove top.  In a small saucepan, heat up the olive oil on medium low.  Mince your garlic clove and add it to the oil.  Add the rinsed and drained beans and then sprinkle with the cumin and a pinch of salt (to taste).  Warm the beans.  Dice your avocado.
Assembly:  Lay down the rice, then the beans, then the corn, then your cheese (adding the cheese near the warm ingredients helps it to get a bit melty if you're into that sort of thing - which I am).  Then add your tomato, lettuce and avocado.  Pour your dressing over the whole shebang.  Enjoy.

Wednesday, May 28, 2014

New Toy, New Troubles, New TASTY


We bought a grill, a Weber Spirt gas grill that is my new favorite cooking tool.  So far we have made wings (heavenly, but still perfecting our spice rub), burgers (standard issue), chicken (meh, should have used a better recipe) and pizza.  Mmmm. Pizza.  The dough was delicious beyond delicious, but I am yet a novice.  I went into pizza making with only the vaguest of recipes and the most cursory of looks on the internet.

Here is what I learned:
  • Brush your dough with olive oil, it helps with the sticking.
  • Having a grill that tells you how hot it is, is magnificently convenient and helpful.
  • Wet toppings = sad, so keep them dry so they don't interfere with the crust's crisping.
  • Keep your toppings warm.  Ours got a bit cold.  I think next time I'll put them on the raised rack in foil while we do the crust so they go on nice and hot.
  • Cheese next to the crust, it's the best way to melt it.
  • Smaller is better, because it's easier to remove
  • Thin crust is a nasty nasty thing to try to lay on the grill properly.  I will be rolling out my dough thicker next time.
  • Cooking on the grill is one billion times faster than doing it in the oven (actually, no, that is a gross exaggeration, but the oven takes 6-7 minutes for the crust and then another 5ish minutes for the toppings.  I think we went from dough on to topped pizza and off the grill in under five minutes.
Here is what I need to know:
  • How do you transfer your dough to the grill? It seems like it should be easy, but alas, it was terribly hard and resulted in some tears and much swearing.  
I promise to make many more pizzas this summer and let you know when I have hit level win.

If you have mastered the art of pizza-on-grill please, please, please share your tricks, tips and techniques in the comments.  

Wednesday, May 21, 2014

Yet Another Grilled Cheese


It is entirely possible that I have never met a grilled cheese I didn't like.  But this grilled cheese is one that I didn't eat.  Not because I had anything against it, mind you, simply because I made myself a different one.  Mine was tasty, true, but since my mother-in-law proclaimed this to be the best grilled cheese she'd ever eaten, I figured I might as well share.  Now, my mother-in-law may have been exaggerating slightly as she is often overly generous with her praise of my cooking (not a bad trait at all, I must say) but my husband did confirm that it was a damn good sandwich.

GRILLED CHEESE WITH CHEDDAR, HORSERADISH, ONIONS AND APPLES

INGREDIENTS:
2 slices of bread per person - I used multigrain, it's all I had, but I think a nice deli rye would be ideal
3 slices of bacon per person, cooked up to a crispy goodness
onions, carmelized by cooking on low heat until golden, silky and sweet
red horseradish (seriously, my husband WILL NOT with the white stuff)
grated cheddar cheese - a nice sharp cheddar, and a decent amount per person, no skimping
a tart apple (maybe half an apple per person, how much do you like apples?) like a Northern Spy or Granny Smith, sliced and sauteed until soft and juicy but not mush
Butter

ASSEMBLY INSTRUCTIONS:
Begin with the bread.  Smear one side with a thin but even layer of horseradish.  Get it all the way to the edges (doing things to the edges is key with a good grilled cheese).  Mix together your onions and apples and then carefully layer them on top of the horseradish.  Top it with half of your grated cheddar cheese.  Then apply the slices of bacon.  Top with another layer of cheddar.  Finally add the top slice of bread.

DIRECTIONS:
Heat up a pan to medium high (a cast iron would be lovely).  Melt a healthy pat of butter in the pan.   Plop the sandwich in the pan.  Cook until the cheese starts to melt and the bread is toasty.  Using a spatula, carefully slide from the pan.  Melt another healthy pat of putter in the pan.  Carefully flip the raw side of the sandwich so it's touching the pan.  Cook until the cheese is completely melty and the sandwich is golden on the other side as well.  Cut.  Munch.  Mmmmm.

LinkWithin

Related Posts with Thumbnails