Saturday, December 21, 2013

Bird's Nest Cookies


In the midst of all the chaos, there is still Christmas.  Maybe it's having a child of my own, maybe it's just that I've always been violently attached to traditions, but this year, I have no tolerance for change.  A few years ago, we overthrew the family bird's nest cookie recipe in favor of Ina Garten's Jam Thumbprints, which are delicious, rich, buttery and shortbready.  But this year, with my mother making a gluten-free version for my dad, I wanted nothing more than the original.  Of course, no one HAD the original. My mother had tossed the original recipe deeming it too fussy to deal with.  She claimed her brother might have a copy, but nope.  And the whole time I couldn't get the recipe out of my head.  I could picture it so clearly.  Why could I picture it so clearly?  Maybe because I had it all along.  Safely written in the cookbook my mom gave me full of family recipes, was our bird's nest cookie recipe.  So with my little one safely in my mother-in-law's arms, I whipped up a batch.  They are every bit as good as I remember.  They are also, a bit fussy in parts, but I'll try to help you through that.

BIRD'S NEST COOKIES
Makes ~ 3 dozen
recipe courtesy of someone my mother's family once knew (a  little help on this mom?)

INGREDIENTS:
2 sticks of softened unsalted butter (this is 1 C)
1 C brown sugar, lightly packed
2 T vanilla extract
1/2 t almond extract
2 eggs (reserve the white of one, so you need 1 whole egg + 1 yolk for the cookie, 1 white for rolling)
2 C flour
1/2 t baking powder
2 C chopped nuts (I used a mix of walnuts and pecans)
assorted jams, jellies and marmalades

DIRECTIONS:
Preheat your oven to 350 F.
Cream together your butter and sugar. This was a bit harder than usual.  Maybe brown sugar is softer than white and can't break up the butter as well?  So maybe soften the butter properly (I am notoriously lazy and rarely soften the butter enough).  You don't want it to be liquid, but it should be soft to the touch.  Then add your eggs, mixing well after each. Next add the extracts and quickly mix again.  Finally, mix together your flour and baking powder and slowly add to the wet ingredients.

I used a mini-prep to chop my nuts.  They should be small so they stick, kind of like this:

Prepare to roll the cookies.  You'll need a small plate covered with nuts, a bowl with the egg white and an ungreased cookie sheet.  

First, create a small ball with the dough.  If you make them too small, it's hard to make an indentation for the jam. If you make them too big, well, you don't get as many, and it's a lot harder to fit in your mouth.  I think about 3/4" is the best which is a bit smaller than I usually make cookie balls.  

Next, dip the ball in the egg white.  Then roll it in nuts and place on the cookie sheet.
You may not need the full two cups of nuts and if you'd like to save nuts, I'd say only pour some on the plate and replenish periodically.  You can't save what's left on the plate after you've rolled because of the egg white.  Ew.

The balls should be 2" apart on the cookie sheet.

Bake for 10-12 minutes. This baking thing is the other fussy part.  If you over bake it's extremely hard to make an indentation.  If you under bake, well, you have gross raw cookies.  So watch them carefully.  I had some take longer than 12, but most came in at 12 minutes.  My mom's recipe said 10.  In order to check for doneness, I wanted them to sort of slide off their spot when poked, have a light golden underside if checked.  When you pull them out, make a small indentation in each and allow to cool on a cooling rack.  You can make your indentation with your thumb (ow! hot!) or with the back of a teaspoon measure (which isn't great because it's more likely to make the edges of the cookie split apart).  Your call which you use.

When the cookies are cool, place a small amount (about a teaspoon) of jam into the indentation. I used blueberry, raspberry and apricot for these, but you can use whatever you like!


Monday, December 16, 2013

Hungry Hippo Gift Guide 2013

Happy Holidays! Oh, the hell with it.  Merry Christmas!  If you're Hanukkah shopping right now, you are more than a day late and a dollar short, so lets move it along.

Want to shop for your favorite kitchen loving pals?  Take a gander at what I've picked out for you this year!

1. Measuring Cubs - $36 at Anthropologie
If I weren't already in possession of the world cutest hedgehog measuring cups I would want these, badly.  Do you see the fish in his belly?  Adorable!!


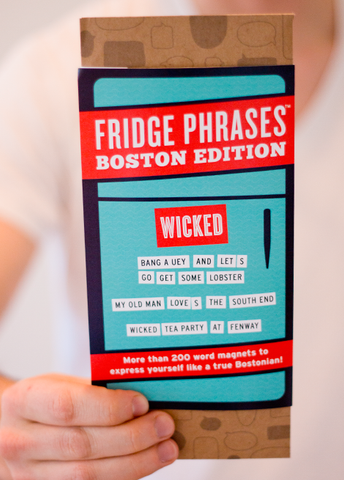
2. Fridge Phrases - $15
Perhaps your favorite chef also has a fridge.  One that things stick to (this is getting increasingly hard to find, my fridge is wood paneled, bizarrely enough).  Maybe that friend also lives on the east coast and needs a regionally specific set of fridge magnets.  Clearly, I would choose the Boston edition myself.
3. Maptote $17
You know your foodie friends are shopping for local organically grown produce at the farmer's market and would love a made in the USA cloth bag to use to carry their groceries home.  I have Seattle and Cape Cod.  I need to add Paris, Boston and Philadelphia to my collection.  Available in a range of places and styles.


We're getting to the point where just about everyone knows someone who is gluten-free.  My father, who knows good food better than just about anyone I know, heartily endorses this cookbook as the best source of gluten-free baked goods.  I've sampled them and let me tell you, they're not just good for something that's gluten-free, they're actually delicious.  


I think my nana is on a one woman mission to convince the world that this is the best pan ever.  If you live alone, or enjoying eating one egg, it really might be.  The egg turns out the perfect shape (really! no squiggly edges!). Plus the pan is so small and easy to wash! 


Look, I don't know if this is the best waffle maker on the market.  All I know is that I need a waffle maker.  I have always wanted a waffle maker.  I have never had space for a waffle maker.  Currently, I have space for a waffle maker.  Also, I would greatly appreciate it if you threw in someone to operate the waffle maker.  That would be truly exceptional. 

NB: Although I know next to nothing about waffles I do know that they should be square. Not round.  

It's only too bad these are fox terriers not welshies.  I'm sure there's a joke in there somewhere about terriers and caffeine delivery devices but I am entirely too exhausted to work it out for you.  

I have no clue whether or not this works, all I know is that I never have the foggiest notion how much spaghetti to make.  


9. Blossom Trivet 2 for $19.50
Look, I haven't a clue how it does all those other things it says it can, but it's still pretty cool for a trivet. Plus, it seems like it would be fun to play with.  Functional + toy = win!

My math skills are decent, but cooking (particularly baking) isn't exactly a place to be taking chance.  And fractional division is far from my mathematical strong point.  So why not make life easier with a recipe divider magnet (Who cares if it's magnetic? IT DOES MATH).  I know my husband* would love to no longer hear "Babe? What's a third of three quarters?"echoing from the kitchen in frenzied tones.

*this is in no way intended to read as "girls are dumb at math and need to ask boys for help".  My husband is a human calculator freak.  It's just so much faster to ask him.  At your house, it's entirely possible that the lady of the house is the one with the math skillz.  The only relevant fact is whether the person who cooks (regardless of gender) is also the person in possession of the ability to quickly and accurately divide fractions.  If not, helloooo recipe divider!

What's on your kitchen wish list?  Let me know in the comments!  I think I need #3 (in any one of the cities named), #6 (or similar, WAFFLES!!! WAFFFFFFFFFLESSSSSSS!) and #7.

Interested in last year's list?  Many items are still available!

Thursday, December 5, 2013

Dooooo It

This is not a recipe, this is a public service announcement.  In the mad dash to use up the Thanksgiving leftovers  I found my self staring into a container of leftover stuffing.  We're partial to the cornbread/sausage variety around here, and my mother had made a delicious batch of it for us.  But days after Thanksgiving (or more accurately, after days of Thanksgiving leftovers) even my favorite treat was looking hard to swallow.

So I did what any self-respecting desperate person would do.

I added an egg - I had maybe a cup to a cup and a half of stuffing left.
I rolled it into balls.
I gently rolled those balls in flour (you could use cornstarch).
And I dropped them into hot oil.

Mine are a bit on the, erm, dark side shall we say?  That's what comes of not using a thermometer for your oil and generally being distracted while cooking.  Not recommended.

If you use a thermometer, keep your oil at about 350 and cook your balls for only a minute or two per side.

The result was so good.  Like a sausage-y hush puppy.  Like a ball of corn dog.*

Stuffing wins.

*what does cornbread have to do with dogs?  No really.  I'm asking.

PS - You all know by now that the salad greens are purely an effort to pacify my husband.  I just used lettuce, apple, carrot, pecans and a dressing of olive oil, apple cider vinegar, maple syrup and salt and pepper.  It did nothing to detract from the fried stuffingy goodness.

Saturday, November 16, 2013

Pizza (and a Friend) to the Rescue!


As I've mentioned before, one of the true drawbacks to having a child is that my brain no longer can manage its usual everyday level of function.  And as such, figuring out dinner can be a really bad scene, especially when I haven't planned ahead.  On this day, I had planned exactly as far as "pizza", which gave me a complete false sense of confidence in dinner because once the appointed hour rolled around I realized I had absolutely no idea what to put on the pizza (given that there were no sausages in the fridge or freezer, something I hadn't bothered to check).  So I did what everyone should do in desperate times, I begged for help.  I e-mailed a friend a short list of what was in my fridge and she sent back a step-by-step list of what I should use and how.  In this list was included absolutely no judgment or shaming for the fact that I needed someone to tell me to move my right foot, move my left foot, just helpful advice.  So, thanks to my friend, I not only made dinner, I made an amazing dinner.  And I will share the love with you.  Just in case you're having the kind of day the necessitates someone else making the decisions for you.


INGREDIENTS:
1/3 recipe dough
3-4 C washed, chopped kale (ribs removed)
2 garlic cloves, minced
1/4 C finely chopped onion
1 T apple cider vinegar
2 C grated mozzerella
6 slices of bacon, crisped (you know, cooked until crispy) and chopped into bits.
5-6 eggs
olive oil
cornmeal for sprinkling on pan.
DIRECTIONS:
Preheat your oven to 450 F.  Roll out your dough.  Sprinkle your baking sheet with cornmeal.  Carefully place dough on baking sheet.  Bake 5-7 minutes or until it just starts to crisp up (we do like a crispy crust around here).  While the dough is baking, prepare your kale.  In a largish pan, heat up a tablespoon of olive oil.  With the heat on medium low, add the garlic and onion.  The heat is too high if they make any sizzling noises.  You want them to gently heat up and turn pale golden.  Add your kale. The kale will turn bright green and begin to wilt.  I don't like mine cooked down all the way, so I only cook it for a few minutes until it's bright green and tender.  Add a tablespoon of apple cider vinegar and sprinkle with salt and pepper.  Give it a taste and add more salt, pepper or vinegar as needed.  Remove from heat and set aside.  When your dough is done, remove it from the oven and use a brush to brush the whole crust with olive oil.  Lay down your kale evenly over the crust.  Then cover the kale with mozzarella.  Next, sprinkle your bacon over the pizza. Finally, it's time for the eggs.  It's much safer to do your eggs one at a time.  Hit it on your counter, open it into a bowl, make sure you have no shells, then slide it onto the pizza.  Repeat until all eggs are placed.*  Bake 5-7 more minutes until the white of the egg has set and then yolk is just a titch runny (or however you like your eggs).

*If you do not anticipate being able to eat the whole pizza in one night, due to the number of people you're serving, you might only want eggs on the parts you're sure will be eaten so that you are saved the dilemma of trying to figure out how to save (and if it's safe to eat) leftover pizza with an egg on top. Although I did reheat an eggy slice the next day and did not die or get sick.  So there's a sample size of one to reassure you if you want to go that route.

Friday, November 8, 2013

With Apologies to My Mother

It can be difficult for me to pick a dinner menu when my parents come to visit.  My father has Celiac Disease which means I generally stay away from dishes involving gluten (which rules out all pasta).  My husband won't eat red meat or pork (which is my normal life) but my father isn't overly fond of vegetarian.  Which means that unless I'm going to serve chicken every night, I'm going to have to make fish.  So the last time my parents were here, we were standing in Whole Foods and I said to my mother, "I'm going to get cod for supper."  My poor mother.  She is not overly fond of fish, especially when it tastes like fish (and not like teriyaki sauce or fried deliciousness or the like).  My father hates fish that does not taste like fish.  So it was with grim determination that my mother said "ok."  But.  This cod is tasty! Delicious even! I'm about as much of a fish fan as my mother (show me a crab, lobster, clam, shrimp, squid or octopus and I'm there, but fish? eh) and I like this!  But I did not waste my breath trying to convince her.  I simply made the cod, with a light fresh tomato and balsamic topping and let it do the convincing.  I think we may have won her over.

CRISPY COD WITH TOMATOES AND BALSAMIC

Equipment: You really do need a cast-iron skillet, large enough to fit your cod without touching.  A small pan will make this much harder to make and also, it will not turn out as well.  Why?  Well, you want your cod to be crisp (or at least kind of crisp) and the fish will give off moisture as it cooks.  Too many filets in your pan means too much moisture, means no crisping.  Also, you have to turn the fish over.  It can't just sit there.  And if you've crammed the pieces in, there is no room for the spatula.  Oh right, also, you need a spatula, and you'll be far happier with a fish spatula, you know the long narrow metal kind.

INGREDIENTS:
1/2 lb cod per person
1 tomato per person
1/2 T balsamic per person
fancy balsamic to finish - I have some aged orange balsamic that is amazing.
olive oil
salt and pepper

DIRECTIONS:
For the cod -
Make sure your cod is deboned.  I buy mine from Whole Foods and generally don't have any trouble with it, but you may have a few pinbones in there.  If you do, pull them out gently.  Pat your fish dry then, sprinkle it with salt and pepper.  Add about 2 T of olive oil to your cast iron pan.  Basically you want a very thin covering over the whole bottom of the pan, so don't try to undercut the amount, and don't pour a ton, you're not frying it.  Heat the pan on medium or until the oil looks a bit shimmery.  Then add the cod.  Reduce your heat to medium low (cast-iron keeps the heat) or even low if it seems out of control sizzle-y. Cook for 4 minutes.  It should come up easily for flipping.  Try nudging your spatula under one edge.  If it doesn't budge, you may have to let it go another minute.  If the fish flakes apart and you can't do a perfect turn, no worries, you can hide it under the tomato sauce.  Anyway, flip the fish over and cook it another 2-5 minutes.  The cod should be white and flaky.  Carefully transfer it to a plate.
For the tomatoes with balsamic - 
In a small pot or non-stick fry pan, pour about a teaspoon of olive oil.  Chop up the necessary tomatoes (I cored mine, then cut in a large dice) and toss in the pan over very low heat.  Add the balsamic.  Let cook while your cod is cooking, you should end up with the balsamic thick enough to coat a spoon.  Right before I pulled it off the heat, I added an extra tablespoon of my fancy balsamic (I served 4 people, so I guess that's a 1/4 tablespoon fancy balsamic per person).  If you are lacking in the fancy balsamic department, just add an extra tablespoon of the regular stuff at the start.  It will cook down just fine.

Spoon the tomatoes on top of the cod.  Please fish lovers and the fish neutral alike.

Wednesday, October 30, 2013

Just in the Nick of Time

Ironically, while I cannot for the life of me come up with appropriate treats for Valentine's Day, the day when you express your love in the form of exquisitely decorated baked goods, I seem quite competent at it for Halloween, the day when you celebrate ghosts and witches and other possibly dead (or undead) things.  I don't really know what that says about me, but it can't be good.  In the past I've made Halloween sugar cookies but this year I needed to simplify.  I also needed to use up yogurt. So just in the nick of time, with a mere two days to go before Halloween and not a whole lot longer before the yogurt's expiration date (I know, I know, yogurt is immortal), I pulled together this happy chocolate cake.

The recipe for the chocolate cake part is here.  You're best off finding your own icing, because I winged it, trying to use up cream cheese and heavy cream.  I often go to Martha Stewart for things like that because her recipes usually work.

So here's your set of directions for a fast last minute Halloween cake:
1. Bake the cake.  Be very careful taking it out of the pan.  It sticks.  Also, it will stick to whatever you place it on once you remove it, so choose well.
2. While the cake is baking, whip up your icing.  You could even use canned. I won't tell.  Then add your food coloring.  My box of poison food coloring had very nice instructions on how many drops to add to make orange.
3. I make my life easier by frosting only the middle and top.  So basically I put the bottom of the cake on a plate, then slather on half the frosting, then press the next layer gently on top and slather on the other half of the frosting.  It's cool with this cake, because then you can see the layer of orange in between the dark brown cake layers and it looks more Halloween-y (shut up, it's a word) than just frosting the whole thing in orange.
4. Grab a few squares of chocolate.  I used 3 squares of Ghiradelli 60% cacao because that's all I had.  Use whatever you like.  Microwave it for 30 seconds, stir, check for melting.  Repeat until your chocolate is melted.
5. With a steady hand and a spoon, carefully draw a jack o' lantern on the orange surface.  Pumpkin lines are optional.
6. EAT.  Because of course, it's not like you'll have a slew of candy to contend with in the next few days or anything.

Sunday, October 27, 2013

Tasty!

It is entirely possible that my brains have been eaten by zombies.  It is awfully close to Thanksgiving * Halloween, after all and I'm told that creatures of the night are fond of the holiday.+ Unfortunately, this means that I am completely lacking adequate ability to describe food.  So I'll keep it simple.  I saw this recipe for a miso sweet potato broccoli bowl on SmittenKitchen and thought "that looks tasty".  But far more importantly, I thought, "that looks easy."  This is probably the driving force behind all of my cooking right now.  Easy.  So I gathered the necessary ingredients (I got the miso paste - the hardest to find ingredient, at Whole Foods), whirred some stuff up in a food processor, roasted some stuff up in the oven, pressed start on my rice cooker and warmed some beans in a skillet and then dumped it in the bowl.  And then I tasted it.  It is so incredibly delicious, roasty and sweet and salty with a bit of crunch. I want it all the time.  Always.  I am Sam I Am.  It is my Green Eggs and Ham.  (At the end of the book, when he's eating it every where.  With a fox. In a box.  You get the idea.)  Yum.

*I really did type Thanksgiving.  I thought I'd leave it so you could see exactly how brainless I am.
+I'm sure that there are some zombie/werewolf/vampire zealots out there that know all possible rules pertaining to these imaginary baddies who would love to advise me why I'm wrong in associating them with Halloween, but while I may have been kidding about the zombies eating my brains, I am certainly not kidding about my current mental capacity.

MISO SWEET POTATO AND BROCCOLI BOWL
Recipe on Smitten Kitchen

My notes:
1. I made brown rice in my rice cooker. It's not fancy, like her rices, but I had it in the house and it was easy.  I think the dish really benefits from having a non-white rice base, but white rice would work in a pinch.
2. I warmed up some canned (rinsed and drained) black beans in order to add a protein to the dish.  They were delicious and I would do it again, partially because I like keeping the dish vegetarian.
3. I think this would be delicious with beef or pork if you happen to live with someone *cough*myfather *cough* who doesn't think a meal is complete without meat.
4.  The dressing in insanely good.  I would put it on anything.  Everything.  You may feel the same way.  The good thing about this is that you will no longer second-guess your decision to drop $10 on miso paste.  Because you can now imagine running out of that huge jar, and soon.

Tuesday, October 22, 2013

In Which a Miracle Occurs

I had a spectacular weekend.  My uncle and cousin came to visit, drawn in by the siren lure of an adorable baby.  I swear, if I'd known how much more often people would visit me, I would have had one years ago!  Ever the gracious hostess, I planned to take my guests out to dinner on Saturday and for Friday night, I expected them to cook for me.  Well, I expected my uncle to cook for me anyway.  He made an absolutely delicious roast chicken which I will try to replicate at some point, some lemony roast broccoli, but most miraculously, he made delicious eggplant.

My friends, there are exactly two vegetables I do not eat: zucchini and eggplant.  Zucchini is pretty much the food of the devil, but eggplant and I have a very touchy relationship.  I want to like it.  I really do.  I've never really minded the flavor, but for whatever reason, eggplant has always made me gag.  I've had it made in the Parmigiana style.  Nope, didn't work.  I've pureed it in pasta sauce, alas, a deep and thorough failure.  But the way my Uncle John made it was so tasty, I went back for a second piece.  That's right, I took seconds of my second most loathed vegetable.

Does that tell you everything you need to know about my uncle's cooking?  No?  You want the recipe too?  Okay!  I got it!  (Totally selfless I am, always thinking of you).

UNCLE JOHN'S EGGPLANT

INGREDIENTS:
2 eggplants
3/4 C extra virgin olive oil plus more for brushing
2 T red wine vinegar
2 cloves garlic, minced
2 T of capers with juice
1/4 of a small red onion (optional - Uncle John was not pleased with how it turned out using the red onion, I think I liked it, but will try it without next time)

DIRECTIONS:
Slice your two eggplants into 1/2" thick slices.  Set your oven to broil.  Lay out the eggplant slices on a cookie sheet and brush them with olive oil.  Flip them and brush the other side with olive oil.  Sprinkle both sides with salt and pepper. Put in the oven to broil for 10 minutes.  Flip them and let them broil for 10 minutes on the other side.  Whilst they are broiling, find yourself a large serving dish with sides.  We used my lasagna pan.  Mix together your olive oil and red wine vinegar.   In the bottom of the pan, pour about 1/4 C of olive oil and the red wine vinegar  and sort of swish it about so it's evenly distributed.  When the eggplant is done, lay it out in the dish.  Add the garlic, capers and onion (if you use it) to the remaining oil and vinegar.  Drizzle this over the eggplant layer.  Add another layer of eggplant and pour over more of the good stuff.  Continue until eggplant is used up and all topping has been poured out.


Let marinate at room temperature for 6 hours.  Ours only sat for 4 hours and was delicious, but don't try to cut it any closer than that.  Uncle John says it's great for dinner parties, because you can make it in advance, but also it takes up no room in your fridge!

Tuesday, October 1, 2013

Chicken Croquettes


I have been cooking, I swear.  Almost every night I make dinner. I've even started baking again, some muffins, some scones, some cookies, a cake.  It's just that it's all been familiar.  Safe.  Easy.  And that can get just a little bit boring.  So last week I dragged a stack of cookbooks over to the sofa and started paging through them for something new to try.  I looked through three whole cookbooks. But honestly, I'd made up my mind the minute I saw these chicken croquettes.  Tasty nuggets of chickeny goodness?  Yes please!!  It's the very first thing I've made from Secrets of the Best Chefs: Recipes, Techniques, and Tricks from America's Greatest Cooks by Adam D. Roberts, which I got last Christmas.  Don't worry, I'm embarrassed about it too. On the upside, I will be using the cookbook again, whether for the croquettes or something that appears after 104 which is when my mind was officially poisoned against all other recipes.

Verdict: Delicious.

CHICKEN CROQUETTES
adapted from Secrets of the Best Chefs

INGREDIENTS:
1 lb ground chicken or turkey
8 oz mushrooms - I used baby bella, the recipe asked for shiitake
3 cloves garlic
3 T sun dried tomato, minced
3 T grated parmesan
1/4 C bread crumbs
2 large eggs
salt and pepper
vegetable oil for frying
1 T butter
1 C panko bread crumbs

DIRECTIONS:
Wash and roughly quarter your mushrooms.  Toss them in a food processor with the garlic cloves and give everything a good whir until it's small chunks.  Mine ended up more towards the paste end of the spectrum from using a teensy food processor, but I'd aim for the size you'd get if you'd minced everything.  Then melt the butter in a small saute pan.  Add the mushroom and garlic mixture, sprinkle with a bit of salt and pepper and cook for 3-5 minutes until mushrooms are tender.

Deal with your sun-dried tomatoes.  Mine were dried and needed to be reconstituted, which I did according to the package directions.  But yours might be jarred in oil.  Either way, chop them up until itty-bitty.

In a large bowl, combine your ground poultry, mushroom and garlic mixture, minced sun dried tomatoes, the grated parm, the bread crumbs, the eggs and a teaspoon of salt and a good sprinkle of black pepper.  Mix the whole thing up (use your hands) until well combined.  If you like to check your seasoning, you could fry up one little ball and then taste it, but otherwise, begin making your croquettes.  Form little patties (mine were about 2 inches in diameter) out of the meat mixture.

Pour the panko bread crumbs on a clean plate. Coat the patties with the panko and set them aside (you can leave them like this in the fridge for several hours if necessary).

In a large skillet, heat up your oil.  You want enough to coat the bottom of the pan, but you don't need any real depth to it.  Coat the bottom well, no skimping.  Heat it on medium heat and pop in your croquettes.  Cook them 3-4 minutes per side.  They are done when the middle is no longer pink.

Tuesday, September 17, 2013

The Best Hot Dog EVER?


While visiting with some family, I had the opportunity to go to Walter's Hot Dog Stand, which is shaped like a Pagoda and has some seriously old-school famous hot dogs.  They've been in business since 1919 and have a sort of cult-like following.  Evidently, the line for hot dogs is usually epic, but since I happened to go during the last two weeks in August, I only waited in a short line before getting my two dogs.  The menu is basic, no-frills, and frankly, a bit "my way or the highway".  There's no accommodating allergies or preferences here.  We took our dogs to a picnic bench under some shade trees (pleasant on a breezy August day) and dug in.

They were good.  Delicious even.  But at the end of the day, they were still hot dogs.  I think maybe I'm just not sure what the fuss is about.  I like hot dogs.  When at Fenway Park, I always order a Fenway Frank or two, which is probably about 90% pork byproduct and 10% water (I made that up.  I have no idea.  But needless to say, nothing fancy and plenty questionable).  Walter's is made up of a mix of beef, pork and veal.  Again, delicious.  Far superior to a boiled stick of who-knows-what.

But I was left asking, what if the best hot dog in the whole world still just wasn't all that impressive?

Would I go there again?  Sure, if the line was short, the dogs were cheap and tasty.  But I wouldn't stand forever for them.

What about you?  Have you had the best hot dog ever, either at Walter's or another famous hot dog stand?  Was it transcendent?

Monday, September 9, 2013

Nanny's Crescents

By all accounts, Ryan's grandmother was an excellent cook.  This means that when Ryan's father (who lives alone, in Alabama) comes to visit, he is an extremely appreciative audience.  He knows good home cooking, but he almost never gets it.  Since he was coming into town this weekend, I wanted to make sure to have some dessert on hand and proposed making cookies.  Ryan's mother suggested that I make his favorites, crescents.  She e-mailed his sister for his mom's recipe and in no time, we were mixing up a batch.  They are delicate and crumbly and sweet, even when slightly overdone (which is how Ryan's dad likes them).

NANNY'S CRESCENTS

INGREDIENTS:
2 C flour
1/2 lb butter
4 1/2 T powdered sugar (plus more for rolling)
1 t vanilla
1 t orange juice
1 t cold water
1/2 C chopped walnuts

DIRECTIONS:
Pre-heat your oven to 350 F.  Start by cutting the 2 sticks (that's usually how many are in a half pound) of butter into smaller bits.  Then, in your stand mixer, mix your butter until creamy and add the powdered sugar. Then add the orange juice, water and vanilla, continuing to mix.  Slowly add the flour while mixing on low until it is incorporated.  Finally add the walnuts.  Mix one last time to distribute the walnuts evenly.  Form into crescent shapes and set on an ungreased cookie sheet. Bake for 20-25 minutes or until done (mine were definitely done at 20 minutes, any longer would possibly have made them too brown even for Ryan's dad).  Take them out and toss them in powdered sugar and set to cool. Try to keep them in the house for more than a day.

Wednesday, September 4, 2013

Caution! The Perils of Baking Post-Partum...


For several days, Ryan and I had been lamenting the lack of dessert.  We'd eaten all available ice cream, blueberries and even granola cereal.  Things were getting dire.  Armed with an extremely cooperative baby and a thorough inventory of my nearly empty cupboards I set about to bake a cake.  I knew I had the ingredients for a basic yogurt cake, but I had next to nothing to put into it, nothing to make it more than just a plain yellow moist cake.  Finally, I was inspired!  I would make a bit of a chocolatey streusel to put in the middle.  And off I went.  I mixed up the batter, chopped, pinched and fluffed the streusel and carefully layered it all in my cake pan.  I say carefully, because boy howdy was my batter dense.  Really, sticky and dense.  I hadn't remembered this batter being dense, but I ignored the nagging feeling and popped it into the oven.  As I began to wipe off the counter and returned a recipe book to its home, I realized exactly what was wrong.  I hadn't added the vegetable oil.  I grabbed the cake out of the oven, placed a quick consult call to stellacarolyn and then, with a heavy heart, I mixed together that carefully layered streusel with the oil and undid all my planning and ended up with an entirely different cake than what I'd wanted.  Still tasty mind you, but not at all what I'd intended.  I think it will be far superior if you do as I say and not as I do.  Which is probably easier if you haven't recently had a baby and subsequently lost most of your brain function.

YOGURT CAKE WITH CHOCOLATE STREUSEL

INGREDIENTS:
for cake
2/3 C plain greek yogurt
1 C sugar
3 eggs
2 t vanilla
1/2 C vegetable oil
2 C flour
pinch of salt
1 t baking soda
for streusel
1/4 C packed brown sugar
1/2 C chopped walnuts
3/4 C chopped chocolate chips
2 t cocoa powder
2 T butter

DIRECTIONS:
Preheat your oven to 350 F and grease a 9" cake pan.

Mix together the greek yogurt, sugar, eggs, vanilla and vegetable oil.  You could do this in a stand mixer or with a hand mixer, or do it by hand.  In a separate bowl, mix together the flour, salt and baking soda.  Combine the wet with the dry and stir together well.

Make your streusel.  The butter should be a bit softened when you work.  Add all the ingredients listed under "for streusel" to a small bowl.  Use your fingers to smush it all together so it's in crumbly delicious bits.

Pour half the cake batter in your cake pan.  Sprinkle the streusel evenly over the whole top of the batter.  Use all of it.  Then carefully distribute the other half of the cake batter over top of the streusel in a single layer.

Bake for 35-45 minutes or until a knife inserted in the center comes out without any sticky bits on it.  Allow to cool for 10-15 minutes before removing from the pan.

In all honesty I have no idea how this would taste.  I'm betting good.  But since I forgot the oil, I scooped all of my carefully layered cake batter back into a bowl, mixed in the oil and then plopped it all unceremoniously back into the cake pan and shoved it into the oven spilling a bit on the way.

Friday, August 30, 2013

Presto! Pesto!


I recently came into possession of a garden mess of weeds that once was a garden.  Very few things in this overgrowth are identifiable.  There are a few green tomatoes, yearning for the sun.  Some sad yellow cucumbers buried beneath the overgrowth.  But the basil* is standing tall and proud.  A veritable taunt to my basil-allergic husband.  Clearly this was a call to pesto.  I grabbed the baby and harvested about a cup of basil* leaves which was just enough for a half-recipe of my mom's pesto.  Of course, since I'm eating alone, a half recipe should be just fine.

*at least I hope it's basil.  Otherwise I just made a delicious and hopefully not poisonous weed pesto.


BASIL PESTO
Let's pretend you have enough basil for the full recipe, shall we?

INGREDIENTS:
2 C basil leaves
1/2 C olive oil
2 T walnuts 
2 cloves garlic
1 t salt
1/2 C freshly grated Parmesan
3 T softened butter

DIRECTIONS:
Put the basil, olive oil, walnuts, garlic and salt into your food processor.  Blend until it looks like pesto. Pour into a bowl and add the parm and the butter.  Stir.  Now you have pesto!  It will keep in the fridge for a week or so, but if you want to freeze it, you can do that before adding the cheese (no idea why it's BEFORE the cheese.  You'll have to ask my mom).


Saturday, August 3, 2013

Kindness

My absence has in large part been due to our new arrival.  Our son was born three weeks ago, and needless to say, my cooking has suffered greatly. After returning home from the hospital we've only succumbed to takeout once, mainly because Ryan has been a whiz and cooked us delicious dinners from scratch.  But also, due to the incredible kindness of a work colleague.

My mother used to work with a very wise, very kind woman named Louise who had an expression that really she often used, "People are interesting."  This was about as damning as Louise would ever get, because she was someone who was kind to the bottom of her heart.  And so it's been Louise I've thought about in the days after I've had my son and paid close attention to people's actions rather than their words.

Some of the people I worked with that I considered myself to be quite friendly with have not so much as texted congratulations after being told of our new addition, while others have sent lovely cards and gifts which warmed my heart and another showed just how big her heart is.

Throughout my pregnancy, one work colleague was beyond generous with her advice, time, unwanted baby clothes (tags still on) and prenatal yoga DVDs.  And so when she drove up to visit me the other day, I shouldn't have been surprised to see her kindness extended even further, to bringing us a delicious meal.

A quiche, a salad and a delectable blueberry pie.  Can you ask for anything more?

Okay, fine, you could ask for me to actually update this blog more frequently - which hopefully will start in late August.  And you could ask for a picture of the little one - which I shall respectfully decline at this point.  Maybe later.


Monday, July 15, 2013

Experimentation

I don't usually write about things that are purely experiments, especially if I'm not really sure I'll ever make them again, but desperate times call for desperate measures.

My parents are currently inundated with fresh produce, because they've been given the CSA share of a neighbor who is away on vacation.  Their solution has been to pass on lots of delicious veggies to Ryan and I.  Last week we ended up with kale, radicchio, zucchini (clearly for Ryan only) and red leaf lettuce.  By the time I got around to the radicchio I wanted something that didn't seem like greens or salad, so started thinking about making a pasta.  Maybe something with some white beans.  Then serendipitously, I ran across this recipe. So I thought I could use radicchio instead of escarole, keep the white beans, add some garlic and parm and have something that would resemble dinner.  I also had this box of Kamut and Quinoa pasta that Ryan had gotten as a free sample.  It is a bit shameful to admit, but I've never eaten any type of whole grain pasta, much less something as exotic as this.  But honestly, the earthy taste (and yes, there is one, it's not going to just hide under tomato sauce) went really well with the greens and beans.  Plus, I love the idea of getting extra protein in when I have a vegetarian pasta dish.  So I definitely need to experiment with different kinds of pasta in the future.

RADICCHIO, WHITE BEANS AND GARLIC WITH WHOLE GRAIN PASTA

INGREDIENTS:
8 oz whole grain pasta, I used Kamut and Quinoa Twisted Pair
3-4 C radicchio (I only had 2 C and was sad)
4 cloves garlic, minced
2 T olive oil
1-2 t vinegar (I used red wine vinegar, but I think balsamic would have been a better match)
1 can white beans (reserve the bean liquid, but go ahead and drain the beans)
1/6 C bean juice
salt
red pepper flakes (1-2 t or more depending on how spicy you like things)
2 cups grated parmesan cheese

DIRECTIONS:
In a large pot, boil some water for the pasta and don't forget to salt the water.  This particular pasta said to cook for 10-12 minutes, but it was DONE at 6 minutes, I can't even fathom what disgusting mush it would have been if we'd let it go.

In a non-stick pan, heat up your olive oil, red pepper flakes and garlic on low heat, you want your garlic to release it's garlicky goodness, but not brown.  In 1-2 minutes when it is golden, go ahead and add the radicchio and let it wilt.  Radicchio can be extremely bitter.  So add some salt now, and a small hit of vinegar to combat that.  Definitely taste the radicchio to see if it's coming along nicely.  You want it to have a little bite (both texturally and flavor wise) but you shouldn't have to force down bitter greens.  A bit before you think the greens are done, add the white beans and some more salt.

When the pasta is done, drain it, reserving a bit of cooking water.  Add the pasta to the pan with the radicchio and beans.  Add a bit of the bean juice (I used 1/6 C) and a splash of pasta water to help it all be a bit of a sauce.  Add the parm and mix it all well to combine.  Recheck your salt, pepper and liquid, adding more of whatever it needs to become a normal dinner dish.

Wednesday, July 3, 2013

Type A Personality + Uncontrollable Events = A Full Freezer?

It is no surprise to anyone who knows me (or to longtime readers of this blog) that I prefer situations where I am in control.  Needless to say many people are cackling and rubbing their hands together in anticipation because they know that having a child will definitely lead to me being faced with an unbroken chain of uncontrollable events, possibly for the rest of my life.  And some people are mean and take perverse pleasure in things like that (oh, you know who you are).

So while I wait (ah yes, the waiting for the first of these uncontrollable events) there's nothing I can do other than to try to organize my food world.  So despite my husband's protests that we'll be able to cook dinner ourselves, I've been stocking the freezer.

My current freezer status ~

HOMEMADE:
5 balls of homemade pizza dough - This recipe would make 6, but I stole one for calzones.
4 artichoke and spinach calzone although made with a small amount of provolone rather than mozzarella
2 huge portions of macaroni and cheese
2 big (but not huge) portions of fancy macaroni and cheese
2 meals worth of meatballs although I added garlic to them
3 meals worth of lasagna

STORE BOUGHT:
Ice cream - this is critical for my sanity.  I have a coupon for Ben and Jerry's and you better believe I'll be adding a few pints to the collection.
Tortellini - this is one of my go to foods when I'm not actually cooking.  I pretty much lived on it during the first trimester.  I bought a huge club pack from Wegman's.  Just plain cheese.
Lou's Natural Sausage  - A while back we did a taste test of chicken sausage and these won.  I love them especially because they don't have sausage casings (Ryan won't eat sausage casings, so I have to peel them off).  I got a few flavors.  They go along way to turning mac and cheese into a meal.

SPECIAL TREAT:
We are lucky enough to have an amazing farmer's market nearby.  And because of where we live, this farmer's market includes a few stands run by the Pennsylvania Dutch (I don't know whether or not they're Amish, I do know they wear bonnets and old fashioned clothes).  One of these stands has homemade baked goods and for years (I wish I were exaggerating, but I'm not) I've wanted to try their cinnamon buns.  They look amazing.  Last week my mother surprised me with a package, all individually wrapped, ready to freeze and enjoy later.  I did test out one, just for quality control reasons you understand and I was not disappointed.

I really don't feel like it's enough but it's what I've got and there's not a ton of room left in there as you can see.  What else do you think I need in my freezer?


Sunday, June 23, 2013

Imagine this was a new picture. Imagine these were Korean-ish. Imagine I'm not a failure.


My current fail category in life is pretty much full.  Sleep?  FAIL.  It's currently 2:40 in the morning and I am too hot to sleep.  What's that about air conditioning?  Oh we have it, and it's on.  I'm just still too hot to sleep.  So I guess that would put me at a fail for body temperature regulation as well.  Returning phone calls and texts?  SUPER FAIL.  I haven't called back my darling cousin who I adore and am massively proud of because she just graduated from med school.  I haven't texted or called back two lovely people I work with who just wanted to check in with me and have been supremely kind to me.  Preparing for the baby I am supposed to be having in less than 3 weeks?  PROCRASTINATOR FAIL.  Carseat? Not installed.  Crib or other similar sleeping device?  Not in place.  Diapers of any sort? Not purchased.  Any type of book on how to actual keep a baby alive once you get home from the hospital? Unread.  And of course, the one you all are familiar with, keeping up with my blogging?  EMBARRASSING FAIL.  And the worst of it is, it didn't need to be this bad.  I have things to say about food.  Last night Ryan and I went out to a fancy dinner, probably for the last time pre-baby.  I fully intended to write about it here (even if I didn't cook it, I thought you might be interested) but of course, another fail, this time in the category of taking pictures.  I made sure to pack my phone which takes much better pictures than Ryan's phone.  I told Ryan to remind me to take pictures.  And then I ate my appetizer without taking one.  So in between courses, again, I told Ryan to remind me.  I reminded myself.  And then I ate my dinner, without taking a picture.  I didn't even bother with that charade by dessert.  I just shoveled it down without a thought.

So, PHOTOGRAPHY FAIL.  That would be why, instead a of brand-spanking new photo up there, you're getting a recycled one.  But that seems only fair, because instead of a brand-spanking new recipe, you're getting a recycled one.  Or at least a twist on a recycled one.  Remember these deliciously tasty lettuce wraps? Well, while spending far too long in the doctor's waiting room reading magazines, I stumbled across a suggestion to make lettuce wraps with Korean flavors.  They had me at gochujang.  I e-mailed myself some sketchy notes on what ingredients to include and then came home and (I know, brace yourself here) actually made dinner.  Right?  I never would have expected it of me either.

Anyway, they were completely delicious, so my fail category must have been full, because cooking? When I actually get around to it?  Actually competent!!

KOREAN-ISH LETTUCE WRAPS
Inspired by some magazine.  Good Housekeeping?  Southern Living?  What do they normally have at the doctor's office...

INGREDIENTS:
1 lb ground turkey
1 T grated fresh ginger
2 cloves of garlic
1 T peanut or vegetable oil
2.5 T soy sauce
3 T rice wine vinegar
2 T brown sugar
1.5 T gochujang (I am a huge wimp about spicy right now. If you like spice, add at least 2 T)
1/4 C dry roasted, unsalted peanuts
lettuce - about 3 big leaves per person

DIRECTIONS:
In a large skillet, heat up the oil to medium.  Add the garlic and ginger and cook for about 3 minutes or until the garlic is slightly golden.  Increase your temperature to medium high and add the turkey and cook until mostly browned (look, once you add the other stuff, it's kind of hard to tell if the turkey's fully cooked, so go ahead and cook until until done if you don't trust yourself with that kind of thing).  Add the soy sauce, rice wine vinegar, brown sugar and gochujang.  It gets a bit soupy with all those things, so you'll need to stir it and cook it a bit longer to make sure they're all incorporated.   Then toss in the peanuts and stir again to coat them.  Serve on a lettuce leaf.  If you've made yours spicy, you will be relieved to have rice as a side.

Thursday, June 20, 2013

I'm Sorry, Were You Expecting a Recipe?

Honest truth?  I have barely cooked in the past two weeks.  Barely.  I have eaten out, from crappy prepared dinners from Whole Foods and cheap chinese food and to amazing black pepper fettucini with pork guanciale, english peas, onion cream and grana padano which was so good I went back and had it a second time within a week.


I have eaten leftovers from a party thrown by my mother.  Amazing smoked pork barbecue, cheese and spinach pie and moist rich chocolate cake, none of which I have the recipe for.

I have gratefully eaten anything my husband has put in front of me, either on the weekend or late after he comes home from work and finds I have made no progress towards dinner.

I have managed very little in the way of cooking and you have my sincerest apologies.  Tonight I am going to cook something and if it's any good, I promise to tell you all about it.  In the mean time, thanks for not giving up on me entirely.

Sunday, June 2, 2013

Not Another Potato Salad...


Actually, yes, yes, another potato salad.  Why?  When I already have two recipes for potato salad, why would I possibly need a third?  I don't know.  Why do I need more than two pairs of shoes?  More than two colors of lipstick?  Is it greed?  Or is it just good old fashioned variety?

All I know is that this potato salad is delicious and was a huge hit at our Memorial Day gathering.  It was the perfect compromise between the traditional mayonnaise laden potato salad my mother and I prefer and the elegant if not somewhat austere green bean and red potato salad dressed in vinegar that satisfies Ryan's stringent no mayonnaise requirement.

This is tangy, but casual, rich, despite its lack of cream.  And so, yes, here I am, with another potato salad.  With hard-boiled eggs and bacon, it's plenty festive and feels indulgent.  The spicy brown mustard dressing, dotted with bits of jalapeño gives it a tangy kick without being fire-y in the least.

POTATO SALAD, TAKE  3

INGREDIENTS:
2 lbs red potatoes
6 slices of bacon
2 hard-boiled eggs
1/4 + 1/8 C extra virgin olive oil (you could possibly increase this to a half cup)
3 T apple cider vinegar
1.5 T spicy brown mustard (none of that high-faluting dijon here)
1 scallion minced (white and light green parts only - about a tablespoon)
1/2 a jarred jalapeño, minced
1 t salt (adjust to your liking)
pepper

DIRECTIONS:
Cook your bacon until crispy and set aside.  If your potatoes are large, quarter them.  If they're little, you can half them or if they're tiny, leave them whole.  Add them to a large pot of boiling water.  Cook at a boil for 10-15 minutes.  You want them to be able to be cut, but not mushy at all like you'd need for mashed potato.  Drain them and set aside until they're cool enough to handle.  At that point, you'll need to cut them into bite-sized (1-2") chunks. Place these in a large bowl, big enough to handle the potato salad.

Mix up your dressing.  I used a dressing mixer, but a whisk should do nicely.  You combine the olive oil, vinegar, mustard, salt and pepper, the jalapeño and the scallion.

Grab your large bowl of potatoes.  Pour the dressing over it and gently toss to coat.  Get your bacon and cut or crumble it into little pieces and toss it into the salad.  Peel and chop your hard-boiled eggs.  Add them to the salad as well.  Toss it all extremely gently, you don't want the eggs to disintegrate.  Taste and adjust the seasonings accordingly.

This is much better when it's had time to sit, because the potatoes need to absorb the dressing a bit.

Also, if you hate jalapeños or just want to make the whole thing more kid friendly, consider substituting chopped up baby gherkins.  Because who doesn't like little sweet pickles?

Saturday, May 25, 2013

Brilliant Ideas Converge


I can't even tell you how long I have loved this idea that David Lebovitz wrote about on his blog.  The picture above (borrowed from his blog - definitely taken by David Lebovitz and NOT me) shows a set of napkins he spotted at a farm.  Diners were encouraged to write their names in permanent marker on napkins so that each would know his own.  Over time, the napkins show the history of visitors to the farm, recent ones marked brightly, some others faded into near obscurity.  I'm not doing it justice, so read the whole post here.

For years I have dreamt of having a set of napkins at my own house that could be used for company, labeled, washed and treasured as a record of guests in my home.  Of course, this would require that I actually have guests in my home, which at present is certainly nothing but a dream.  It would also require the perfect napkins.  I have yet to find the perfect napkins.

Until this week...

They are completely perfect right?  They'll go with anything, the stripes will be perfect for collecting the names.  Just perfect.  

They're available from Furbish, but I spotted them on the owner's design blog, i suwannee.

Now if I can just get my act together to order two sets (four in a set) before the end of the weekend, I can even get 15% with the code LONGWEEKEND...

Then I can focus on finding some guests.  Any takers?


Saturday, May 11, 2013

Pretty Healthy


Generally speaking, I am not in charge of the vegetables.  I leave them to Ryan.  Sometimes, if he asks about them, I manage a slightly dismayed and mystified expression, as though I have somehow inexplicably forgotten.  That really, I'd planned for some but somehow it just slipped my mind.  I'm sure this stopped working years ago, but I still try.  It's not that I dislike vegetables exactly, it's more that I forget that I do like them.  At least, I like them certain ways.  And I definitely like them as red cabbage slaw.  It's tangy and crunchy and with the apple, just the slightest bit sweet.  Also, it's really pretty.  Ryan likes it because it is entirely mayonnaise free.  It's the perfect dish to master with summer right around the corner because it goes fabulously with bbq and fried chicken.

RED CABBAGE SLAW

1/2 head of red cabbage
3 carrots
1 apple, julienned (can you julienne apple?  I certainly tried)
1/2 C apple cider vinegar
1/4 C olive oil
1/4 C chopped shallot
2 t celery seed
1 t sugar
salt and pepper

DIRECTIONS:
Slice your red cabbage into bite sized pieces.  I like pieces on the longer side.  So basically I core the half and then slice down to make long strips and then cut those long strips in half.  Put all the cut cabbage into a strainer, rinse with water.  If you have time, you can sprinkle with salt and let sit (around 30-60 minutes) to remove some of the water, but if you don't it's not a big deal at all.  If you do salt it, rinse it again once you're ready to use it.  After you've rinsed the cabbage, pat it dry.

In a very large bowl, combine the apple cider vinegar, olive oil, celery seed, sugar and a healthy amount of black pepper.  Whisk them up.

Peel and grate your carrots.  I did mine using the mandolin, which made nice long uniform strips.  Use whatever kitchen tool you prefer.  Your goal is carrot strips.

Put the carrots, chopped shallot and cabbage into the large bowl with the dressing. Toss it well to coat and let sit at least 1 hour.  Add the apple.

This was still delicious several days after making, although it did accumulate more liquid at the bottom of the bowl.

Sunday, May 5, 2013

Cinco de Mayo

In theory, I love this holiday.  I support any holiday that involves Mexican food and people getting to drink their fill of whatever festive alcoholic beverage strikes their fancy. But in practice, I don't think I've ever gotten my act together to actually celebrate Cinco de Mayo.  (Probably, this is good and I should stand on some sort of moral high ground for not co-opting the holidays of others).  This year, for example, I will be having crab cakes and artichoke.  Not even a little bit Mexican.

But just in case you're in the mood and are hunting for some probably inauthentic but tasty and manageable by the home cook type of recipes, here are some Hungry Hippo offerings...

Really good vaguely authentic enchiladas


What are your favorite Mexican recipes?  Are you celebrating Cinco de Mayo?  Already?  


Tuesday, April 23, 2013

For Boston

Today I read an article somewhere in the great internets about how the current generation is so self-absorbed that they tend to co-opt tragedy as their own.  They regale people with stories of how they could have been there at the site of the tragedy du jour.  There but for the grace of God...

This Boston tragedy was not mine.  It belonged to others, some near and dear to me who were at the scene of the bombings.  Others I've known and cared about over the years.  But it could not have happened to me.  I have been a long time gone from that city.  But in a time when the Yankees are playing Sweet Caroline to honor Boston, certainly I can say that in my heart of hearts, Boston you're my home.

And that my heart is breaking for all of those who have no need to co-opt tragedy, because it is their own.  Because it came right up to their doors and into their homes. Should you want to help, rather than retell your own plans to someday maybe run the marathon, check out charity navigator's advice on ways to donate.

And since you came here for food (you did come here for food, right?) rather than lectures on how to properly handle your reactions to crisis, how about a recipe from The New England Clam Shack Cookbook for some delicious scallops?  It's a much better way to feel like an honorary New Englander.

Verdict:  If I have any common sense, I'll get this in regular rotation in time for the summer.  Curing homesickness through cooking is something I definitely sign on for.


PAN-SEARED SCALLOPS
modified slightly from The New England Clam Shack Cookbook

INGREDIENTS:
1 lb sea scallops - select scallops that aren't sitting in a lot of liquid, scallops are better when dry.  Also pick ones that haven't started to separate
1/4  t salt
1/4 t sugar
1/2 t thyme
1/8 t garlic powder
1/8 t onion powder
olive oil
lemon wedges

DIRECTIONS:
Mix together the salt, sugar, thyme, garlic powder and onion powder.  Heat a cast-iron pan to medium high and add a bit of olive oil, just enough to cover the bottom of the pan (I used a paper towel to help smear it around and make sure I didn't have too much oil).  Pat your scallops dry and then sprinkle them top and bottom with the seasoning mix.  When the pan is hot, place the scallops in the pan, not touching.  Cook for 2-3 minutes on the first side, then if they are golden brown, flip and cook for 2-4 minutes on the other side.  Cooked scallops should be more opaque than when they started, firm to the touch and have those nice golden edges.  Garnish with lemon wedges (you know, so you can squeeze lemon on them).

LinkWithin

Related Posts with Thumbnails