Thursday, July 26, 2012

Other People's Food

I'm not sure if my workplace is typical, but it seems to me that it requires an inordinate number of potlucks.  Sometimes we have to bring things; sometimes things are brought to us.  True confession:  my team and I are terrible potluckers.  We sign up for juice, as a group.  It is not only the lazy person's way out, it is cheap.  Once, we let a new girl buy juice and she spent over $20.  On juice! Needless to say, we kicked her out of our little contribution group and she had to start bringing stuff on her own - expensive crap like store bought muffins.  I feel only marginal guilt about bringing next to nothing, because in all honesty, I'll eat next to nothing.  We've covered my fear and loathing of public eggs in the past, but food from questionable kitchens is right up there on the list of stuff I won't eat.  I do not want to eat anything that may have come in contact with your cat's hair, your child's grimy hands or your can't-remember-the-last-time-you-wiped-it kitchen counter.* And on top of my rampant germophobia there's my fear that you** can't cook, so I'm also not eating anything that might not taste good.  Which means that if I am particularly hungry I will hover near where people drop things off so I can see who brought each specific food product.  LABELS people.  Let's get with the program!  Tell me what is in it and who made it for the love of Mike.  This blueberry coffee cake was one such potluck exception, I knew the baker and felt confident her kitchen was clean.  And it was SO good.  I totally stalked potlucks looking for it.  Finally she gave me the recipe.  Which means I could totally make it and be a good potlucker, but that's not really my style.  I'll stick to making it at home and leave the quality baking to someone else.


 *Unless of course, I've just been petting the cat in question and you have a child who calls me Auntie in an adorable little voice and can sing along to Call Me Maybe, but that is a highly specific special case.

**I don't mean you person reading my blog. I'm sure you're a perfectly good cook. Unless you're not, in which case, no offense, but I don't want to eat what you've brought.

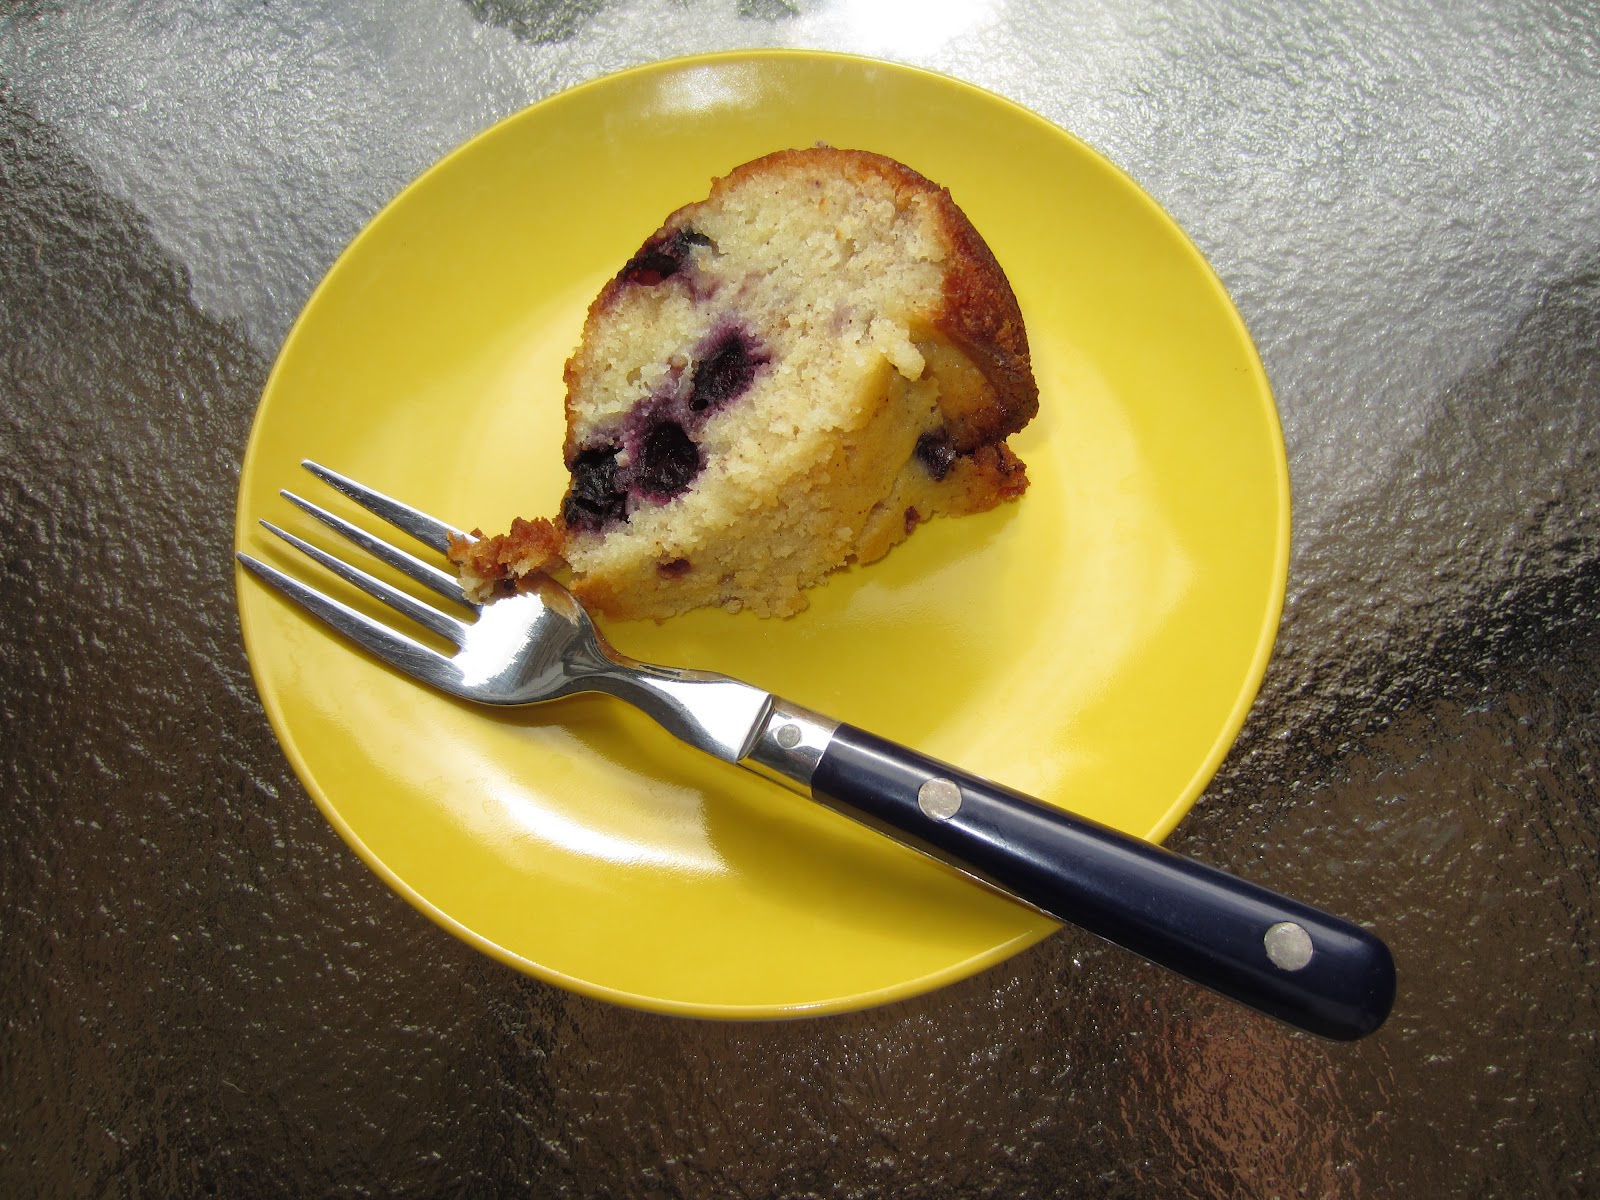
BLUEBERRY SOUR CREAM COFFEE CAKE
adapted rather liberally, the original calls for a brown sugar, chopped pecan and ground cinnamon streusel to be used after you've poured in half the batter and again when you've added all the batter.  I was a) rather unsurprisingly lazy and b) shockingly short of pecans, so I improvised.  Ryan's been calling it "Blueberry Muffin Cake".

INGREDIENTS:
1 C butter, softened
1 1/4 C granulated sugara
2 eggs
1 C sour cream
1 t vanilla extract
1 1/2 C all-purpose flour (make that 1/2 C a scant one okay?)
1t baking powder
pinch of salt
1.5 C fresh blueberries
1 T brown sugar
2 t cinnamon
2 T flour

DIRECTIONS:
Preheat your oven to 350 F (175 C).  Grease and flour a bundt pan (I used that spray that comes with the flour in it - for when you care enough about your family to coat their food in chemicals).  In your stand mixer, combine the sugar and butter and cream them together until light and fluffy.  Beat in the eggs one at a time (I use the paddle attachment, it's fine).  Then add the vanilla and the sour cream and give it one more good mix.  In a separate bowl, mix the flour and baking powder and salt.  Slowly add it to the mixer and then turn it on until it just incorporates.  Rinse your blueberries and pat them dry.  In another bowl, mix the 2 T of flour, the brown sugar and the cinnamon.  Add the blueberries to this and mix them until coated, it's okay if it doesn't stick perfectly.  Remove the bowl part of your stand mixer, because you'll want to add the berries by hand.  Add them and fold them in gently using a spatula or wooden spoon.  Make sure you get any left over brown sugar or cinnamon that's lurking in your bowl.  Slowly pour all of this into your bundt pan and then pop it into the oven.  Bake for 50-60 minutes or until a knife inserted into the cake comes out clean.  Cool it in the pan on a wire rack and then remove it to a serving plate.  I found this kept very well.

Monday, July 23, 2012

Pickle Grand Champion

I made that title up.  I have no idea what it would take to become an actual pickle grand champion, or if one can even BE a pickle grand champion.  But in my little contest of three pickles, this was the clear winner.  I would eat them in a boat and I would eat them with a goat.  (Deepest apologies to Dr. Seuss) Seriously.  I love these pickles.  They are tart and sweet and flavorful and easy to make.  I'm going to make another batch today.  The first ones went entirely too quickly.  Also, don't skimp on the onions and don't be afraid to eat them.  They are crunchy and delicious, not merely an agent for flavoring the pickles.

BEST PICKLES
I made this using stellacarolyn's recipe from My Family Table and Serious Eats's recipe for Bread and Butter pickles.
The recipe below DOES NOT MAKE ENOUGH PICKLES.  You might as well double it.  Otherwise you'll be lamenting lost pickles.

INGREDIENTS:
8.5 oz kirby cucumbers.
1/2 small vidalia onion
1 T sea salt
1 t mustard seed
1/2 t red pepper flakes
1/4 t celery seed
3/4 C white vinegar
1/2 C sugar

DIRECTIONS:
Slice your cucumbers in 3/8" slices (again, not a precise measure, totally guesstimated.) Slice your onion.  Put them in a small bowl and toss with the 1 T sea salt.  Refrigerate for 30 minutes.  Remove, rinse and pat dry.  Heat up the vinegar and add the sugar.  Stir to dissolve.  Add the mustard seed, red pepper flakes and celery seed.  Bring it all up to a boil, then turn off burner.  Fill a (clean, empty, dry) jar (I used a spaghetti sauce jar) with the cucumber and onion slices.  Pour over the pickling brine, leave it to cool on the counter a bit and then pop it in the fridge.  Pickle Perfection.

Thursday, July 19, 2012

First Runner Up: Dill Pickles

These dill spears were sort of obscenely easy and incredibly tasty.  I gave one to my father to try yesterday and immediately asked for a pastrami sandwich.  Sadly, I had none.  Just the pickles.  Want to make them?

DILL PICKLES
from food in jars

INGREDIENTS:
2 kirby pickles
1/2 C apple cider vinegar
1/2 C filtered water
2 smashed garlic cloves
1 t dill seed
2 t sea salt
1 scallion

DIRECTIONS:
Slice your pickles into spears.  In a small pan bring your vinegar and water and sea salt to a boil.  You'll need a single jar - again I used an empty, clean spaghetti sauce jar.  Put the garlic and dill seed into a jar, then carefully arrange your cucumber spears, taking care not to squish any.  When the liquid had boiled, pour it over the cucumbers.  Wait for it to cool and pop it in the fridge.  Wait at least a day and then locate your nearest pastrami sandwich (I'd settle for a Reuben) and enjoy!

Tuesday, July 17, 2012

Second Runner Up


Every contest has a loser and despite the pretty colors, this was not the star of the pickle party.  They were supposed to "asian" and honestly just tasted very vinegary.  I mean, of course pickles taste vinegary but these just didn't have any real dimension beyond that.  It's kind of my fault because I knew the recipe lacked a little something and I went ahead with it anyway, mostly because I was too lazy to get to the story to find anything that might improve it, like ginger.  I may try this recipe from Hogwash next time and see if it's any better.

Just in case you are dying to make mediocre pickles:

"ASIAN" PICKLES
inspired by a recipe posted on wyldethyme

INGREDIENTS:
8.5 oz kirby pickles (for me this was a pickle and a half)
2 carrots
3/4 C filtered water
3/4 C rice wine vinegar
1 t sea salt
2 scallions
1 clove of crushed garlic
1 t red pepper flakes

DIRECTIONS:
Cut off the ends of the pickles and discard.  Slice the remaining pickles into 3/8" slices.  That sounds really precise and I totally went and looked for a ruler so that I could be sure, but I could not find one.  So you'll have to deal with my highly technical estimates.  Anyway.  Slice the scallion, I used the white and light green parts.  Put the scallion, crushed garlic and red pepper flakes in a jar (I used a clean, empty, washed tomato sauce jar).  Stuff in the pickles and carrots.  I mean stuff figuratively, you really don't want to cram them in.  Gently layer.  In a pan, bring your water, vinegar and sea salt to a boil.  Pour this into the jar.  Let it cool for a while on the counter, pop in the fridge, wait a day.  Now you have pickles.

Friday, July 13, 2012

50 Cents

Can you think of anything you can still buy for 50 cents?  Because there is not a single solitary thing offered by my work vending machines that is 50 cents.  A simple bag of chips or a candy bar will run you 55 and if you want an iced tea instead of soda, you're all the way up to $1.25.  I think you can get up to an hour on a parking meter in certain places, but around here you'll rack up a solid 24 minutes for your change.  Or two days worth of fines at the library (which might be a bargain if you're not finished your book and someone else has a hold on it).  But you know what's cheap?  Cucumbers. At the farmer's market this week I picked up five adorable kirby cucumbers for 50 cents.  And you know what you do with kirby cucumbers right?  You pickle them!!  In an absolutely uncharacteristic fit of summer motivation I made three kinds of pickles the other day.  I will share them with you and reveal the fact that when it comes to pickles, I play favorites.  There was a definite winner to project pickle and it will be revealed!!

PS - These are refrigerator pickles.  Do I really seem like I have my shit together enough to own a whole canning/pickling set up?  People, I am exceedingly lazy, that is just not happening.  These are 100% guaranteed lazy person pickles.

Tuesday, July 10, 2012

Can't Stop

My Fourth of July post was really just the beginning.  Because when I go to New England, I can't help myself, I just can't stop eating seafood.  I had grilled shrimp, fried clams (twice), fried haddock, clam chowder, steamers, a lobster and shrimp cake, haddock and clam bouillabaisse, an a hot lobster roll (butter, not mayonnaise). Then when we got home, my parents invited us over for some crab salad.  It has been heaven. I cannot compete with how fresh and delicious the seafood is up there, but on the other hand, I just can't stop eating it!! These fried shrimp will assist me in my serious efforts to completely block my arteries with butter and oil, because they are so delicious, you can't stop eating them either. Go ahead, make them and let me know!

INGREDIENTS:
1 lb fresh shrimp, peeled and deveined
1 C flour
1 T Emeril's "Essence"
9 oz of good beer
vegetable oil for frying

INGREDIENTS FOR ESSENCE:
2 1/2 T paprika
2 T salt
2 T garlic powder
1 T black pepper
1 T onion powder
1 T cayenne pepper
1 T dried oregano
1 T dried thyme


DIRECTIONS:
Pat the shrimp dry.  In a large, heavy pot or pan (I use a dutch oven usually), pour in enough oil to deep fry your shrimp. This should be a couple of inches deep.  You'll want a thermometer for the oil, so that you can tell when it's ready.  I fry between 350 F and 375 F.  Put your oven on low (200 F?) and line a cookie sheet with a few layers of paper towel.  This way when your shrimp are cooked, you'll be able to lay them on the sheet and pop them in the oven to keep warm.  In a large bowl, combine the flour and essence. Quickly dredge the shrimp so that they have a thin layer of flour on them.  Then pour the beer into the rest of the flour/essence mixture while whisking so that there are no lumps.  Dip about 5-6 shrimp in the beer batter and sort of hold them up so the excess drips off a bit.  It's a pretty light batter, so if you notice the shrimp aren't really getting covered, don't worry about letting the excess drip, just coat them.  When the oil is warm enough, gently place the group of shrimp in the oil.  Wear long sleeves, oil hurts like heck when it spatters.  Flip them using metal tongs after about 2 minutes. They'll only need about 2-6 total minutes, how long depends on if you little shrimp or HUGE ones.  If yours are really big, put fewer in the pot at once.  I use a spider to fish them out and drop them on the tray I've prepared.  Let the oil come back up to temperature before starting your next batch.  When they're done, you are allowed to eat them.  But don't blame me if you can't stop.  I warned you!!

Friday, July 6, 2012

Grill Mooch


I have never owned a grill.  My parents have always had one, first a avocado green charcoal beast, most likely squatting over our gravel driveway, later a shiny gas number, lovingly ensconced on a new back porch.  The house where I lived  senior year in college had one.  I can't even remember what it looked like, I only remember the luxury of padding out onto the back porch and being handed a burger.  There is nothing more magical in college than food that appears before you, already cooked, particularly if it didn't come from a dining hall.  After college, my best friend set up house in Brookline, where her grandparents had lived.  In the same backyard she grew up playing in, she'd throw the perfect summer party:  tons of friends, floating around the pool and dragging yourself up to the deck for dinner off the grill.  I tended to ignore the ubiquitous burgers and dogs for her steak tips.  To this day, they are on my short list of ultimate summer grill foods and I beg for them each time I visit.  The fact of the matter is, I am a grill mooch.  I have not owned one, I cannot operate one, but sweet merciful heavens do I love what can come off one.  This Fourth of July, my father-in-law manned the grill.  I did  the prep, but in the end, there was more than a little mooching.  I'm also afraid that at least one recipe was largely improvisational.  Sorry!

GARLIC BREAD:
Take a loaf of day old bread, drizzle olive oil over it.  Peel a garlic clove and rub it against the surface of the bread.  Grill until it looks delicious (just like above.)  Unsurprisingly, the garlic bread portion of this post is NOT gluten-free.  The rest of the stuff is.

SHRIMP:
Have you made Mark Bittman's Spicy Shrimp? You really should.  They are dead easy, really delicious and can be made inside if you don't have a grill.  I made them in the oven just a few weeks ago, but they were even better on the grill. Oh, and did  I mention fast?  They're fast.  Just 2-3 minutes a side.  

AVOCADO, TOMATO AND CORN SALAD:
This was seriously delicious.  But I didn't measure anything.  I feel terrible. I promise to try it again with actual proportions because it was wonderful.  If you want to attempt it yourself, here's what I did...

INGREDIENTS(ISH):
2 ears of corn
2 very small avocados
2 tomatoes
freshly squeezed lemon juice
red wine vinegar
olive oil
less than a teaspoon of cumin
salt  and pepper
butter

DIRECTIONS(ISH):
Sprinkle the ears of corn with salt and pepper.  Rub them with a bit of butter.  Wrap them in foil and grill (I think he did them for 20 minutes, but don't hold me to that).  Remove and scrape the kernels off the corn into a large bowl.  They will be hot as all get out, so you can let them cool a bit, or handle them using an oven mitt, whatever works for you.  Also, if you don't have a grill, you could cook the corn however you usually do it (I usually bring a huge pot of water to a boil and toss them in for 5 minutes).  Chop the tomato and avocado into nice little bite sized bits.  Toss the tomato, avocado and corn together.  In a separate bowl, mix together the lemon juice (I know I didn't use more than half a lemon), the red wine vinegar (no idea how much) and some olive oil.  Add the cumin and some salt and pepper, then mix again.  Pour this all over the salad.  Taste and add more salt, lemon or cumin to taste. I added more salt (I didn't have access to Kosher, only table salt and had no idea how much I needed).  While the lemon may save the avocado from browning for a little while, I probably wouldn't really make this ahead, because I can't promise it would keep the avocado pretty for long.  Don't worry about leftovers, there were none.


LinkWithin

Related Posts with Thumbnails