Showing posts with label vegetarian. Show all posts

Tuesday, January 20, 2015

Nana turns 90

Only a few days after Christmas, my grandmother celebrated her 90th birthday.  It was lovely having her for the holidays and for her special day.  You would never ever guess she is 90; she spent the visit watching and playing with the little one and hopefully, eating well.

My mother was kind enough to cook the main course, steak, since I have such limited experience with it.  I'm pretty sure we had mashed potatoes (there you go, it's been less than a month and already I have no memory) with it.  And I provided the brussels sprouts.


BRUSSELS SPROUTS
altered only slightly from the amazing Balaboosta cookbook - I can't wait to use more recipes from it!

INGREDIENTS:
1 lb Brussels sprouts
1/4 C honey
1 clove garlic, finely chopped
1 gala apple, peeled cored and grated
2 T olive oil
sprinkle of kosher salt

DIRECTIONS:
Preheat your oven to 425.  The original recipe calls for 400 but my oven needed to be hotter.
Cut the bottoms off the brussels sprouts and then peel off the outer leaves.  This takes a reasonable amount of time and also reduces the amount of brussels sprouts you have by a lot.  I gave them a good rinse too.  Then I patted them dry, laid them on a sheet pan and tossed with the garlic, honey, olive oil and then sprinkled them with salt.  I added the apple last because you really don't want the fruit on the pan, if you do it that way, it will just burn on the pan.  If it's on the sprouts, it drips down its juices which is much better.

Pop the tray in the oven and roast until tender.  The outside will get a nice crisp on it, but they shouldn't be super crunchy throughout.  I tossed them a few times to get more of a crisp on the outside and to make sure the apple-y parts were okay.  The recipe called for a shorter cooking time than I used. Mine needed at least 40-45 minutes to be finished, so watch yours and taste test frequently.

Sunday, October 27, 2013

Tasty!

It is entirely possible that my brains have been eaten by zombies.  It is awfully close to Thanksgiving * Halloween, after all and I'm told that creatures of the night are fond of the holiday.+ Unfortunately, this means that I am completely lacking adequate ability to describe food.  So I'll keep it simple.  I saw this recipe for a miso sweet potato broccoli bowl on SmittenKitchen and thought "that looks tasty".  But far more importantly, I thought, "that looks easy."  This is probably the driving force behind all of my cooking right now.  Easy.  So I gathered the necessary ingredients (I got the miso paste - the hardest to find ingredient, at Whole Foods), whirred some stuff up in a food processor, roasted some stuff up in the oven, pressed start on my rice cooker and warmed some beans in a skillet and then dumped it in the bowl.  And then I tasted it.  It is so incredibly delicious, roasty and sweet and salty with a bit of crunch. I want it all the time.  Always.  I am Sam I Am.  It is my Green Eggs and Ham.  (At the end of the book, when he's eating it every where.  With a fox. In a box.  You get the idea.)  Yum.

*I really did type Thanksgiving.  I thought I'd leave it so you could see exactly how brainless I am.
+I'm sure that there are some zombie/werewolf/vampire zealots out there that know all possible rules pertaining to these imaginary baddies who would love to advise me why I'm wrong in associating them with Halloween, but while I may have been kidding about the zombies eating my brains, I am certainly not kidding about my current mental capacity.

MISO SWEET POTATO AND BROCCOLI BOWL
Recipe on Smitten Kitchen

My notes:
1. I made brown rice in my rice cooker. It's not fancy, like her rices, but I had it in the house and it was easy.  I think the dish really benefits from having a non-white rice base, but white rice would work in a pinch.
2. I warmed up some canned (rinsed and drained) black beans in order to add a protein to the dish.  They were delicious and I would do it again, partially because I like keeping the dish vegetarian.
3. I think this would be delicious with beef or pork if you happen to live with someone *cough*myfather *cough* who doesn't think a meal is complete without meat.
4.  The dressing in insanely good.  I would put it on anything.  Everything.  You may feel the same way.  The good thing about this is that you will no longer second-guess your decision to drop $10 on miso paste.  Because you can now imagine running out of that huge jar, and soon.

Tuesday, October 22, 2013

In Which a Miracle Occurs

I had a spectacular weekend.  My uncle and cousin came to visit, drawn in by the siren lure of an adorable baby.  I swear, if I'd known how much more often people would visit me, I would have had one years ago!  Ever the gracious hostess, I planned to take my guests out to dinner on Saturday and for Friday night, I expected them to cook for me.  Well, I expected my uncle to cook for me anyway.  He made an absolutely delicious roast chicken which I will try to replicate at some point, some lemony roast broccoli, but most miraculously, he made delicious eggplant.

My friends, there are exactly two vegetables I do not eat: zucchini and eggplant.  Zucchini is pretty much the food of the devil, but eggplant and I have a very touchy relationship.  I want to like it.  I really do.  I've never really minded the flavor, but for whatever reason, eggplant has always made me gag.  I've had it made in the Parmigiana style.  Nope, didn't work.  I've pureed it in pasta sauce, alas, a deep and thorough failure.  But the way my Uncle John made it was so tasty, I went back for a second piece.  That's right, I took seconds of my second most loathed vegetable.

Does that tell you everything you need to know about my uncle's cooking?  No?  You want the recipe too?  Okay!  I got it!  (Totally selfless I am, always thinking of you).

UNCLE JOHN'S EGGPLANT

INGREDIENTS:
2 eggplants
3/4 C extra virgin olive oil plus more for brushing
2 T red wine vinegar
2 cloves garlic, minced
2 T of capers with juice
1/4 of a small red onion (optional - Uncle John was not pleased with how it turned out using the red onion, I think I liked it, but will try it without next time)

DIRECTIONS:
Slice your two eggplants into 1/2" thick slices.  Set your oven to broil.  Lay out the eggplant slices on a cookie sheet and brush them with olive oil.  Flip them and brush the other side with olive oil.  Sprinkle both sides with salt and pepper. Put in the oven to broil for 10 minutes.  Flip them and let them broil for 10 minutes on the other side.  Whilst they are broiling, find yourself a large serving dish with sides.  We used my lasagna pan.  Mix together your olive oil and red wine vinegar.   In the bottom of the pan, pour about 1/4 C of olive oil and the red wine vinegar  and sort of swish it about so it's evenly distributed.  When the eggplant is done, lay it out in the dish.  Add the garlic, capers and onion (if you use it) to the remaining oil and vinegar.  Drizzle this over the eggplant layer.  Add another layer of eggplant and pour over more of the good stuff.  Continue until eggplant is used up and all topping has been poured out.


Let marinate at room temperature for 6 hours.  Ours only sat for 4 hours and was delicious, but don't try to cut it any closer than that.  Uncle John says it's great for dinner parties, because you can make it in advance, but also it takes up no room in your fridge!

Saturday, May 11, 2013

Pretty Healthy


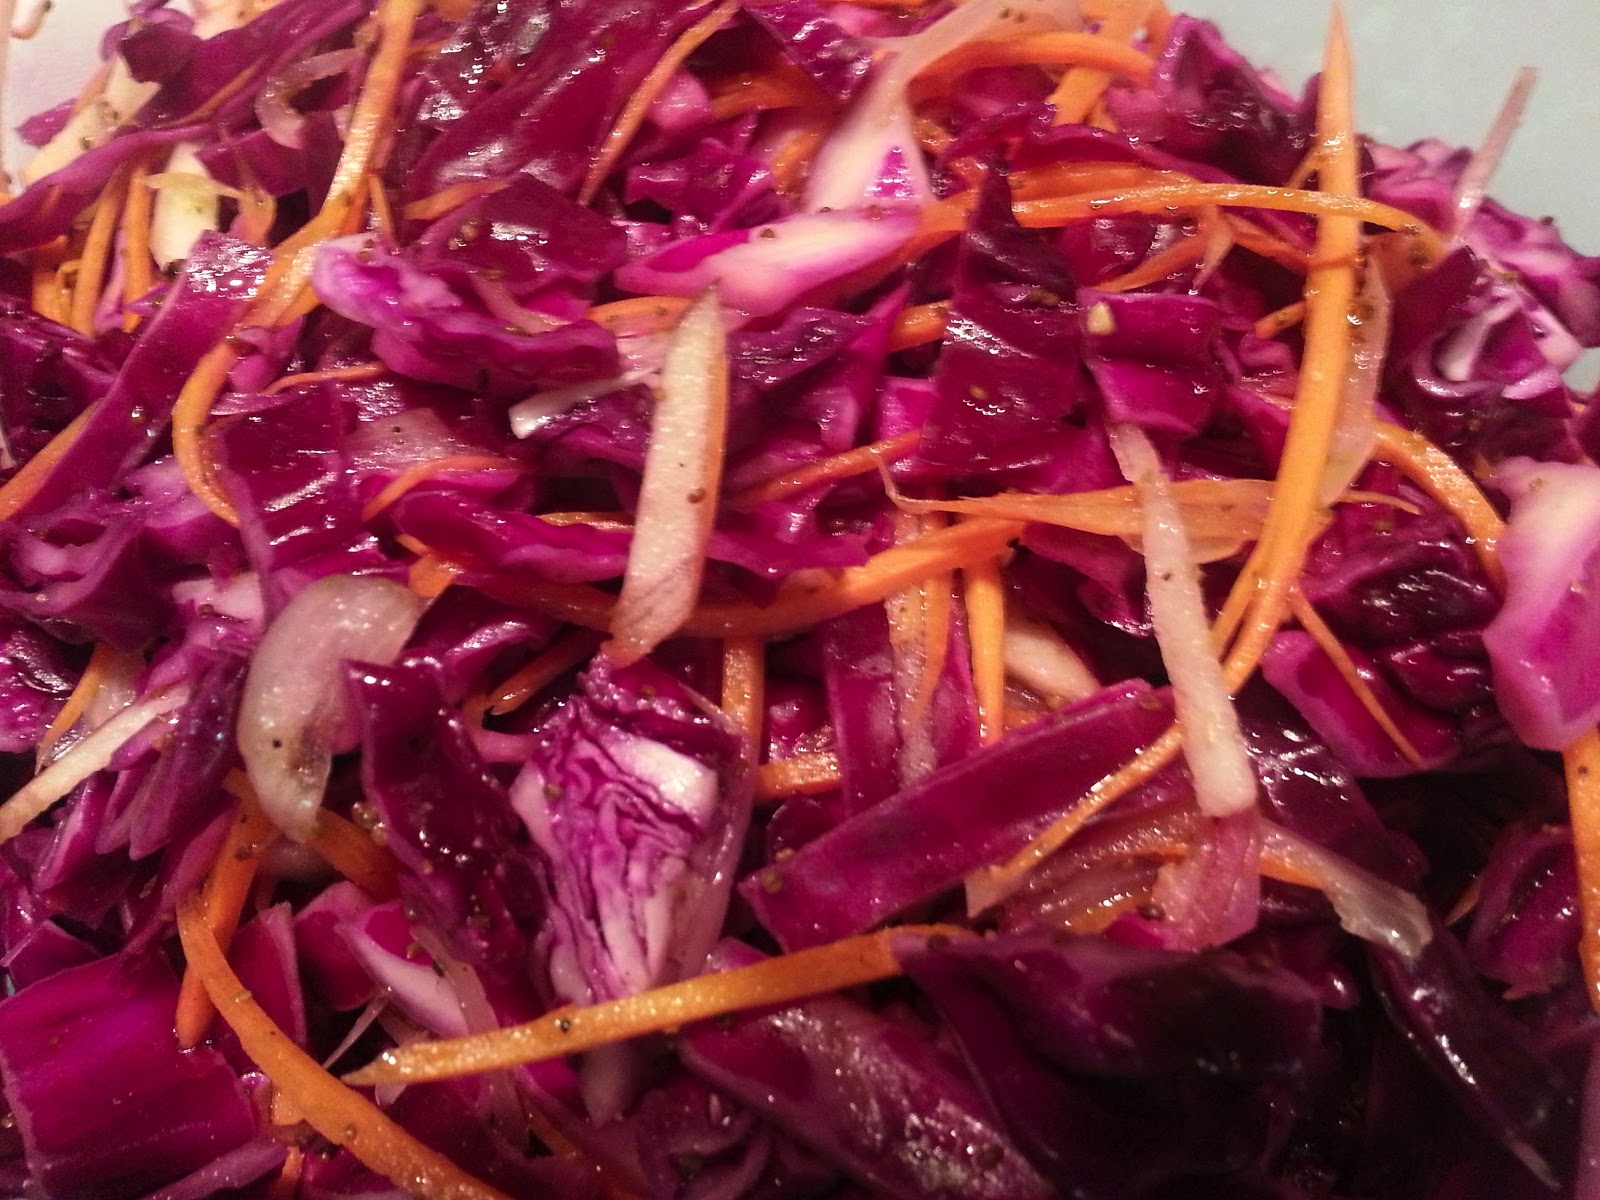
Generally speaking, I am not in charge of the vegetables.  I leave them to Ryan.  Sometimes, if he asks about them, I manage a slightly dismayed and mystified expression, as though I have somehow inexplicably forgotten.  That really, I'd planned for some but somehow it just slipped my mind.  I'm sure this stopped working years ago, but I still try.  It's not that I dislike vegetables exactly, it's more that I forget that I do like them.  At least, I like them certain ways.  And I definitely like them as red cabbage slaw.  It's tangy and crunchy and with the apple, just the slightest bit sweet.  Also, it's really pretty.  Ryan likes it because it is entirely mayonnaise free.  It's the perfect dish to master with summer right around the corner because it goes fabulously with bbq and fried chicken.

RED CABBAGE SLAW

1/2 head of red cabbage
3 carrots
1 apple, julienned (can you julienne apple?  I certainly tried)
1/2 C apple cider vinegar
1/4 C olive oil
1/4 C chopped shallot
2 t celery seed
1 t sugar
salt and pepper

DIRECTIONS:
Slice your red cabbage into bite sized pieces.  I like pieces on the longer side.  So basically I core the half and then slice down to make long strips and then cut those long strips in half.  Put all the cut cabbage into a strainer, rinse with water.  If you have time, you can sprinkle with salt and let sit (around 30-60 minutes) to remove some of the water, but if you don't it's not a big deal at all.  If you do salt it, rinse it again once you're ready to use it.  After you've rinsed the cabbage, pat it dry.

In a very large bowl, combine the apple cider vinegar, olive oil, celery seed, sugar and a healthy amount of black pepper.  Whisk them up.

Peel and grate your carrots.  I did mine using the mandolin, which made nice long uniform strips.  Use whatever kitchen tool you prefer.  Your goal is carrot strips.

Put the carrots, chopped shallot and cabbage into the large bowl with the dressing. Toss it well to coat and let sit at least 1 hour.  Add the apple.

This was still delicious several days after making, although it did accumulate more liquid at the bottom of the bowl.

Sunday, February 24, 2013

Variation on a Theme


It's a month later and yet I have to confess to you, I'm still hung up on mixing cruciferous vegetables with cheese product.  I can't help it.  I've always loved cheesy comforting foods, particularly during the winter doldrums, but the addition of some nice healthy crunch is currently irresistible to me.  It keeps the cheese from becoming too rich (I know, I don't know what's wrong with me either).  So basically, rather than making anything new and fascinating, I'm just messing about with old favorites.

For this recipe, I started with the risotto and cheese I posted way back here.

BROCCOLI AND CHEESE RISOTTO
INGREDIENTS:
1 T butter
1 leek, pale green and white parts only, minced and rinsed to be free of grit
1 1/2 C arborio rice
2 T dijon mustard
4-5 C veggie stock (Watch this carefully, I needed slightly under 4 cups this time, over 4 last time).
1/2 C grated cheddar cheese
1/2 C grated colby jack cheese (yes, just a cup of whatever cheese makes you happy will work fine)
2-3 C broccoli
salt and pepper as needed

DIRECTIONS:
Chop your broccoli into bite sized pieces.  Then steam your broccoli and set it aside. We do ours stovetop in a steamer. I think it takes around 5 minutes, but don't quote me on that. Put the butter and leek in a large pan with high sides. In a pot next to it, heat up the stock. Melt the butter and cook the leek 2-3 minutes until softened. Watch closely so it doesn't burn. Add the arborio rice and cook another 2 minutes or so, turning frequently so the rice gets coated in butter and toasts a bit. Add the mustard, this was sort of a mixing smearing process for me. Add the warm stock about a ladleful at a time. Stir the risotto after you add the stock until it is mostly absorbed (I wait until I can pull a spoon through the risotto without having liquid fill up the track I've made). Then add another ladleful or two. Keep doing this until the stock is gone and the rice is soft (not mushy) but still has some texture. It should take about 18-20 minutes. When the risotto is nearly done, add the cheese and stir. About a minute before you pull it off the stove, add the broccoli and mix well (but gently). Taste to see if it needs salt and pepper. It may not need salt depending on your chicken stock and your cheese, both of which can be salty.

Sunday, January 27, 2013

Cafe Constant


One of my favorite restaurants in Paris is Cafe Constant, a tiny place mere steps from the Eiffel Tower (take a moment to get over just how snooty I sound name dropping my favorite Parisian restaurant).  We've been there twice now and it was wonderful both times.  Our first trip there, I noticed that not only did the chef have a cookbook, but it was in English called Everyday French Cooking.  I mean this is nothing short of miraculous in Paris.  But in a moment of frugality, I decided I didn't need it.  Which of course meant that I promptly spent several years wishing that I had bought it.  Finally Santa took mercy on me and delivered it.

It is (unsurprisingly) full of French recipes, many quite traditional, and many involving fois gras or duck liver.  This weekend I whipped up a Cauliflower and Broccoli Gratin.  Not quite as intended in the book, I made quite a few adjustments due to my usual issue: sheer laziness.  But the result was delicious nonetheless.  (You should probably also know that the original recipe called for a pound (a POUND!) each of broccoli and cauliflower, as well as slices of baked ham, so it would be a whole dinner, for certain, or one of the most elaborate, substantial sides known to man).

Verdict:  I need to use this cookbook more.  Why don't I use this cookbook more?

BROCCOLI AND CAULIFLOWER GRATIN

INGREDIENTS:
2 C broccoli
2 C cauliflower
2 T butter
2 T plus 2 t flour
1 1/3 C milk
2 egg yolks
2/3 C cheese (the recipe called for gruyere, I used 1/3 C cheddar, 1/3 C parm) PLUS extra for sprinkling
about 1/4 C bread crumbs
salt and pepper
sprinkle of nutmeg

DIRECTIONS:
Set a large pot of water to boil (add a sprinkle of salt).  Cut your broccoli and cauliflower into florets. When the water boils, drop the broccoli and cauliflower in and blanche for 1 minute (blanche just means let it cook in the boiling water).  Then quickly remove it.  You might even want to shock it by quickly putting it in ice water.  Set it aside.  It might be easiest to just put them in the baking dish you've already prepared by greasing with butter.

Preheat your oven to 400 F.  In another pot (or you know, the same one if you washed it first), melt the butter.  Add the flour and stir (or whisk) until the flour is all sludgy and golden (you know, make a roux).  Very slowly add the milk, whisking constantly.  If you add the milk quickly, you will have lots of lumps, so go very slowly.

Remove the pan from the heat and add your egg yolks one at a time, again, whisking constantly (this time to avoid making scrambled eggs.)  Add the cheese and keep stirring!  Add salt and pepper to taste. You really do have to taste because how much salt you need really depends on how salty your cheese was.  Add the sprinkle of nutmeg and you're set!

Pour your sauce evenly all over the broccoli and cauliflower.  Then top that with your breadcrumbs mixed with the extra sprinkling cheese.  Bake for 25-30 minutes or until thoroughly warm, golden and bubbly.  I made mine in the toaster oven.

Friday, June 29, 2012

Radish in Review

 With only one day left before I go back to the farmer's market, I better return to my radish evangelizing, if only to psych myself up for my inevitable radish impulse buys!  In fact, I'm not going to even separate my radish recipes, I'm going to go ahead and give you two, right now.  (This is in no small part due to the fact that the second recipe isn't really a recipe. You'll see).  I really will try to be better about posting here this summer, but for now, go forth and eat radishes!

RADISH SALAD
INGREDIENTS:
1 black radish
1 red or purple radish
greens - I used romaine, but mixed would be nice
2 T freshly squeezed orange juice
1 T champagne vinegar
1 t honey
2 T extra virgin olive oil
Locatelli cheese

DIRECTIONS:
Peel and slice your black radish.  Fill a bowl with ice water and put the slices in for a few minutes, then remove and pat dry.  The soak takes out a lot of the bitter and spiciness, so you can adjust based on how you like your radishes. Slice the red or purple radish.  Chop your greens into manageable sized pieces (only necessary if you're using a lettuce  I suppose).  Put the radishes and greens into a salad bowl. In a small bowl, mix your orange juice, vinegar, honey and olive oil, combine it well with a whisk.  Pour the dressing over the greens and toss well to dress.  Plate your salads then use a peeler or grater to sprinkle with cheese.  Delicious!


RADISH + BREAD = HAPPY
YOU NEED:  Radishes, really good butter, really good french bread, kosher salt
HOW TO:  Slice the bread in half, toast if desired.  Spread with cold good butter (wait a bit for the bread to cool if you've toasted it).  Sprinkle with salt.  Lay down slices of radish.  Munch.

Thursday, June 21, 2012

Radish!

 I can't stop buying radishes at the Farmer's Market. It's like a sickness.  Last weekend they were buy one get one free.  I called my mother and asked her if she needed radishes. It gets worse.  I have three posts about radishes coming up.  That's what it's come to around here.  I've become a radish pusher.  

Come on, they're so pretty, don't you want to try them?  At the bottom of the bowl are the longer, red and white french breakfast radishes.  These are the most mild of the radishes.  Then I have some red and purple ones, they have slightly different flavors but are a bit more bitter than the breakfast radishes. There a white radish, which is spicier still and then of course, the glorious black radish, which is the most peppery.

I was most excited about the black radish, so when I got it home, I peeled it and sliced it so that we could try it right away.  I should have videotaped our reactions.  Ryan made a face like he'd bitten into a lemon, followed by a fairly aggressive blech.  It was bitter and sharp, peppery and had the faintest aftertaste of dirt.
Not exactly delicious. But then again, there are a whole lot of vegetables you shouldn't eat a slice of raw, so despite the inauspicious beginning I wasn't discouraged.  Black radish  is much better suited to be used as a flavoring.  In this seriously tasty spread, the sour cream mellows the bitter flavor and the spicy peppery flavor makes this far more exciting than your usual bland coleslaw. And the vague aura of dirt is completely gone (unless of course, you're the type of person that generally thinks things taste like dirt. If that's you, you should probably avoid radishes).


DELECTABLE RADISH SPREAD/DIP/SLAW
INGREDIENTS:
1/4 C grated black radish (this was one large black radish)
1/3 C grated carrot (this was one carrot)
1/4 C of minced cucumber (seeded and peeled)
3" piece of scallion, minced
2 T sour cream
pinch of salt - less than 1/4 t, just a pinch, really.

DIRECTIONS:
Mix together all ingredients.  Eat as a spread on bread, or a dip.  Consider making in larger batches and pretending it's coleslaw, but more interesting.

Friday, March 2, 2012

Lenten Excess


Lent is supposed to be a time of austerity. I'm usually pretty big on doing without. Over the years, I've given up caffeine, diet drinks, shopping, sweets in all forms; really any number of bad vices, fun pastimes or delicious indulgences. This year I'm giving up sloth (no not this kind of sloth, the kind where you're really lazy and never exercise) which means I've sort of hit the double negative of going without.  If I do without doing nothing, I must be doing something, right?  

And a lucky thing that is too, because this macaroni and cheese has to be the most decadent meatless dish I've ever served up on a Lenten Friday.  It is so creamy and cheesy and rich and delicious, but it also uses up all the little bits of leftover cheese lurking in your cheese drawer.  And come on, how slothful can you be if you're efficient enough that use each morsel of food in you fridge, letting none go to waste?

Right.  It's a really good thing I'll be getting plenty of exercise.

 DELICIOUS MIXED UP MACARONI AND CHEESE
Evidently Sara Moulton reads my mind, because I ended up watching this episode the day I planned this dinner.  Kismet I say.

INGREDIENTS:
1 lb pasta, I used elbows, but little shells are cute too
6 T butter
1 1/2 C milk
4 T flour
1 T Worcestershire sauce
4-5 drops hot sauce
1 T dijon mustard
plenty of cheese - I used monterey jack, cheddar and blue cheese (incidentally, this would be a great way to hide blue cheese if you have some but your family is not into it).  Sara suggested an 8-12 oz guideline.  I totally eyeballed it.

For optional topping:  1 T butter, 1/4 C panko breadcrumbs, olive oil, about 8 cherry tomatoes per person

DIRECTIONS:
Put the water for the pasta on to boil, when ready cook according to the directions on the package.  While the pasta is cooking, get the sauce ready.  In a large pot, melt the butter on medium heat.  Mix in the flour to make a roux, cook for 3-4 minutes while stirring until the butter and flour are all mixed together.  Remove from heat and add the milk and whisk well to incorporate.  Add the Worcestershire sauce, hot sauce and mustard.  Return to the heat (now on low) and slowly add the cheese.  Hard cheese should be shredded, things like blue cheese or goat cheese you can crumble in.  Stir as you go.  You want the cheese to slowly melt into the the milk.  When it's all melted and the pasta is cooked and drained you can mix the sauce and the pasta.  At this point taste it and decide if it needs salt and pepper.  Mine didn't need salt because of the cheeses I used.  

OPTIONAL TOPPINGS:
The slow cooked cherry tomatoes are heaven and provide a sharp and sweet balance to the richness of the cheese.  I put them on a foil covered tray, tossed them in a bit of olive oil and a sprinkle of salt and stuck them in a 300 F oven for about 40 minutes.  Delicious.

The panko breadcrumbs give a nice crunch.  Heat up the tablespoon of butter in a pan, toss in the breadcrumbs until golden and sprinkle over the top.


Thursday, November 10, 2011

Pretty Is as Pretty Does


When I picked out this recipe to make, I was fondly recalling one of my favorite Philadelphia restaurants, Melograno. They're a relatively big deal in a fairly big space right now, but when we used to go, they had a tiny corner spot just a few blocks from our apartment. Despite a pretty tasty looking menu, I always ordered the same thing, beet ravioli. Here, read the menu description for yourself - homemade pasta filled with roasted beets & mascarpone cheese finished in a brown butter sage sauce and poppy seeds. It's like candy (unless of course, you're someone for whom beets taste like dirt. J, look away honey, it's going to get worse before it gets better). Dessert for dinner, in a delicate pasta shell. So in my head, this was going to be roughly the same thing. After all, it had pasta, beets, poppy seeds and brown butter. This version was much earthier, probably from the farro pasta and the goat cheese rather than ravioli with sweet mascarpone, but definitely still tasty. It wasn't all that filling though, so you may prefer it as an appetizer or with substantial sides. Also, it was seriously, mind bogglingly, pink. So, you know, if you ever need something pink to eat...

PRETTY PINK PASTA
adapted from epicurious

INGREDIENTS:
1 lb red beets, peeled and destemmed, this was about 4 bigger than a golf ball, smaller than a tennis ball sized beets
1/8 C water
1/8 C olive oil
1/2 lb farro pasta (I'm sure you could use regular or whole-wheat)
4 T butter
1 T poppyseeds
1 t salt
1/4 C pasta water
a young, mild, goat cheese

DIRECTIONS:
So, I tried to do what the recipe said in terms of roasting beets, and it didn't really work. I used a 400 F oven and cut the beets into quarters. I placed them in foil lined roasting pan and added the olive oil and water. I roasted them for an hour, but they weren't done. I upped the temperature to 450 for the last 15 minutes and it was fine. Let them cool.

Make the pasta according the the box directions.

Place the butter in a pan large enough to accommodate the pasta. Turn the heat on high and let the butter sit for 2 minutes. It should get to be a nice golden brown color. Add the poppyseeds and toast for 2 more minutes. Then add the beets, and mix well. Add your pasta water and again stir to combine. Add the drained pasta and toss well to coat. Serve with a dollop of goat cheese on top.

Wednesday, August 17, 2011

Little Bites of Heaven

Now that I live country-adjacent (the directions to get to my apartment include the words: turn at the corn) and am no longer a city mouse, I have to say that my access to ridiculously amazing produce has increased. Just the other day I stopped by a farm stand and picked up a pair of beautiful heirloom tomatoes. Best thing ever? The stand had a tray of tasting bites each labeled with the tomato name. I picked out a Purple Cherokee and a Persimmon. Really, my restraint is admirable, because I did not just eat them in the car on the way home. While you can dress up tomatoes any which way, heirlooms deserve better. They should not be buried in a sandwich or blended into gazpacho. They should be the star. Ryan complained that I even did anything to these, but I think they were delicious with the trimmings, and so easy to make!

HEIRLOOM TOMATO AND RICOTTA BITES

INGREDIENTS:
1 (or more) heirloom tomatoes
ricotta cheese
baguette
salt
extra virgin olive oil

DIRECTIONS:
Slice your tomato into thinnish pieces, don't make them too thin, but don't do huge chunks either. Then cut the largest pieces in half. Count how many you have. Then slice a corresponding number of rounds from your baguette. Make these pretty thin, because you don't want the bread to overpower the tomato. Toast them lightly (I do mine in the toaster oven, but you'd be better off with a real oven than with a toaster-toaster). Smear a bit of ricotta (maybe a tablespoon) on each toast. Gently place a tomato slice on top. Continue until all bites are constructed. Arrange on a plate, sprinkle with salt, drizzle with olive oil, enjoy!


Saturday, July 16, 2011

Hey, I Was Going to Read That!


Once, when we were out at a restaurant in Philly, some friends and I decided we needed to know if you could mail a napkin. So we addressed the napkin, stamped the napkin and put that sucker in the nearest post box. It arrived about a week later (despite having been mailed a block from my apartment) in a little plastic baggie with a note attached apologizing for the condition of our mail. Ahem. We mailed a napkin; there was no need for such a formal apology. Which makes it all the more infuriating that two weeks ago when I received my July issue of Real Simple there was not a single page between the covers. It was an empty shell. It had the post office's lovely yellow forwarding label on it, but nothing else. Post office, let me share with you, I will notice if the magazine part of my magazine is missing. And I will care. Because the magazine part is the part I want. The cover can go hang for all I care. Luckily due to extensive complaining on my part to anyone who would listen I ended up with 2 July issues (one from my mother and one from Real Simple) plus an extra June. And even more luckily, there was something in those missing pages that intrigued and inspired me. In the three ingredient recipe section they had portobello quesadillas. Now, I couldn't be satisfied with any three ingredients, so I gussied them up a little for you. And I'll even give you the recipe in case you've received a pageless edition of Real Simple as well.

PORTOBELLO QUESADILLAS
Inspired by July's Edition of Real Simple
makes two full sized quesadillas

INGREDIENTS:
2 large portobello caps. Mine were huge. Get three if you're worried.
1 - 1/2 C thinly sliced red onion
1 1/2 t balsamic vinegar
1/2 C pepper jack
1/2 C cheddar cheese (I used all pepper jack but found the pepper overwhelming, you do what you like, just get yourself a cup o' cheese)
4 flour tortillas
olive oil
salt
pepper
butter

DIRECTIONS:
In a smallish pan, put 2 tsps of extra virgin olive oil. Turn the heat to medium Then add your thinly sliced red onion (I cheated and sliced on a mandolin because my knives are dull and I am lazy, also I don't usually wash the dishes). Add a healthy pinch of salt. Watch them, you want them to be sort of carmelized not crisped, so let them cook low and slow. Once they're more soft than hard, add your 1 1/2 t balsamic vinegar. It took mine about 10 minutes on medium low and they had the tiniest bit of resistance when you bit in, just make sure you like how done yours are. When they're done, put them in a dish. Take your portobellos. Wash/wipe the caps. If you're anti-gill like I am, scrape them out with a spoon. (I'd eaten the gills for years, and then once they tasted like dirt and now I always scrape). In a small bowl whisk up 1-2 T of extra virgin olive oil with some salt and pepper. Then rub this all over your mushrooms. Put them in a medium high pan and cook 5-6 minutes per side (if you had a grill, you could grill them, but I don't so I don't know how). When they're nice and soft, chop them into largish chunks. Grate your cheeses and mix them together. When it's time to make the quesadillas, sprinkle on half the cheese, then half the onions, then half the portobellos. Distribute evenly so each bite tastes good. I like to put a pat of butter in a large pan over medium heat, lay down the first tortilla and assemble right on it, so I don't have to move it with the fillings falling out. Then I just lay the other on top and cook about 4-5 minutes until the bottom is goldeny brown and the cheese is melty. Then flip and cook another 4 minute until done. If you're making them one at a time, keep them warm in a warm oven covered with foil, otherwise you can use all the pans in your kitchen and to them simultaneously. Evil to do to the dishwasher but efficient for the chef I say. Cut in wedges with a pizza cutter and serve with a dollop of guacamole, or salsa or whatever makes you happy.

Wednesday, July 13, 2011

Quick - A Quiche!


Maybe it was the delicious lunch my grandmother and I had at The Tea Shoppe or maybe it was reading a book that's set in Paris (disclosure, there is no quiche in that book, crepes, mais oui, but not a quiche. I can't make crepes though, so you're stuck with the quiche). Either way, I found myself desperately wanting quiche. Usually a summer staple of mine, I can't even think of the last time I made one. Luckily I consider quiche fairly easy to throw together (hence it being a summer staple). This one is vegetarian because I resisted the urge to throw in bacon. Believe me, I had the urge but reason won out. Which is okay, because it was completely delicious without. I won't tell if you add it though.

QUICHE, NO BACON

INGREDIENTS:
1/2 recipe dough (I make a full recipe and freeze the other half for later!)
1 T extra virgin olive oil
3 C sliced mushrooms
1/4 C well minced yellow onion
2-3 C washed, dried, stem removed, fresh baby spinach
3-4 sprigs of thyme (leaves only)
1 C gruyere cheese
1 1/2 C milk
4 eggs
salt and pepper

DIRECTIONS:
Preheat your oven to 450 while you make the dough. Then place the dough in a 9" pie plate. Cover it with foil and your pie weights, pennies or dried beans, whatever you use for blind baking. Bake for 8 minutes, then remove weights and foil. Prick the bottom all over with a fork and return to the oven for 4-5 more minutes. When you remove it lower your oven to 325 F.

While the pie is baking, get your fillings going. In a large pan, pour your tablespoon of olive oil. Add the mushrooms and onions, a pinch of salt and a healthy grating of pepper. Cook for 6 minutes on medium high (you don't want crispy, you want soft and tasty). Add your thyme and spinach and cook for 3 minutes more.

In a separate bowl, give the eggs a nice little beating and then pour in the milk and mix well. Add a pinch of salt and some pepper and then the gruyere. Give it another stir or two.

When the crust is ready, put the mushroom/onion/spinach mixture in the bottom of the crust. Then pour over the egg/milk/cheese mixture. Pop it in the oven (now reduced to 325 F) for 40-45 minutes or until it has set up (meaning a knife is pretty clean when you stick it in the middle). Allow it to cool for about 10 minutes before cutting in.

Monday, July 4, 2011

Frenzy for Frying

I have only once been to a State Fair, but oh, what a State Fair it was. Minnesota takes that sort of thing very seriously. And as tourists, my friend Lizzie and I took fair food quite seriously. We started the day out with cookies, moved on to fried cheese curds, added in a little corn on the cob and giant turkey leg and I believe finished the whole thing up with dessert on a stick. The Minnesota State Fair is very into food on a stick. Evidently, in many parts of the good old US of A it is State Fair season. I wouldn't know about that. There's probably a state fair (note the intentional lower case letters) in my state, but I know it's not serious. Nothing like a real State Fair. But even here, in State Fair season, talk turns to frying. Because nothing says fair food like some fried whatever-the-hell-it-is, fried Kool-Aid, fried Twinkies, fried beer, fried pizza, fried butter and fried hoagies (people stop the madness!) I am not ashamed to admit, I was whipped into a frenzy for frying. I had an uncontrollable urge to fry. And what food in my fridge was the lucky winner? Who exactly was going for a bath in that deep golden oily goodness? Leftover polenta, baby. Crispy on the outside, creamy goodness on the inside.


FRIED POLENTA BALLS

INGREDIENTS:
leftover polenta (don't worry I'll tell you how to make polenta)
flour
corn or vegetable oil

POLENTA INGREDIENTS:
2 C milk
1 C chicken stock
1/2 C water
1 C ground yellow corn meal - I use Quaker
2 T butter
1/2 C cheddar cheese (Shut up, the southerner in me can't help equating polenta with grits, and I can't help a little cheese in them. You're lucky it's not Velveeta.)
salt and pepper to taste

POLENTA DIRECTIONS:
In a medium pot, combine your liquids. Bring them to a boil, then remove from heat and begin to sprinkle in the cornmeal. Really sprinkle, don't just dump it, because if you dump it you'll have a congealed mass of ook. Instead, sprinkle, sprinkle, while whisking. Return it to low heat and watch it and stir it until it gets nice and thick. But not too thick. At the last minute, stir in the butter and cheese. I like to serve it under shrimp, or with a fried egg and greens, there's a lot you can do with it. But when you're done, stick the leftovers in the fridge for polenta balls!

DIRECTIONS FOR POLENTA BALLS!
In a medium pot (or whatever you use for frying), pour some oil. You need it to be deeper than the balls, but you know, don't fill the pot or anything. Heat up your oil to about 375 F. I'm totally guessing at that. My thermometer and I had a falling out. Or a jumping out, it wouldn't stay in the pan, so I just guessed at when to add the balls. While the oil is heating, take your leftover polenta. Working quickly, roll it into little balls and coat with flour. I tried to make mine meatball sized, like a small meatball, but as you can see, I was pretty irregular about it. Drop the floured balls into the hot oil and cook for a few minutes on each side. Really watch it, because you want them nice and golden. Remove (gently, they'll fall apart otherwise) and place on a plate covered with paper towels. I strongly recommend using a slotted spoon for this, because with a regular spoon you might end up dripping oil on your burner which results in fire. Ask me how I know. Keep warm in the oven until you're ready to serve. I put mine in a salad, but really, you can have your balls any way you like.

Wednesday, April 13, 2011

Effortless


As in, requiring no effort. Clearly I can't handle anything else these days. I know I barely post anymore, but honestly, I barely cook anymore either. I work later now than I ever have - Monday nights I'm lucky if I walk in the door before 7pm, Thursdays tend to fall in the 6:15-6:30 range. That (plus some other stressful stuff) means that I am exhausted. It's a miracle if I can tell you what I ate a few days ago, much less what I'm going to eat in the next few days.

Last night I ate hot dogs. I was sulky because I had to buy buns for the damn things.

Tonight I'm debating the pros and cons of pasta with butter and cheese or Trader Joe's gnocchi.

But this meal? This one was effortless.

ASPARAGUS AND GOAT CHEESE PASTA
Would you believe Martha does effortless?
adapted for 2 people

INGREDIENTS:
1 bunch asparagus
1/2 lb rotini
1 T olive oil
2 T butter
2 oz goat cheese
salt and pepper

DIRECTIONS:
Put a pot of water on to boil to make your pasta. Turn on your oven to 450 F. Rinse the asparagus. Chop off the bottom third of the asparagus and cut the top parts in 1 1/2" sections. Like this:
Line a sheet pan or baking dish with foil. Pour the tablespoon of oil over the asparagus and add some salt and pepper. Bake for 10-12 minutes. They should be tender but not mushy and bright happy green. I pulled my tips after 10 minutes and left the thicker parts to go for 12. Add the pasta when the water boils. Cook the pasta according to the directions. Before draining the pasta, reserve 1 C of the pasta water. You can reuse the now empty pasta pan. Over low heat melt the butter. Add the goat cheese and whisk until melted and smooth. Slowly start to add in the reserved pasta water. I added 1/4 C and that was plenty, but go according to how thick or thin you like your sauce. I tossed the pasta back in with the sauce and stirred to coat well, then I mixed in the asparagus. Definitely taste for salt and pepper, mine needed a bit. Simple, tasty (especially if you can get good asparagus), effortless.

Saturday, December 25, 2010

All right, already!!

Last night at 10:54pm my mother received an e-mail from a friend asking for this recipe. It's my fault really. Last weekend Ryan and I went to my parents' house and had dinner with them and their friends. The pot roast was heaven, but the big winner of the night was this roast vegetable dish. I waited a whole two days before I made it again for us. And I had promised to blog it, but then the time just got away from me. So in order to stave off any other Christmas crises, here's the recipe.

ROAST CARROTS, TURNIPS AND FENNEL
from my mom
Serves 4 as a side dish
Cooking time: 1 hr

INGREDIENTS:
1/8 C olive oil
1 t salt
pepper
5 carrots
3 tennis ball sized turnips
1 smallish bulb fennel

DIRECTIONS:

Get out a small roasting pan, and preheat your oven to 425F. Peel the carrots and cut off the tips (top and bottom). Cut the bottom half off your carrots and cut that in halves lengthwise. Then cut the tops in half lengthwise and then again lengthwise. Next cut the fennel. Take off the furry fronds and the end of the bottom. Then chop into half inch strips. Put the carrots and the fennel in the roasting pan together. Finally, peel your turnips and cut off any icky ends. Chop them in half and then in pieces that are of uniform size, and about the same size as your carrot sticks. Add the 1/8 C of olive oil and salt and pepper. Toss well until everything is coated. Put the pan in the oven and roast for 30 minutes. Then toss gently to give everything a chance to be in the best roasting spots. Cook for another 30 minutes, but check every 10 minutes or so to make sure things aren't burning. The fennel especially can burn if it you cut it too small. The carrots cooked the most slowly for me. If they're really not cooking at an even pace, you can always pull out the fennel pieces and put them back in for the last few to heat up again. You shouldn't need to do this, just giving advice should things go very wrong. If you cut things in pieces of the same size to start you really should be okay. At the end, taste for salt and pepper, add more as needed. Serve and wait a few days. See if you get demanding late night e-mails looking for the recipe. Breathe easily and send them a link here, I'm already on it.

Wednesday, October 20, 2010

Bedeviled Cauliflower Mac & Cheese


I'm not entirely sure about this, but I think I have already confessed to you that Ryan and I watch an inordinate number of cooking shows? Particularly cooking contest shows like Dinner Impossible, The Next Iron Chef, Chopped and The Next Food Network Star? Anyway, we started watching Ten Dollar Dinners after Melissa D'Arabian won The Next Food Network star a few years ago. I watch it because her recipes tend to turn out really well. Ryan watches it so he can heckle. He takes exception to what they claim costs under $10. Recently she roasted a chicken with potatoes, a side of swiss chard and made a dessert with Nutella and called it under ten bucks. Around here the going rate for a jar of Nutella is about $6.00 (yes, I know there's some serious price gouging in these parts). Even if you're not using the whole thing, you still have to shell out the six bucks to get it. Also, she always talks about proteins going on sale. Maybe it's this whole East-Coast-big-city thing I've got working, but I've yet to see sale chicken or steak. The one thing I do have though, is the dollar vegetable bags at the produce stand in Reading Terminal Market. This week Ryan scored a cauliflower for $1.50. I know, not a dollar, but it was a huge whomping cauliflower. With the cauliflower and the pasta being the main ingredients in this dish, I'm pretty sure we've got a real candidate for Ten Dollar Dinners here.

BEDEVILED CAULIFLOWER MAC & CHEESE
I'm calling this bedeviled because the spicing is pretty much the same as if you wanted to devil something else, like chicken or eggs.

INGREDIENTS:
4 C chopped cauliflower
1/2 lb medium shell pasta
3 T butter
1 3/4 C shredded cheddar cheese (use bright orange if you'd like your bedeviling to turn out holiday colored)
1 T flour
1/2 C milk
1 T dijon
1 t paprika
pinch cayenne pepper
topping: 1/3 C breadcrumbs + 1-2 T melted butter

DIRECTIONS:
Preheat the oven to 325F. Chop your cauliflower into shell sized florets. I use a steamer basket in a pot, and started from ice cold - it took about 15 minutes until tender. If you add the cauliflower when the water is boiling it shouldn't take nearly as long. Or maybe I just had a rough day. I'd check it starting at about 5 minutes.

Boil water for the pasta and cook the pasta according to the package directions. Drain and set aside. In the pasta pot (I used a huge one), melt the 3 T of butter. Add the flour and stir well. Cook for 2-3 minutes over low heat until the flour is golden. Slowly add the milk, stirring or whisking well to incorporate the flour. Continue to stir and add the dijon, paprika and cayenne. Then slowly add the cheese until the cheese is all melted in the sauce. Add the cooked shells to the sauce and toss gently. Finally add the steamed cauliflower and again toss gently until everything is coated in cheesy goodness. Pour into a greased casserole dish (I used a 1.5 quart dish). On the stove top melt the 1-2 tablespoons of butter for the topping. Add the breadcrumbs. Toss a few times until the breadcrumbs are golden and fluffy. Top the cauliflower and shells with the breadcrumbs and bake for 20-30 minutes.

Wednesday, August 4, 2010

If at First You Don't Succeed, Steal, Steal Again

Lately, I've been feeling like a failure. I just can't seem to do anything right. It's been about a million different little things from grammar mistakes to (pesky, not serious) health stuff that has me at physical therapists or doctor's appointments three days a week. And then there's my cooking. I made those baked mozzarella sticks. They were pretty yummy, except that I turned my back on them for one minute too long and they were melting piles of goop. Then I made a no-cook pasta sauce I saw on another blog. Flavorless and watery. I tried a hand at dessert - Julia's Baked Yogurt Tart topped with fresh raspberries. I suppose I should not be surprised that it tasted very much like lukewarm yogurt. I'm hoping refrigeration helps matters, but I'm not holding my breath or anything. So basically, I just keep trying. And failing.

Considering my recent streak it should not be a big surprise that this recipe isn't even mine. It's stolen from my mom's friend Joanne. You remember Joanne right? She's the one responsible for the highly addictive cauliflower crisps? Trust me, these days you're much safer making something I'm not responsible for. Also, please tell me in the comments what I left out. It seems unlikely given my recent track record that I would have written this up properly.

KALE AND BEET SALAD
serves 4

INGREDIENTS:
for the salad:
6-8 large leaves of kale, center rib removed, torn into bite sized pieces (wash thoroughly, kale lives in sandy soil, so be sure to remove all the grit)
4 medium beets, cut into a small dice
1T olive oil for roasting beets
red onion (about a slice per person)
goat cheese- 1-2 oz crumbled
salt and pepper

for the dressing:
2 T olive oil
2 t balsamic
one crushed garlic clove (remove before pouring dressing)

DIRECTIONS:
Peel and chop the beets to a small dice. Spread the beets on a foil lined cookie sheet, drizzle with olive oil and toss with salt and pepper. Bake at 375 for about 20 minutes until tender and sweet. While the beets are cooking, mix up the dressing and let it sit, this will give the garlic time to release its flavor.

Allow the beets to cool completely. Remove the garlic from dressing and toss the kale with the dressing. Arrange the kale on plates, top with beets, goat cheese and red onion. Run for your camera, demand the recipe and post to your blog. Continue to consider yourself a failure, if a well-fed one.

Wednesday, July 21, 2010

Tomato, Tomahto

I'm continuing farm fresh week here at the hungry hippo. It all started with a trip to the Trenton Farmer's Market, which you can learn more about at Half a Yard. Today - you say tomato, I say tomahto - why Jersey tomatoes are pure bliss.

I hate to break this to you, but what you've been eating is NOT a tomato. In fact, this time of year I'm reminded that what I've been eating is not a tomato. Or what I've been avoiding is not a tomato. Those limp pinkish things that they put on sandwiches? The mushy wedges lurking in your salad greens? NOT TOMATOES. I promise. Because tomatoes are an amazing, amazing thing. When the summer gets nice and hot, Jersey works its magic and somehow, these perfect red globes appear to remind you of everything a tomato could and should be.

A true Jersey tomato is heaven sliced with just a sprinkle of salt. If you must, slice some fresh mozzarella to place on top of the slices and drizzle with a smidge of extra virgin olive oil (yes, it must be extra virgin - this is about the best ingredients, nothing less). You can then top with a beautiful confetti of fresh basil (unless your husband gets violently ill from basil like mine does).


If you've acquired enough of them, you might find yourself willing slice them up to become the star of a BLT.

But if you have a true bounty of them, it is time for gazpacho.

I know. Shut up. Just add a set of googly eyes and it looks like a muppet head. I'm still working on the food photography thing.

Muppets aside, I'm serious about the cold soup. I'm so serious that it's been about three years since I've had gazpacho and I'm still hung up on it. There's no way I could hope to touch the perfection of what I had, but ever since I tasted the gazpacho at Chez Les Anges, I cannot get the thought out of my head. Gazpacho with avocado. Why don't more people do this? The silky creamy avocado is the perfect balance to the sharp fresh spicy tomato. They were M.F.E.O. (made for each other - those of you who have also seen Sleepless in Seattle too many times know this).

GAZPACHO
inspired by Chez Les Anges

INGREDIENTS:
1 whole avocado (per 2 people - save until the end)
1 medium cucumber, peeled, chopped (seeded too if you have a crappy blender) if you seed them, add another third of a cucumber
3 1/2 baseball sized ripe tomatoes, chopped(bonus if they're farm fresh)
2 cloves garlic, chopped
3 slices slightly stale good bread, torn into pieces
2 T red wine vinegar (I used cider vinegar because that's all I've got, but I would have preferred red wine)
1 T hot sauce
1 1/4 C water (or more if you like it thinner)
1/4 C olive oil
1 pinch cayenne pepper
salt and pepper to taste

DIRECTIONS:
If you have a real blender for heaven's sake use it. I only have an immersion blender and it was messier than I care to discuss and did not get the soup as smooth as I would have liked.

If you have a real blender, combine everything but salt and pepper and process until smooth. Then add salt and pepper to taste.  If you own a real blender maybe you don't need to chop everything?  If you're stuck with an immersion blender, you have to chop your solid ingredients. HAVE TO.

If you only have an immersion blender, put all liquid ingredients (hot sauce, water, vinegar, oil) in a pot and then add the garlic, cucumber and tomato. Get it as smooth as you can, then add the bread. Let it soak a bit to soften up. Then try your best to keep the blender actually immersed as you continue to blend. Then add salt and pepper to taste.

Chill in the refrigerator. When you are ready to serve, peel and pit the avocado. Place half and an avocado in each bowl. We had them served all in one piece, but certainly slice if that strikes your fancy. That would probably avoid the muppet face problem. Although, if you're trying to feed this to kids, you may want to look into googly eyes, hard boiled eggs perhaps? With olives?

Thursday, July 8, 2010

Empanaditas

Do you have any friends that give you a culinary inferiority complex? Because as much as I consider myself a competent cook, I totally do. My internet friend Robin is incredible. Everything she makes for dinner sounds straight off a restaurant menu. I'm serious.

Gorgonzola-stuffed chicken breasts with fig-balsamic reduction and roasted asparagus,

Blue cheese-apple puff pastry tartlets, chicken roasted with olives and lemon, and quinoa with swiss chard and currants,

Pork roast with garlic, port, brown sugar, chile paste and five-spice powder,

Lamb chops with orange, rosemary and pistachio gremolata, honey-glazed root veggies (carrots, parsnips, turnips), and farro with fresh peas and radishes. Candied ginger shortbread for dessert
.

Intimidating and insanely mouth-watering right? The trick with friends like this is not to give up, or become discouraged because you will never cook as well as they do. Oh no. The trick to to get them to give you their recipes. I've been hoping she'll start a food blog, because then I could read about all her delicious meals in more detail, but no such luck. Although, today I can share one of her recipes with you! These empanaditas are incredibly addictive, and it's a pretty flexible recipe. I changed the filling based on what I had readily available, and you can too. Of course, you can also assume Robin's way is the way and I'm sure you can't go wrong.

EMPANADITAS FILLED WITH BUTTERNUT SQUASH AND GOAT CHEESE
Courtesy of Robin, who actually is a professional at this kind of thing. She has one cookbook out already and promises another one soon. But I'm not giving up hope on the food blog idea. Come on Robin! Do it!

first is my adaptation of the filling, followed by Robin's original

INGREDIENTS:
First you need a crust. Robin allows a store bought crust (you need the kind with both a top and bottom for enough dough). I make my own from my standard recipe, but empanaditas are a lot of work, so you may want to cheat.

My filling
1.5 pounds diced butternut squash (I dice it small, smaller than an inch)
olive oil
salt
4 ounces fresh goat cheese
2 T Mrs. Renfro's Green Salsa

Robin's Filling
1.5 pounds diced butternut squash
Olive oil spray
Salt
4 ounces fresh goat cheese
5 or 6 roasted, peeled, seeded pasilla chiles (I used canned this time), diced
3 (?) T hot salsa

If you'd like them to brown up nicely, like many pie adjacent items, they could do with an egg wash. - Clearly, I did not do this, my poor empanaditas in the photo suffered from lack of egg wash, and being cooked in a toaster oven, because as I may have mentioned before, IT'S HOT HERE and there was no way I was turning on the real oven.

Dipping Sauce (I made this up. Ryan likes to dip.)
1 C sour cream
2 T lime juice
2 t cumin
(mix well)

DIRECTIONS:
Preheat oven to 400. Spread squash on a baking pan, spray with olive oil spray, sprinkle with salt, roast for about 30 minutes until soft. Check it, and allow extra time. If you cut the squash bigger it will take longer to cook. Cool. Mix squash, chiles (if you're using Robin's filling), goat cheese and salsa together in a large bowl until well blended.

Roll out the pie crust until it's a bit thinner than for a regular pie. Then cut out 3" circles. Robin has a pastry cutter, but you know I just use a drinking glass turned upside down. You can roll up the excess dough, and roll it out to cut even more circles. Then roll out each circle a little bit more, and place a heaping tablespoon of filling on the top half. Fold over to form a little half moon shape and then use the tines of a fork to make the edges look nice (a step I neglected in the insane heat - don't skip it, it's pretty). If you're going to make them right away, you can baste the tops with a little egg thinned with a bit of water, then pop them in a 400 oven on a baking sheet for 20-25 minutes, until crisp and golden. You could also freeze them (before you do the egg wash). They cook up beautifully. This recipe will make about 40.

Serve with dipping sauce.

LinkWithin

Related Posts with Thumbnails