Showing posts with label sides. Show all posts

Saturday, May 11, 2013

Pretty Healthy


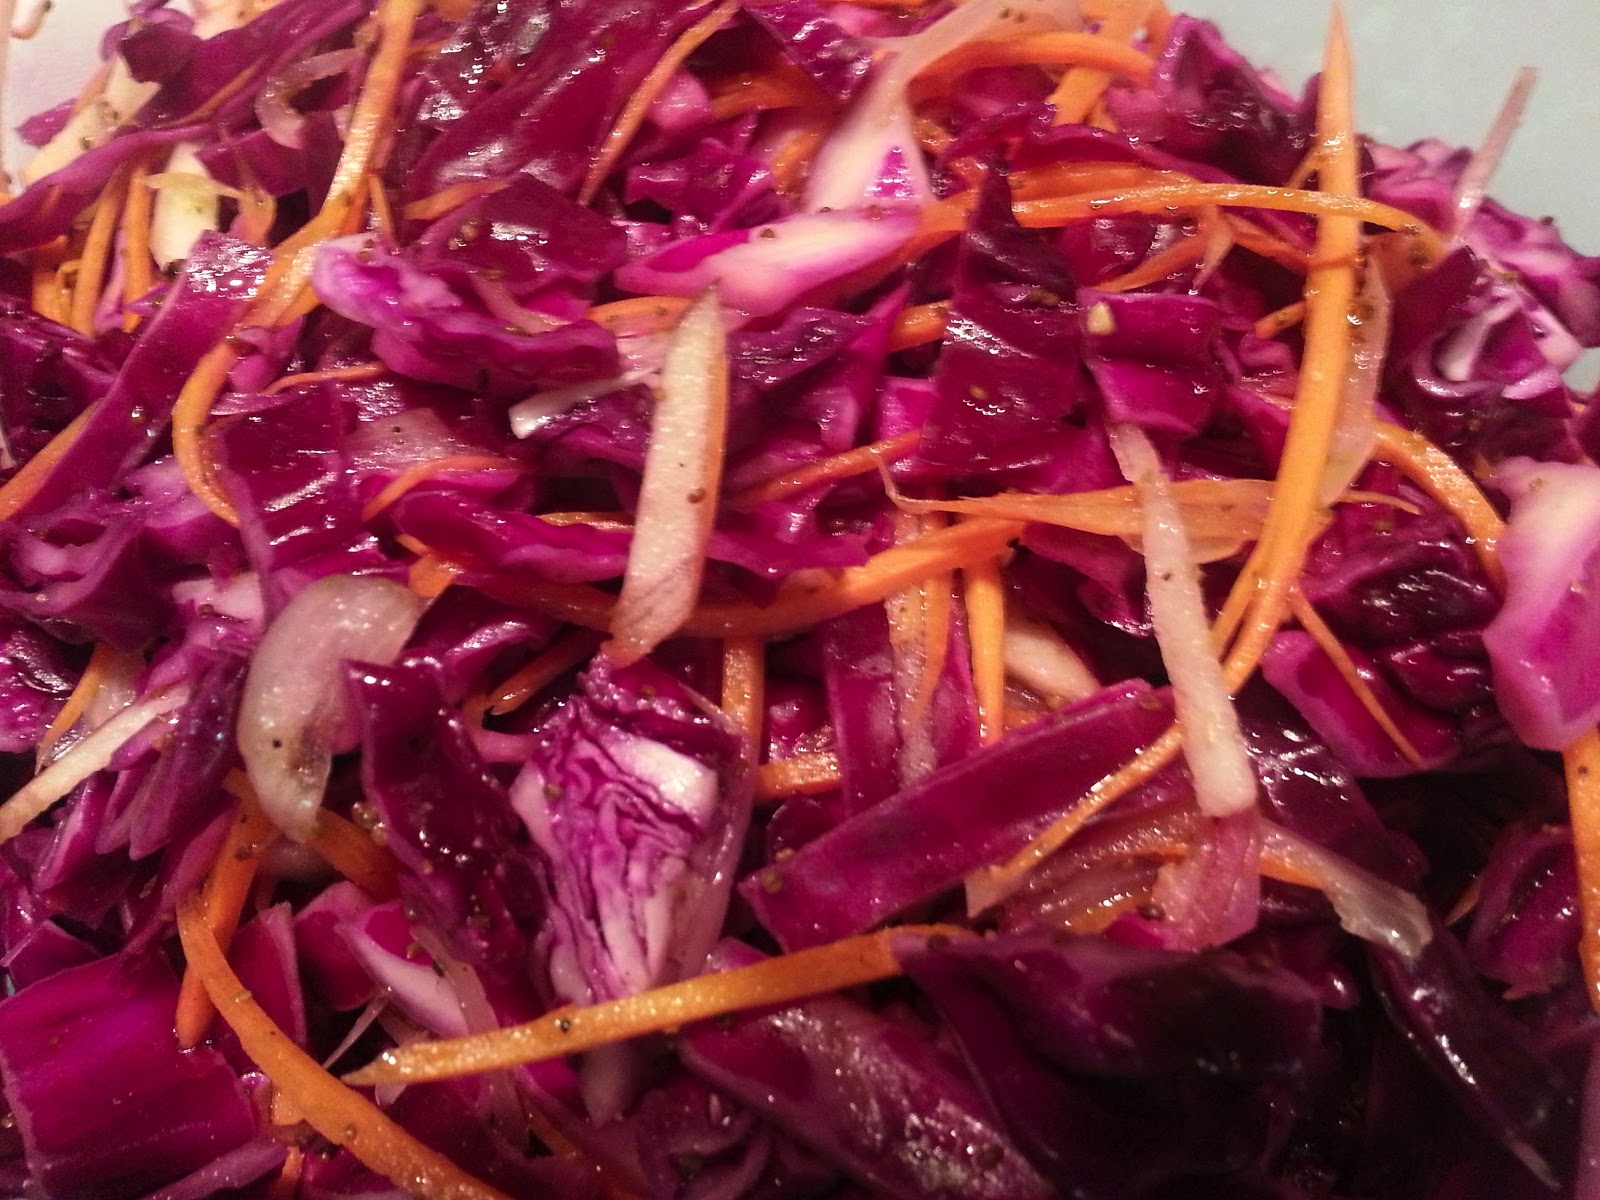
Generally speaking, I am not in charge of the vegetables.  I leave them to Ryan.  Sometimes, if he asks about them, I manage a slightly dismayed and mystified expression, as though I have somehow inexplicably forgotten.  That really, I'd planned for some but somehow it just slipped my mind.  I'm sure this stopped working years ago, but I still try.  It's not that I dislike vegetables exactly, it's more that I forget that I do like them.  At least, I like them certain ways.  And I definitely like them as red cabbage slaw.  It's tangy and crunchy and with the apple, just the slightest bit sweet.  Also, it's really pretty.  Ryan likes it because it is entirely mayonnaise free.  It's the perfect dish to master with summer right around the corner because it goes fabulously with bbq and fried chicken.

RED CABBAGE SLAW

1/2 head of red cabbage
3 carrots
1 apple, julienned (can you julienne apple?  I certainly tried)
1/2 C apple cider vinegar
1/4 C olive oil
1/4 C chopped shallot
2 t celery seed
1 t sugar
salt and pepper

DIRECTIONS:
Slice your red cabbage into bite sized pieces.  I like pieces on the longer side.  So basically I core the half and then slice down to make long strips and then cut those long strips in half.  Put all the cut cabbage into a strainer, rinse with water.  If you have time, you can sprinkle with salt and let sit (around 30-60 minutes) to remove some of the water, but if you don't it's not a big deal at all.  If you do salt it, rinse it again once you're ready to use it.  After you've rinsed the cabbage, pat it dry.

In a very large bowl, combine the apple cider vinegar, olive oil, celery seed, sugar and a healthy amount of black pepper.  Whisk them up.

Peel and grate your carrots.  I did mine using the mandolin, which made nice long uniform strips.  Use whatever kitchen tool you prefer.  Your goal is carrot strips.

Put the carrots, chopped shallot and cabbage into the large bowl with the dressing. Toss it well to coat and let sit at least 1 hour.  Add the apple.

This was still delicious several days after making, although it did accumulate more liquid at the bottom of the bowl.

Sunday, January 27, 2013

Cafe Constant


One of my favorite restaurants in Paris is Cafe Constant, a tiny place mere steps from the Eiffel Tower (take a moment to get over just how snooty I sound name dropping my favorite Parisian restaurant).  We've been there twice now and it was wonderful both times.  Our first trip there, I noticed that not only did the chef have a cookbook, but it was in English called Everyday French Cooking.  I mean this is nothing short of miraculous in Paris.  But in a moment of frugality, I decided I didn't need it.  Which of course meant that I promptly spent several years wishing that I had bought it.  Finally Santa took mercy on me and delivered it.

It is (unsurprisingly) full of French recipes, many quite traditional, and many involving fois gras or duck liver.  This weekend I whipped up a Cauliflower and Broccoli Gratin.  Not quite as intended in the book, I made quite a few adjustments due to my usual issue: sheer laziness.  But the result was delicious nonetheless.  (You should probably also know that the original recipe called for a pound (a POUND!) each of broccoli and cauliflower, as well as slices of baked ham, so it would be a whole dinner, for certain, or one of the most elaborate, substantial sides known to man).

Verdict:  I need to use this cookbook more.  Why don't I use this cookbook more?

BROCCOLI AND CAULIFLOWER GRATIN

INGREDIENTS:
2 C broccoli
2 C cauliflower
2 T butter
2 T plus 2 t flour
1 1/3 C milk
2 egg yolks
2/3 C cheese (the recipe called for gruyere, I used 1/3 C cheddar, 1/3 C parm) PLUS extra for sprinkling
about 1/4 C bread crumbs
salt and pepper
sprinkle of nutmeg

DIRECTIONS:
Set a large pot of water to boil (add a sprinkle of salt).  Cut your broccoli and cauliflower into florets. When the water boils, drop the broccoli and cauliflower in and blanche for 1 minute (blanche just means let it cook in the boiling water).  Then quickly remove it.  You might even want to shock it by quickly putting it in ice water.  Set it aside.  It might be easiest to just put them in the baking dish you've already prepared by greasing with butter.

Preheat your oven to 400 F.  In another pot (or you know, the same one if you washed it first), melt the butter.  Add the flour and stir (or whisk) until the flour is all sludgy and golden (you know, make a roux).  Very slowly add the milk, whisking constantly.  If you add the milk quickly, you will have lots of lumps, so go very slowly.

Remove the pan from the heat and add your egg yolks one at a time, again, whisking constantly (this time to avoid making scrambled eggs.)  Add the cheese and keep stirring!  Add salt and pepper to taste. You really do have to taste because how much salt you need really depends on how salty your cheese was.  Add the sprinkle of nutmeg and you're set!

Pour your sauce evenly all over the broccoli and cauliflower.  Then top that with your breadcrumbs mixed with the extra sprinkling cheese.  Bake for 25-30 minutes or until thoroughly warm, golden and bubbly.  I made mine in the toaster oven.

Monday, October 29, 2012

Last Potato Standing

Evidently, potatoes are the hot food of natural disaster.  This is something I honestly did not know.  I'm pretty new to the stockpiling frenzy, having lived in a city for 8 years that generally did not play the "buy out the grocery store" game.  I don't know if it's the proximity to food (walking distance rather than driving), or what, but I never saw the shelves cleared.  The closest I ever got was during a massive blizzard I was picking up a few things while two guys in chef's whites cleared the potato bin.  Their restaurant had a delivery cancelled and they were buying on a major scale.

I suppose that should have been foreshadowing for the great potato shortage of '12 but I really just didn't expect it.  I was pretty blown away to find that our biggest grocery store was out of baking potatoes, boiling potatoes, sweet potatoes, fingerling potatoes... pretty much everything.  All that remained were a few very sad looking shrink wrapped bakers advertising that they wanted to be microwaved and two full bins of red creamers.

What do people have against red creamers?  Why were they the wallflowers of the potato party?  I have no idea.  What I do know is how to make them delicious.

Ina Garten's Parmesan Smashed Potatoes.  Ridiculously easy and tasty (also, sub greek yogurt or regular yogurt for the sour cream if you have none on hand). You will not be sorry, even if you did end up with pickings from the bottom of the potato bin.

Also, I may have been a bit traumatized and overpurchased the next time I saw potatoes (um, the following morning at a small family owned store).  I now have baking potatoes, boiling potatoes and sweet potatoes.


Any theories on why potatoes were such a big seller?  I'd like to think everyone's planning on doing them camping style in their fireplaces when the power goes out, but I somehow doubt that's the case.

Monday, July 23, 2012

Pickle Grand Champion

I made that title up.  I have no idea what it would take to become an actual pickle grand champion, or if one can even BE a pickle grand champion.  But in my little contest of three pickles, this was the clear winner.  I would eat them in a boat and I would eat them with a goat.  (Deepest apologies to Dr. Seuss) Seriously.  I love these pickles.  They are tart and sweet and flavorful and easy to make.  I'm going to make another batch today.  The first ones went entirely too quickly.  Also, don't skimp on the onions and don't be afraid to eat them.  They are crunchy and delicious, not merely an agent for flavoring the pickles.

BEST PICKLES
I made this using stellacarolyn's recipe from My Family Table and Serious Eats's recipe for Bread and Butter pickles.
The recipe below DOES NOT MAKE ENOUGH PICKLES.  You might as well double it.  Otherwise you'll be lamenting lost pickles.

INGREDIENTS:
8.5 oz kirby cucumbers.
1/2 small vidalia onion
1 T sea salt
1 t mustard seed
1/2 t red pepper flakes
1/4 t celery seed
3/4 C white vinegar
1/2 C sugar

DIRECTIONS:
Slice your cucumbers in 3/8" slices (again, not a precise measure, totally guesstimated.) Slice your onion.  Put them in a small bowl and toss with the 1 T sea salt.  Refrigerate for 30 minutes.  Remove, rinse and pat dry.  Heat up the vinegar and add the sugar.  Stir to dissolve.  Add the mustard seed, red pepper flakes and celery seed.  Bring it all up to a boil, then turn off burner.  Fill a (clean, empty, dry) jar (I used a spaghetti sauce jar) with the cucumber and onion slices.  Pour over the pickling brine, leave it to cool on the counter a bit and then pop it in the fridge.  Pickle Perfection.

Thursday, July 19, 2012

First Runner Up: Dill Pickles

These dill spears were sort of obscenely easy and incredibly tasty.  I gave one to my father to try yesterday and immediately asked for a pastrami sandwich.  Sadly, I had none.  Just the pickles.  Want to make them?

DILL PICKLES
from food in jars

INGREDIENTS:
2 kirby pickles
1/2 C apple cider vinegar
1/2 C filtered water
2 smashed garlic cloves
1 t dill seed
2 t sea salt
1 scallion

DIRECTIONS:
Slice your pickles into spears.  In a small pan bring your vinegar and water and sea salt to a boil.  You'll need a single jar - again I used an empty, clean spaghetti sauce jar.  Put the garlic and dill seed into a jar, then carefully arrange your cucumber spears, taking care not to squish any.  When the liquid had boiled, pour it over the cucumbers.  Wait for it to cool and pop it in the fridge.  Wait at least a day and then locate your nearest pastrami sandwich (I'd settle for a Reuben) and enjoy!

Tuesday, July 17, 2012

Second Runner Up


Every contest has a loser and despite the pretty colors, this was not the star of the pickle party.  They were supposed to "asian" and honestly just tasted very vinegary.  I mean, of course pickles taste vinegary but these just didn't have any real dimension beyond that.  It's kind of my fault because I knew the recipe lacked a little something and I went ahead with it anyway, mostly because I was too lazy to get to the story to find anything that might improve it, like ginger.  I may try this recipe from Hogwash next time and see if it's any better.

Just in case you are dying to make mediocre pickles:

"ASIAN" PICKLES
inspired by a recipe posted on wyldethyme

INGREDIENTS:
8.5 oz kirby pickles (for me this was a pickle and a half)
2 carrots
3/4 C filtered water
3/4 C rice wine vinegar
1 t sea salt
2 scallions
1 clove of crushed garlic
1 t red pepper flakes

DIRECTIONS:
Cut off the ends of the pickles and discard.  Slice the remaining pickles into 3/8" slices.  That sounds really precise and I totally went and looked for a ruler so that I could be sure, but I could not find one.  So you'll have to deal with my highly technical estimates.  Anyway.  Slice the scallion, I used the white and light green parts.  Put the scallion, crushed garlic and red pepper flakes in a jar (I used a clean, empty, washed tomato sauce jar).  Stuff in the pickles and carrots.  I mean stuff figuratively, you really don't want to cram them in.  Gently layer.  In a pan, bring your water, vinegar and sea salt to a boil.  Pour this into the jar.  Let it cool for a while on the counter, pop in the fridge, wait a day.  Now you have pickles.

Friday, June 29, 2012

Radish in Review

 With only one day left before I go back to the farmer's market, I better return to my radish evangelizing, if only to psych myself up for my inevitable radish impulse buys!  In fact, I'm not going to even separate my radish recipes, I'm going to go ahead and give you two, right now.  (This is in no small part due to the fact that the second recipe isn't really a recipe. You'll see).  I really will try to be better about posting here this summer, but for now, go forth and eat radishes!

RADISH SALAD
INGREDIENTS:
1 black radish
1 red or purple radish
greens - I used romaine, but mixed would be nice
2 T freshly squeezed orange juice
1 T champagne vinegar
1 t honey
2 T extra virgin olive oil
Locatelli cheese

DIRECTIONS:
Peel and slice your black radish.  Fill a bowl with ice water and put the slices in for a few minutes, then remove and pat dry.  The soak takes out a lot of the bitter and spiciness, so you can adjust based on how you like your radishes. Slice the red or purple radish.  Chop your greens into manageable sized pieces (only necessary if you're using a lettuce  I suppose).  Put the radishes and greens into a salad bowl. In a small bowl, mix your orange juice, vinegar, honey and olive oil, combine it well with a whisk.  Pour the dressing over the greens and toss well to dress.  Plate your salads then use a peeler or grater to sprinkle with cheese.  Delicious!


RADISH + BREAD = HAPPY
YOU NEED:  Radishes, really good butter, really good french bread, kosher salt
HOW TO:  Slice the bread in half, toast if desired.  Spread with cold good butter (wait a bit for the bread to cool if you've toasted it).  Sprinkle with salt.  Lay down slices of radish.  Munch.

Monday, May 7, 2012

"Greek" Duckfat Potatoes

I quite willingly admit my ethnic cooking is largely inauthentic, even if it is tasty, hence the quote marks around "Greek."  I'm calling these "Greek" largely because of the spices I used on them and the fact that they are absolutely heavenly with tzatziki sauce.   So good.  It's entirely possible that this just serves as further illustration that everything goes with duck fat.  Clearly I'm not the only person to believe that though because there's a restaurant I'm just dying to go to in Portland, Maine called Duckfat.  They have duck fat poutine.  A pilgrimage must be made.  In the meanwhile however, I'll just keep finding new excuses to introduce potatoes and duck fat.

"GREEK" DUCKFAT POTATOES
inspired by my Uncle John

INGREDIENTS:
2 medium baking potatoes (organic if at all possible as you'll be eating the skin)
1/2 t salt
1/2 t dried dill
1/8 t garlic powder
~ 3 T duck fat

NB:  This cooks much, much better in a cast iron pan.  I tried a non-stick once just because it was a bigger pan and it did not brown them evenly at all.  Seriously, get out your cast iron.

DIRECTIONS:
Scrub your potatoes well, again because you'll be eating the skin.  Then stab them all over with a fork, you know, so they don't explode.  Then pop them in the microwave for 2 minutes.  After 2 minutes, turn them over and microwave them for 5 more minutes.  Use an oven mitt or other hand protection because "hot potato" isn't just a kids' game and take the potatoes out of the oven and place them on a plate.  Then wrap the plate with aluminum foil, closely sealing it around the edges so no steam escapes.  Set your timer for 7 minutes and just let them sit on the counter.  While they're getting ready, get out your cast iron and your duck fat so you can be ready to go.  You'll want to add the potatoes to a nice hot pan where you've melted 1-2 tablespoons of your duck fat.  Okay, so when then timer goes off, you slice the potatoes in rounds (probably 1/4 to 1/2 inch thick).  You'll need a sharp knife and again, something to protect your hand.  They may be almost falling apart, so a sharp knife will help, also the skin will help hold them together.  Lay the potatoes in the in pan and cook for five minutes.  When you go to flip them, feel free to add another tablespoon of duckfat.  While they are cooking, mix up your spices, the salt, dill and garlic powder.  You can sprinkle them once you've flipped them and then give another healthy sprinkle one they're done.  Serve with tzatziki for a special treat.

LinkWithin

Related Posts with Thumbnails