Showing posts with label chicken. Show all posts

Tuesday, August 28, 2012

In Which I Nearly Burn Down the House...

It wasn't a particularly great day yesterday, but I was really trying to turn things around.  I had made it through a phone call I was dreading and figured I could at least get dinner out of the way.  The chicken was cooked, the buns were ready to toast, the dishes were washed, the glaze was made and the red onions were caramelized.  I just needed to take Dexter for a walk before Ryan got home.  I turned off the heat under the onions and out we went.  It was a nice evening, so we made it a leisurely stroll and even ran into Ryan on the way back in.  As we got closer to the building, I could hear an alarm.  I assumed it was the neighbors burglar alarm at first, but as we walked up the stairs, I broke into a run.  When I threw open the door of our apartment, I knew.  The air was dark and cloudy with smoke.  The alarms shrieked.  On the stove, bits of charred onion smoked heavily in the bottom of a pan whose handle was on fire.

Unlike the gas stoves I've always cooked on, electric stoves have knobs that can be turned either way.  So in flicking it off, I must have over flicked and ended up on temperature 9, maximum heat.  I blew on the handle which sort of shockingly stopped the fire and then rushed the pan outside.  Ryan threw open the windows.  Dexter barked desperately thinking we were idiots for staying anywhere that was bleeping so loudly.  When the smoke cleared out enough the alarms finally stopped, the dog quieted down and I started making another batch of (highly supervised) onions.

The sandwich was delicious.  The apartment still smells of smoke.  I still feel like an idiot.  I blame the stove.

I give you the recipe in good faith that you will watch your onions, but also that you will share with me, in the comments, any tips you may have about un-smoke-smelling my apartment.  Please.

CHICKEN SANDWICHES WITH BALSAMIC GLAZE AND NOT BURNT RED ONIONS
adapted from Cooking Light
Warning:  This recipe requires multi-tasking.  If you cannot multi-task, you should adapt the recipe so that you will not set anything on fire.


INGREDIENTS:
for two sandwiches

1 boneless skinless chicken breast
2 rolls (I used buns because it's what I had, but you might like a real roll)
1/2 a small red onion
goat cheese
lettuce (you can use anything, fancy mixed greens, spicy arugula.  I used half  of a large romaine leaf)
tomato (a thin slice for each sandwich)
olive oil
salt and pepper

for the glaze:
1/4 C + 1/8 C balsamic vinegar
1 t worcestershire sauce
2 T brown sugar

DIRECTIONS:
You need two pans and a pot.  A small pot for the glaze, a small pan for the onions and a large pan for the chicken.  Set them all on the stove.  In the small pot, combine the balsamic, worcestershire and brown sugar.  Turn this on medium low and stir periodically (you may want to whisk it a bit to make sure the sugar all incorporates properly).  You want the glaze thick enough that it will coat a spoon (or you know, your chicken breasts) and not just pour all over your plate.  Slice your red onion nice and thin.  Add a bit of olive oil to the small pan.  Again, your heat should be medium low to low.  Put the onion in the pan and add a small sprinkle of salt.  You'll want to watch your onions.  You want them to cook to caramelized, so while you want them to cook down, you are not looking for crispy.  Any sizzling noises are to be carefully monitored.  This will take the longest time, between 15-20 minutes.  Then prepare your chicken breast (you only need 1 breast for 2 sandwiches).  Trim the breast of any fat or icky bits and salt and pepper both sides.  Add a tablespoon of olive oil to the large pan and turn the heat to high.  You want the oil to sizzle a bit if you add a drop of water.  Once the pan is hot, add the chicken.  It will take about 4 minutes a side, a bit less for thin breasts, a bit more for super fat ones.  Because you'll be slicing the chicken eventually this is a great recipe for beginners. You can cut into the breast to check for doneness, a nice slice through the fattest part.  Chicken should be white and sort of opaque, not pink.  You still want it too be moist.  When your chicken is done, you can cover it with foil and let it rest while you finish up anything you may not have timed correctly.  When you are ready to serve, slice the chicken breast on an angle.  Assemble your sandwiches.  I toasted the buns, and smeared goat cheese liberally on the top bun.  Then on the bottom I placed my lettuce leaf, then my tomato.  Then on top of the tomato I layered the chicken, drizzled the glaze on top and added the caramelized onions.

Tuesday, January 24, 2012

Drag Me Kicking and Screaming


If you need me, I'll be in my closet, on the floor, next to the dog in the sorted piles of dirty laundry.  I don't even care.  Judge me if you must, but seriously, I'm really not coming out.  You'll have to drag me, kicking and screaming.  I'm sure it's no surprise to you that I pretty much loathe confrontation.  So much so that I would rather compete with a snarling terrier for floor space among dirty clothes than have to deal with the work situation that I desperately want to avoid.  I'm squirming inside even contemplating it and yet, I can't stop. My head aches and my heart hurts and I can't stop turning over every single detail of what has already happened and what will have to happen.  So I'll just be here, in the closet, with the dog.  If I give you a recipe will you go quietly?  There.  See?  I knew you could be bought off you cheap thing you. 

CHICKEN STEW WITH LEEKS AND MUSHROOMS
adapted from Donna Hay.  Lord how I love Donna Hay.

INGREDIENTS:
1 pound of chicken thighs (I used boneless skinless ones)
plain flour (for dredging) - make the recipe gluten free by using rice flour or a gluten-free mix
2 T olive oil
5 oz pancetta (I use duck bacon)
2 leeks, pale green parts only, sliced and cleaned (I slice these and then pop them in bowl of water to rinse. Make sure to separate the rings so the dirt and sand fall out )
8 oz button mushrooms (you could half or quarter them, I buy them presliced because of being lazy)
2 cloves garlic finely chopped
1.5 C chicken stock
1 C white wine
1/2 C cream (feel free to use half and half)
1 T flat-leaf parsley (I always skip)
1 T thyme
salt and pepper.

DIRECTIONS:

Start by cutting any nasty bits off the thighs.  I cooked this in a dutch oven, but any large pan or pot will do. So put half of the oil in the pot and heat until medium.  Dredge the chicken thighs in flour, shaking off any excess flour.  Then put the thighs in the hot pan, make sure there's room for them all to touch the bottom.  Brown the thighs, but they don't need to cook through, so basically do about 2-3 minutes per side and then pull them out, set them on a plate and keep to the side.  Then add the rest of the oil and the duck bacon or pancetta. Let your bacony product render some of its fat, so about 2-3 minutes, then add the leeks, mushrooms and garlic.  Let cook until the mushrooms are nice and golden and the leeks are getting tender, about 8-10 minutes. Remove them to a bowl and set aside.  Lower the heat and add the wine and stock to the pot.  Scrape up any tasty brown bits from the bottom.  Raise the heat until it is simmering and simmer for 3-5 minutes.  Then pop the chicken back in, lower the heat and cook for 10 minutes, or until the chicken is cooked through and tender.  You can pull it apart if you like, or keep it in big pieces for serving.  Once the chicken is cooked, add the pancetta, leek, mushroom and garlic mixture back in. Then pour in the cream, thyme and salt and pepper to taste. Cook for 5 more minutes. 

This is delicious served over mashed potatoes or rice, even brown rice, all of which are gluten-free options. If you don't care about the gluten, you can serve it over pasta - I used egg noodles this time.

Saturday, January 14, 2012

New Year? No Thanks.

I'm one of those people that totally buys into the concept of a New Year.  There's something sort of magical about that tiptoe crossing out of one year and into something shiny, new, fresh unmarred by disappointments and pain.  I made it exactly eight days into 2012 before I wanted to give it back.  Crawl back to the familiar if somewhat worn 2011.  Unfortunately, unlike unwanted Christmas presents, you are unable to return unwanted years.  You're stuck with them.  You can hope that they get better (hey, we even get a whole extra day to try this year); you can hope that how they start is the opposite of how they'll end, but you can't really do anything else.  So when the only way out is through, I'm the kind of person who'd rather not eat.  I don't want to give a false impression, I'm a real believer in comfort food and the ability of delicious things to lift up your mood, but when things are really, really tough, my appetite goes missing.

This is a soup you can eat when you don't think you can force yourself to swallow one spoonful.  This is a soup you can cook when you don't think you can stand at the stove.

AVGOLEMONO
Adapted slightly from my mother's trusty Time-Life series. Serves two with some leftover.
I even messed up and kind of curdled the eggs, but it was still delicious.

INGREDIENTS:
1 boneless skinless chicken breast
6-8 C chicken stock
3 T freshly squeezed lemon juice (really, seriously, fresh juice, don't use bottled)
1/2 C rice
4 eggs
salt and pepper

DIRECTIONS:
In a large, heavy bottomed stockpot (I used my dutch oven), pour two-three cups of the chicken stock.  Rinse and dry your chicken breast and lightly salt and pepper the breast.  Heat the stock to a low simmer.  Add the chicken breast and cook 4-6 minutes a side until cooked through.  Tear the chicken into little bite sized bits.  Add the rest of the stock. I cook my rice separately because I am rice impaired.  I put the 1/2 C rice with the appropriate amount of chicken stock into my rice cooker and dealt with it that way. You can certainly cook it directly in the soup. I would add raw rice to the stock after removing the chicken and then cook it for 15 minutes or until tender.  Using cooked rice, I simply added it to the stock when it was done, along with the torn chicken.

In a small bowl, whisk the 4 eggs until light and frothy.  Then whisk in the lemon juice.  Stir in a quarter cup of the simmering stock, this will help keep the eggs from curdling.  Lower the heat under your soup because I felt like I couldn't get it low enough.  Slowly pour the egg/lemon juice/stock mixture into the soup pot, stirring constantly.  Cook over low heat for 3-5 minutes or until the soup thickens enough to coat the spoon lightly.  Do not let this boil or even bubble really because the eggs will curdle.  Add additional salt to taste.

Monday, November 14, 2011

Why I Love My Husband

Growing up, I never was allowed to eat processed food. I wasn't even really aware of the whole "not allowed" part. We just didn't. It has often lead to cravings for things that I'm not actually even sure I like. Once in high school I wanted nothing but Spaghettios. For weeks, I was dying for Spaghettios. And then I had them, and they were SO gross. But tater tots? Tater tots are not gross. Tater tots are crispy balls of joy. And when we were first dating and I had a fabulous, talented repertoire of say, maybe, two whole dishes that I knew how to cook, we ate a lot of chicken nuggets and tater tots. They weren't regular chicken nuggets though, they were some special organic, all white meat, magically healthy chicken nuggets that I got from a health food store near where I lived. It's been years. (Fine, a freakin' decade!) But the other day, I decided that I really, really, really wanted to eat chicken nuggets and tater tots. And then I searched. And I could not find a single store bought nugget that I felt okay about. So I didn't buy any and I whined about it loudly and frequently. And this is why I love my husband. Because he made me, especially from scratch, without a single word, comment or expectation, homemade chicken nuggets. They are delicious. They might not fool a kid raised on the packaged (or fast food restaurant) ones, but they certainly were enough for me.


HOMEMADE NUGGETS

Ingredients:
2 boneless skinless breasts
1 t paprika
1/2 t red pepper flakes
salt and pepper
bread crumbs
egg

DIRECTIONS:
Preheat the oven to 400 F.
Salt and pepper the chicken breasts generously. Cut the breasts in chicken nugget sized pieces. In a small bowl, whisk an egg. Add a bit of pepper to the egg. On a plate, put the bread crumbs, between a half cup and a cup, mix in a teaspoon of paprika and the red pepper flakes, a bit more salt and pepper. Then take the raw nugget hunks and dip in egg, shake, then dip in the breadcrumbs, shake again and place on a cooking sheet lined with tinfoil. Bake at 400 F for 10-12 minutes. You can flip them at 5 minutes.

Sunday, November 6, 2011

This Space Unintentionally Left Blank


One of the things I find truly fascinating is that busy is relative. Right now, I am busy. So busy, that I have been neglecting both my blogs, totally phoning in the dinners (hello, frozen tortellini you tasty beast) and generally shirking anything I think I can, things like exercise and vacuuming. I feel this incredible sense of stress and busy because it is evaluation time in my work life, and because I have a massive work presentation tomorrow. But honestly, I'm not all that busy. Last year, I worked 3 tutoring jobs, ran an after school club and pretty much got home 2-3 hours later than I do now. Two years ago I had physical therapy for an hour and a half to two hours 3 night a week and would still make the dinner. Clearly I am not so busy as all that. Clearly I am not so busy as many of you, who are reading this. But it is really amazing how many of us have this base level of functioning that we can sustain, and then if something else is added, that's when you feel busy. It's completely relative. And I want to be clear that it is entirely my own fault that my brain is leaking out my ears and I am unable to compose a coherent post let alone come up with an interesting title.

Okay then. About that dinner. Bone in skin on chicken breasts, with a spicy crisp coating. All you need to do is "massage the bird" (thank you Julia) and stick it in the oven. It's soothing comfort food, just what you'd want someone to make for you if you were stressed and didn't have the same illicit relationship with frozen pasta or tater tots that I do.

DEVILED CHICKEN
inspired by a recipe from Cook's Illustrated book about Chicken

INGREDIENTS:
2 bone in skin on chicken breasts
2 T butter, softened
1 T dijon mustard
1 T white or red wine vinegar
1 t hot sauce (more if you like spice!)
1/4 t cayenne pepper (again, more if you like spice)
1/3 C bread crumbs
salt and pepper

DIRECTIONS:
Preheat your oven to 425. Prepare a cooking sheet with a rack over it, I've used flat racks and roasting racks, it doesn't really matter, so long as there's a way for the heat to circulate around the bird and the breading won't get mushy. Soften the butter and mash in a healthy pinch of salt and a few grinds of pepper. Divide the butter equally between the breasts. Then lift the skin and rub the butter under the skin of each bird.

Mix the mustard, vinegar, hot sauce and cayenne in a small bowl. Massage the mixture over the breasts, front and back. Then coat each breast in bread crumbs.

Place on the rack and into the oven. Cook 40-45 minutes. You may want to start checking the temperature at about 30 minutes to see how it's going. You'll want 165 F for cooked poultry.

Wednesday, October 26, 2011

My Newest Old Love: Sara Moulton's Back!


I am finished with the Food Network. Oh I watch the channel, I even get sucked into to their "Next Food Network Star" programming. Sadly, this leads to watching the show of the next "Star" (which is in quotes for a very good reason) and wishing that you were the kind of lush who plays drinking games on a Sunday morning because "chef's" narration is largely telling me to take some of this "here" and a bit of that "there" until I don't know the difference between the two anymore.

But that's all over now. I have a new love: Sara's Weeknight Suppers. Back in the day, I used to watch Sara Moulton, on what had to be one of the first call-in cooking shows (Cooking Live, if you are old enough to remember). Then the Food Network decided to trade chefs for "talent" and I spent years watching inferior shows. But now, my local PBS station is rescuing me from getting sloshed before lunch. Sara Moulton has a new show, oh glory Hallelujah.

Why I love this show:
1. Sara Moulton actually knows how to cook. CIA trained. Executive chef for Gourmet magazine.
2. She gives helpful tips (the marinade will permeate the meat faster if you leave it all on the counter instead of putting it in the fridge).
3. She knows me. In the first episode she was making four meals out of two, by repurposing the leftovers (and not by making two disgusting meals, as Robin Miller would have you do). She mentioned exactly how happy you'd be when you get home at 6 o'clock and realize you already have dinner mostly made. If I found two already cooked lamb chops in the fridge I'd think the damn food fairy came.
4. She doesn't try to bullshit you. She made nachos for dinner. With a disclaimer that she couldn't believe she was trying to pass this off as a recipe, but on a Friday night, who really cares anymore. At no point did she try to tell you that your nachos would be the centerpiece of a Cinco de Mayo feast that would be so Yum-O that your neighbors would anoint you with EVOO for being the one true queen of Mexican cuisine.
5. Her recipes work and are delicious. Case in point, these chickens. Loved the chickens Sara.
6. She really doesn't seem like an asshole and is pro-women in the workplace. Unlike some other chefs talent I could name.

So come on over, be converted. You don't need that Food Network cable crap. Just good old public programming and you can learn to love cooking shows again too!

CHICKEN WITH LEMON AND OREGANO RUB
adapted from Sara's Weeknight Meals

INGREDIENTS:
2 boneless skinless chicken breasts
zest of one lemon
1/2 t salt
1 t oregano
black pepper
1/8 t water
extra virgin olive oil
for a super quick pan sauce: 2 T butter and a dash of white wine

DIRECTIONS:
Trim your chicken breasts and remove the tenderloins. Add a drizzle of olive oil, lay a bit of plastic wrap over the chicken and pound until uniformly thin (maybe about as thin as a tenderloin). In a small bowl, combine the lemon zest, salt, oregano, a few turns of the pepper grinder and the water. Using the back of the spoon, mash it up until it forms a paste. Rub the olive oil that you drizzles onto the chicken before all over the breasts, adding a teaspoon more if needed. Then divide the rub evenly between the two breasts. Carefully rub this all over the chicken. Don't leave clumps because it will be very strong. I put the rub on my tenderloins too. Then set it all aside to sit for 30 minutes. Right before you're ready, add 2 teaspoons olive oil to a pan and heat to medium high. Add your breasts and tenderloins and cook 3-5 minutes a side (the tenderloins will need less the breasts may need more depending on how thin you pounded them). If you are making in a pan and want a super quick pan sauce, remove the chicken to plates, add 2 T butter and a dash of white wine, let it burble, scrape off the chickeny bits that are stuck to the pan and pour it over. Delicious.

Wednesday, September 28, 2011

Perfect Anytime Roast Chicken

Two Sundays ago, I made this roast chicken for the first time. I couldn't believe how easy it was, or how well it turned out. Or how much it was exactly as comforting and full of fall flavors as I'd imagined, which is almost never the case with roast chicken which is often dry and lacking a little something. Nope. I overcooked this by a solid 20 minutes and it was still really, really good. And that juicy sauce you see up there? Pure heaven. I mean, it's beer+cider+chicken juice. What's not to like? You may find yourself sizing up possible dipping items, so plan well. Oh, and did I mention it cooks its own vegetables too?

Carrots and parnsips. Which taste like candy and yummier candy. Also, you can use your Dutch oven, not that stupid roasting pan which is stuck in a closet or on top of a cabinet or in some other highly inconvenient location. And it doesn't need a rack. It really is the perfect roast chicken, to be made anytime. Like tonight, if you're still trying to figure out your Rosh Hashanah menu (appley! sweet! double win!) Or on Sunday, when you have the time to roast a chicken. Or anytime! Now if only I can get it to wash its own dishes. Hmmm.

ROAST CHICKEN WITH BEER AND CIDER
from Lidia.

INGREDIENTS:
4 lb roasting chicken
2 tsp kosher salt
2 medium onions peeled and quartered
2 large carrots, peeled and sliced into uniform sized pieces. Or a handful of baby carrots. Whatever.
2 medium parsnips, done like the carrots. Oh shut up. You'll like them.
2 T fresh sage leaves
1 cinnamon stick
4 whole cloves
1.5 C chicken stock
1.5 C beer or ale (make it something you like, and yeah that's a whole bottle)
1 C apple cider

DIRECTIONS:
Preheat the oven to 400. Get out your Dutch oven. Get your onions, carrots and parsnips and toss in the bottom of the Dutch oven. Add the cinnamon stick and cloves and sage. You're making a nest for the chicken, so make sure they're distributed kind of evenly. Prep that chicken, trimming off the nasty bits, removing whatever lurks inside, salt and pepper the whole beast inside and out. Plop the chicken on top of the veggie bits, breast side down. Pour in all the lovely liquids - stock, beer and cider. Stick the whole thing on the stove and simmer 15 minutes uncovered on the top of the stove. Then, flip him over, so the breast side is up. Then you pop it in the oven and roast for 30 minutes, basting at 10 minute intervals. Roast another 30 minutes (if it's getting too brown, cover it with your Dutch oven lid) again basting every 10-15 minutes. Check the temperature at each basting. Poultry should get to 165 but will continue to cook a few minutes after you take it out. Roast another 10-20 minutes if needed - mine never has, but Lidia's did. Remember to watch the top for overbrowning too! When done, remove the chicken and veggies to a platter. Then put the Dutch oven o'juice back on the stove and cook on medium high (a nice boil if you please) until the sauce reduces quite a bit (half mayhaps, if you are patient). You can be carving the chicken whilst the sauce is doing its thing. Serve with sauce. Resolve to make it weekly at least. It's that good and that easy.

Make it gluten-free:  Beer is NOT gluten-free, so you'll need to substitute. I used half cider and half stock to make up the beer amount and it turned out great!

Sunday, August 14, 2011

Salvage Mission


Sometimes, I hate technology. The other day I spent over two hours on the phone with Comcast, LG, SMC and Netflix trying to figure out why my movies would no longer stream. Everyone did an amazing job of coming up with an explanation why it was someone else's fault and why they could not possibly help me. All except SMC. They just never called back. When he got home, Ryan tried his best to rescue me from the drudgery by providing one store bought rotisserie chicken for our dinner. I was so relieved I didn't even care that the chicken tasted largely of cardboard and was about as moist. It didn't matter. At that point, the day was utter crap anyway. The only problem was the next day we were left with half of a really dry chicken. And our Netflix still wouldn't work.

Fortunately, the Netflix issue randomly resolved itself. And the chicken? I could fix that easily, and so can you!! Whether you've brought home a dud from the supermarket, or you are personally responsible for the dry bird (I won't judge), with just a little kitchen magic, it can be one of the most delicious, luscious dinners you've eaten - Chicken Pot Pie Turnovers. And if you're certain you'll never need to save yourself from overcooked poultry, just tuck this away until Thanksgiving. You can use it to save yourself from another day of turkey with stuffing as well. The flaky puff pastry crust will melt in your mouth. The cream and vermouth make a rich sauce, and the duck bacon? Oh lordy, the duck bacon.

CHICKEN POT PIE TURNOVERS
Inspired by some Food Network show, although I couldn't find the recipe or the show when I went back to make it again. Sorry!

INGREDIENTS:
4 oz duck bacon (you can use regular bacon or pancetta)
1 T flour
1/2 medium onion chopped fine
2 cloves garlic minced
1/2 C carrot, chopped
1/2 C peas
3-4 stems fresh thyme
1/2 C vermouth
1 C milk
1 t dijon mustard
1 1/2 - 2 C leftover chicken (or turkey), shredded
1 sheet puff pastry, defrosted (save the other, or make Apple Turnovers,
Alsatian Onion Tart or Palmiers (scroll down).)
optional: 1 egg to make an egg wash for the turnovers so they will be glossy and beautiful.

DIRECTIONS:
Preheat your oven to 400F. Get a large skillet, put it over medium heat. Chop your bacon product into small pieces. Cook for about 4 minutes, or until cooked through, but not overly crispy, don't blacken. Especially if you use duck bacon or pancetta this will result in a lot of delicious fat being released into the pan. Don't pour it off, but remove your bacon from the pan and set aside. To the delicious fat, add your onions and garlic, lower the heat if necessary. Cook for 3-5 minutes until softened and the onions are translucent. Add 1 T of flour and mix in. It should coat the onions and garlic and collect all that fat so that it will thicken your sauce. Then add the carrots and peas. Let it cook for just a minute or two.Then add your thyme (maybe 3-4 springs of fresh, stems removed). Increase the heat slightly and add the vermouth. Let it cook off (reduce the liquid by at least half), then reduce the heat to low and add your milk and your mustard. Mix it all in and cook until it's thickened a bit, just a few minutes. Add in your cooked chicken and your bacon. When it's time to roll the puff pastry, act fast and with cold hands. Using a bit of flour, roll out your sheet of puff pastry. Be gentle and be particularly careful with the seams, you may need to sort of press your thumb or fingers on them to keep them from separating. Use a knife to cut into four equal pieces, I think mine were about 4-5" square. Transfer these squares to your baking sheet. I lined mine with a silpat mat. Evenly divide your filling between the four squares. Fold them in half to form triangles and pinch and fold the edge closed. Cut a small slit in the top. If you want, take one egg, whisk it and the paint the top of each with egg, it will make it pretty, but won't alter the taste. I am too stingy and lazy. I used a milk wash (just brush the top with milk) instead. If you don't act fast with the pastry stage, your filling will break through the bottom, which is why I advise adding the filling once the pastry is already on the baking sheet. Pop them in the oven and bake for 15-20 minutes or until the puff pastry is golden brown and tasty looking. Be incredibly grateful that your leftovers will be far superior to the initial dinner.

Sunday, June 19, 2011

Settling In

In the past two months, Ryan has gotten a new job; we've moved to a different state; I've gotten a new job and I've gotten a year older. We've been incredibly lucky because our string of changes have all been pretty positive ones. Okay fine, I could do without the moving and the getting older but the new jobs are certainly exciting. But these changes have meant that things are hectic to say the least. But at last we are settling in. The school year is not quite over and I still have a lot of packing up to do; the apartment is still a work in progress; but I've finally started actually cooking again. I have to admit though it takes me about three guesses to figure out where anything is. I did manage to get my act together enough last week to make this tangy barbecue chicken. I promise it's easy. If I could pull it together while multitasking to the degree I am now, you can too.

EASY TANGY (NOT HOT) BARBECUE CHICKEN LEGS
adapted from Giada

INGREDIENTS:
10 chicken drumsticks
1/2 C balsamic vinegar
1/2 C apple cider vinegar (Giada calls for a full cup of balsamic, but that makes for one really expensive barbecue sauce)
3/4 C ketchup (find a GF brand)
1/3 C brown sugar
1 garlic cloved minced
1 T Worcestershire sauce (Lee and Perrin's is GF)
1 T Dijon (Maille is GF)
2 t sugar
1/2 t pepper

DIRECTIONS:
Put everything other than the drumsticks in a pan and simmer for 15-20 minutes until the sauce is thick enough to coat a spoon. Preheat your oven to 375 F. Line a cookie sheet with foil. When the sauce is reduced lightly coat each drumstick with sauce. Cook the drumsticks for 30 minutes. Bring your sauce back up to a boil to kill off an nasty things that may have come from basting a raw chicken, then turn the heat way down to just keep it warm. After 30 minutes, paint those drumsticks with sauce again, and put them back in for 10 more minutes to finish them off. Repeat your heat and keep warm trick with the sauce. Remove the chickens, paint a final time and serve!

IMPORTANT NOTES:
1. The barbecue sauce is tangy not hot. I might try to add some heat next time.
2. The sauce alone is not all that great, it's vinegary, to the point where I strongly advise not to stand over the pan while it's cooking.
3. It's super tasty on the chicken and Giada claims you can put it on steak too. Mmm. Steak.
4. You can use it for grilling she claims! Many commenters report issues with it burning though, so proceed with caution.
5. I ended up with leftover sauce. Hooray. More barbecue for another day!

Saturday, February 26, 2011

(Oscar) Party Plan


Come Sunday, the women of Hollywood will be corseted and poured into gowns. Their hair will be teased, sprayed and coiffed, their faces painted, their nails shellacked. They will be stunning, breathtaking, works of art. They will probably also be hungry. And uncomfortable. I will not have these problems. My Oscar night party (for one) will involve my sofa, a sloppy ponytail, very comfortable pajamas and food that is most certainly off limits to the good ladies of fashion - teriyaki chicken wings. I will think of them with pity as gnaw on these delectable bites.

Whether you are having an ultra-exclusive party like mine, or one open to your friends, surely everyone will enjoy the freedom to make a mess while enjoying food you can sink your teeth into. Extra bonus - you can do a lot ahead. Make the sauce whenever you have time, then all you'll have to do is cook off the wings.

TYLER'S TERIYAKI CHICKEN WINGS
very slightly adapted from Tyler Florence - this goes really well with Cold Sesame Noodles (which can also be made ahead)

INGREDIENTS:
For the wings -
6-8 wings per person - if you are staunchly anti-wing, try drumsticks, they'll just need to cook longer
salt and pepper
olive oil

For the sauce (I halve Tyler's when cooking for the two of us. It's enough for the wings, and some left over) -
1/2 C soy sauce
1/2 C grapefruit juice
2 T hoisin sauce
2 T ketchup
1 1/2 T rice wine vinegar
2 T brown sugar
1 t sambal (more if you like things fiery)
2 cloves garlic, minced
1" piece of ginger, minced

gluten-free note: You'll need GF soy, GF Hoisin (Premier Japan is GF), GF ketchup

DIRECTIONS:
If you're cooking the wings at the same time as you're making your sauce, preheat your oven to 400F.

To make the sauce:
Chop the garlic and ginger and toss in a small saucepan. Add all the other sauce ingredients, stir and heat over medium low. Cook for 20 minutes stirring periodically or until thicker and tasty. For the love of Mike do not leave this unattended. You will not appreciate cleaning up the mess.

To make the wings:
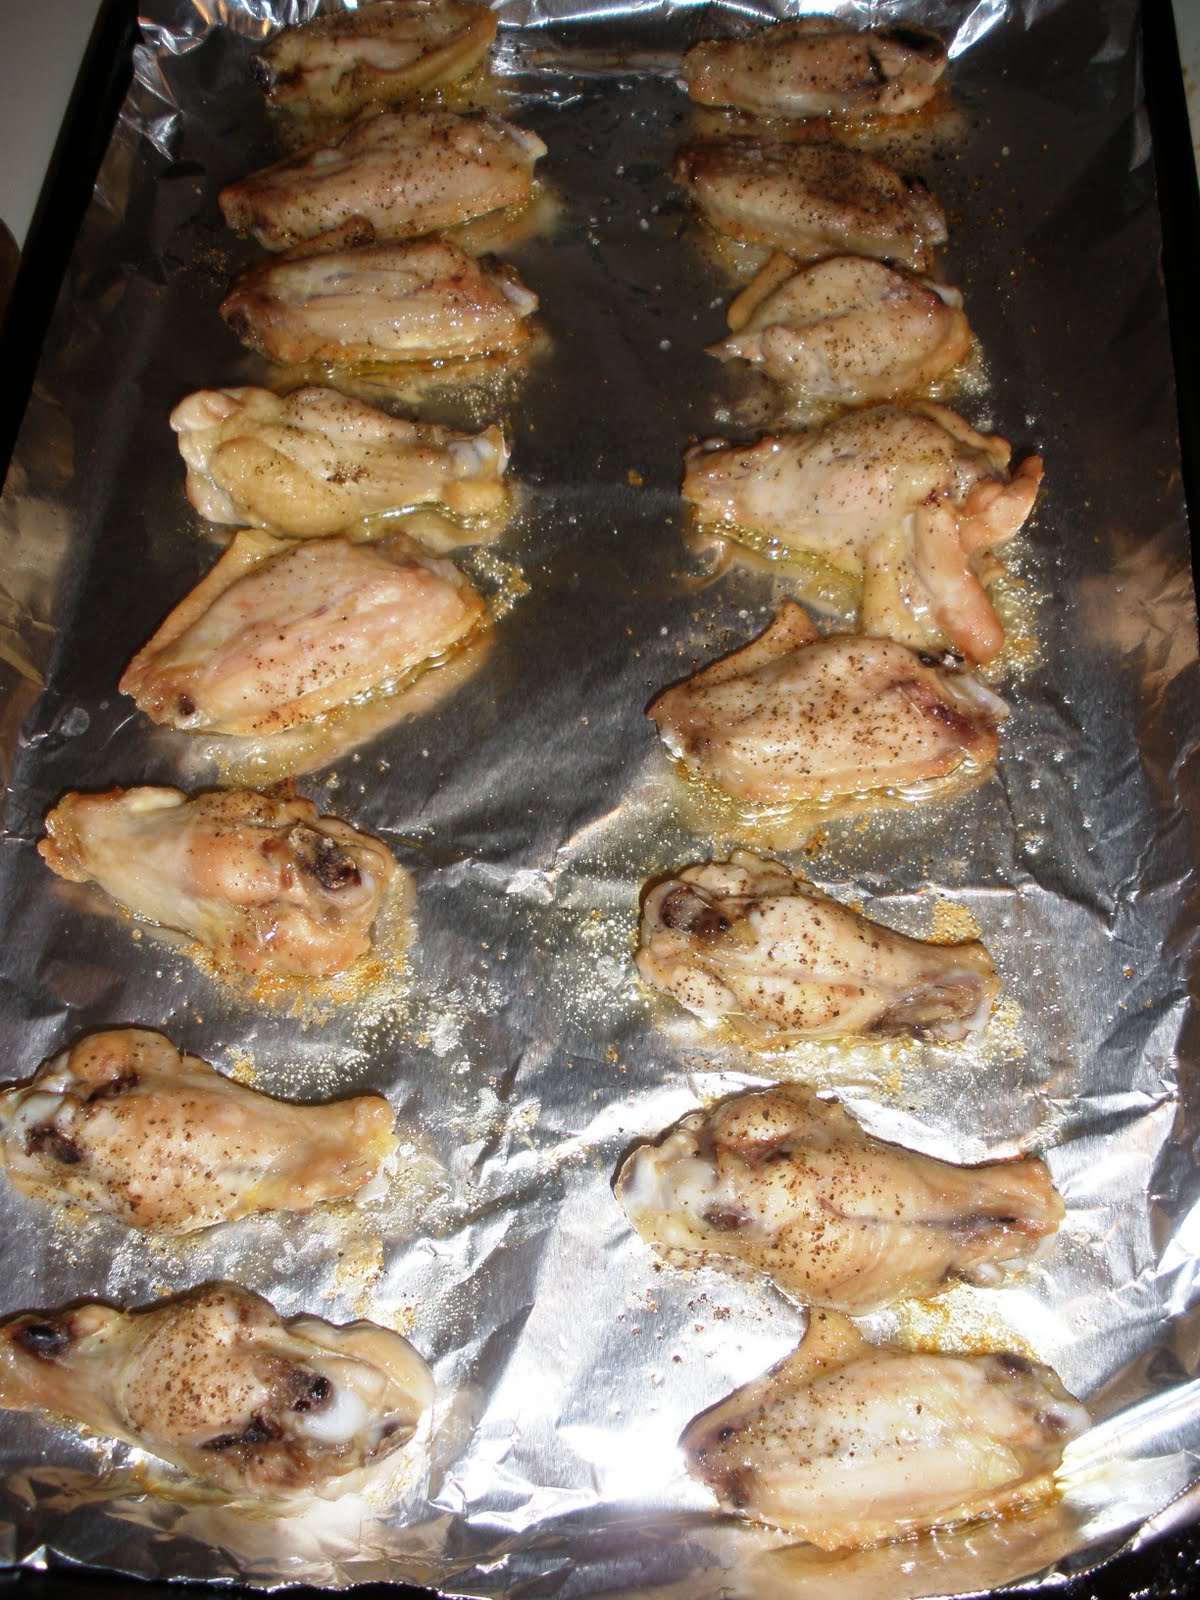
Cover a baking sheet with foil. Salt and pepper your wings and drizzle with olive oil. Bake for 20 minutes. Coat in sauce, tuck back in for 10 more minutes. Toss in remaining sauce. Serve.

So, I usually make the sauce ahead. But if you were so inclined, get the sauce started right as you start the wings in the oven. The sauce should finish cooking right about when the wings need saucing.

Friday, January 28, 2011

Pickin' Your Chicken

Look, I've been keeping something from you. Nothing exciting sadly, but something potentially very helpful. And that something is my breaded chicken recipe. I make it at least twice a month. Sometimes more. So why I haven't I shared? Pure and shameful selfishness. I usually make it when I'm tired and overworked. Which means that I put absolutely no thought into it. I eyeball everything. I time nothing. So I haven't written it up for you because I knew it would be a pain in my delicate spoiled little rear to have to write down what I do and how I do it.

BUT. I'm having this recent spate of altruism where I'm feeling all sharey so I figured we might as well get this out before I go back to being self-involved. Author's note: There has been a 4 day delay between the writing and posting of this post. I am not only self-involved but flighty.

The best thing about breaded chicken? It's incredibly versatile. You can top it with fresh avocado and tomatoes and a drizzle of balsamic like I did. You can make it plain and put a little honey on the side for dipping. Mmm. Honey. You can add Parmigiano-Reggiano to the bread crumbs, delicious. Or you can make it my mother's way with a bit of thyme in the bread crumbs. It's like having 4 whole different dinners. All with one simple recipe. You can manage that. I have faith in you. Walk away from the Shake and Bake aisle. This will taste better. And eventually you will be able to throw it together without thinking like I do. Which is really helpful when you're unsure whether or not you have any brain cells left.

VERSATILE BREADED CHICKEN
serves 2

INGREDIENTS:
for all three variations you need
3-4 Tablespoons Vegetable (or Canola or Olive) Oil
2 chicken breasts
1/8 Cup flour
hefty pinch of salt and several grinds of black pepper
1 egg plus 1-2 Tablespoons Water
1/4 Cup store bought plain breadcrumbs

for breaded chicken with avocado and tomato with a drizzle of balsamic vinegar you need
1 avocado (if you're making this for 1 person, squeeze a bit of lemon over the spare half and wrap it tightly in plastic wrap to slowing browning a bit)
1 C chopped tomatoes (or a few slices off a nice ripe one)
1/2 teaspoon balsamic vinegar per breast

for breaded chicken with parm
1/8 to 1/4 C grated Parm (how much is dependent on how cheesy you like things)

for breaded chicken with thyme
2 teaspoons dried thyme

for plain breaded chicken with honey to dip
a few tablespoons of honey in a bowl for dipping.

DIRECTIONS:
Remove the chicken from its packaging. Rinse it and pat it dry. Trim off any nasty bits of fat or tendony parts. Keep the chicken on a cutting board and cover it with waxed paper or plastic wrap. Use a rolling pin or flat bottomed pan to pound the chicken (as in this recipe). Remember your goal is even thickness. Then prepare your breading station. I have no counter space, so mine is cramped. But you need to put the flour (1/8 Cup) on a plate and add the salt and pepper. You need to put the egg in a shallow dish with a tablespoon or two of water and use a fork to whisk it like it's scrambled eggs. You need to put the breadcrumbs (1/4 Cup) on a final plate. For breaded chicken with parm: Add the parm to the breadcrumbs and mix thoroughly. For breaded chicken with thyme: Add the thyme to the breadcrumbs and mix thoroughly. Get your pan heated up. Put the vegetable oil in a pan and make sure the bottom is well-coated. Put the heat to the high side of medium high. You'll know it's hot enough when a drop of water flicked in the pan sizzles and dances.

Okay, step one in breading: Take the chicken and dip it in the flour, until both sides are coated. Give a little shake so the extra flour falls off. Do both breasts. So you have this:

Next check your pan. You want to put the breaded chicken directly in it, so make sure it's warm enough. If it is, finish breading. Step 2 in breading: Dunk the chicken in the egg mixture. Get both sides covered. Then press it into the breadcrumbs, flip it over and press it in the breadcrumbs again. Make sure there are now blanks spots. Then put the chicken in your pan. It should make a satisfying sizzle (wear long sleeves, your oil may spit). Cook the chicken for 4 minutes on this side. Then flip. Pretty, see:

Allow 3-4 minutes on the second side, lower the heat if necessary. If you want to top it with avocado and tomato, now is the time to slice your avocado and chop/slice your tomato. When the chicken is done (I promise you'll get to know how this feels), remove it from the pan.


Now, if you like, serve it with a side of honey. Or top with the avocado and tomato and drizzle a bit of balsamic vinegar over the top. Or just eat it. It's nice to have choices, isn't it?

Saturday, January 22, 2011

How to Cook a Chicken Breast


No seriously. Today I'm giving out step-by-step, I honestly hope they will be easy enough even for beginners, basic chicken breast cooking directions. Yes, these days I am the very image of domesticity, but back when I first graduated from college I couldn't really cook. I could make a few very specific things (I'm pretty sure I've mentioned here that I got invited to late-night after parties in college more for my ability to make Kraft mac and cheese from a box than for my sparkling personality). But actual dinner every single night? No way. I was crap at getting a decent dinner together when no one was around to monitor what I made and ate. Heck, I still am. But I did learn to cook, with no formal training and surprisingly less swearing than I would have predicted at the outset. So if you're feeling like you need to add a basic dish to your repertoire, or maybe that you should have a dish in your repertoire, here we go. Chicken with balsamic and mushrooms, the baby steps version.

CHICKEN WITH BALSAMIC AND MUSHROOMS - THE (ILLUSTRATED) BABY STEPS VERSION
This recipe is to serve 2 people. It can easily be cut in half if you're only cooking for one, or increased if you're cooking for many.

INGREDIENTS:
1 small chicken breast per person
2 Tablespoons flour (substitute brown rice flour if you want to make this gluten-free)
3-4 Tablespoon butter
1 Tablespoon extra virgin olive oil
1-2 garlic cloves
4 oz sliced mushrooms (the containers you get at the grocery store are usually 8oz, so use half of one of those - buy pre-sliced if you are lazy, it will save you a step. If you don't know what to do with the rest, you can toss some on salads, or cook then in a little butter and fold into an omelet).
1/4 Cup balsamic vinegar (balsamic comes in different degrees of fancy, don't get the cheapest, but don't buy really expensive stuff either).
3/4 Cup chicken stock (the rest can be frozen)
1 tsp dried thyme (it will keep forever, don't worry about owning a jar)
salt and pepper

EQUIPMENT:
1 large frying pan, hopefully non-stick
a cutting board
1 knife
tongs, hopefully with the plastic part covering the ends, not metal which will scrape your pan
an oven proof plate (you can use a cookie sheet if you can't find an oven proof plate)
a liquid measuring cup (for the chicken stock) and measuring spoons
something heavy like a rolling pin or the frying pan
plastic wrap or waxed paper

DIRECTIONS:
1. Turn your oven on to its lowest possible setting.
2. Clean your mushrooms by rubbing with a damp paper towel and slice, you can skip this if you buy pre-sliced.
3. Peel the garlic cloves and cut off the crusty bit at the base and discard. Chop the garlic up very fine.
4. Set the garlic and mushrooms aside in bowls ready to go next to the stove.
5. Take the chicken out of its package. Rinse it off in the sink and dry it using paper towels. There may be some fatty bits around the edges which you can trim off, and there's also a sort of gross tendony bit towards the fatter end which you can cut off. Discard the ooky bits.
6. Put the chicken on a cutting board and cover it with either plastic wrap or waxed paper. You are going to pound the chicken. See how its thick at one end and thin at the other? That will make it cook unevenly.


7. Use a rolling pin or the bottom of a flat frying pan to pound the chicken. You'll need to hit reasonably hard, but make sure your focus is on keeping it uniform in thickness. Your finished chicken may not be as pretty, but no worries, we're covering him in flour. Here it is flattened:
8. Throw out the wrap and put the rolling pin in the sink. Wash your chickeny hands.
9. Put the pan on the stove and add 1 tablespoon of olive oil and 1 tablespoon of butter (butter sticks have tablespoons marked on the wrapper). Turn the heat to medium high/high.
10. Mix the flour together with a half teaspoon of salt and a few good shakes (or grinds) or pepper. Then you can sprinkle the flour right over the chicken. I poured the flour on a dry surface (I used my cutting board, but if it isn't completely dry it will be gross and clumpy, so don't do that) then made sure I coated each side of the chicken.
11. Keep an eye on that pan. The butter can get a deep golden color but you don't really want it to brown. The pan is hot enough when a droplet of water flicked into the pan sizzles and spits. Stand back when you test it like this.
12. When the pan is hot enough, pick up the chicken breast(s) and give a good shake so the extra flour falls off. Gently place in the middle of the pan.
13. Cook for four minutes. Then use your tongs to flip. Lower the temperature to medium.
14. Cook for four more minutes. The chicken will feel much firmer when it is done. Chicken must be cooked all the way through, no pink, so check by cutting open if you're paranoid and new to this.15. Remove the chicken to the oven proof plate and place in the warm oven, remember the temperature is on keep warm or whatever your lowest setting is.
16. Okay your chicken is in the oven and your pan is empty except some leftover oil and some brown crackly bits. Reduce the heat to low. Toss in the mushrooms, garlic and thyme. Add the chicken stock and balsamic vinegar. Use your spatula to scrape the good brown bits off the bottom of the pan and mix in with the mushrooms and sauce. Cook for 2-3 minutes until the mushrooms are all tender and glistening like here:17. Turn off the heat and stir in 2 more tablespoons of butter. Yum.
18. Take the chicken out of the oven (and turn the oven off). Put it on a plate and gently spoon the mushrooms and sauce over top.

See, that wasn't terrible, was it?

LinkWithin

Related Posts with Thumbnails