Showing posts with label gluten-free. Show all posts

Tuesday, December 23, 2014

T minus 2 Part 2

Around 1pm

The deviled eggs are done, if a bit salty.  Maybe don't use the full 1/2 tsp?  

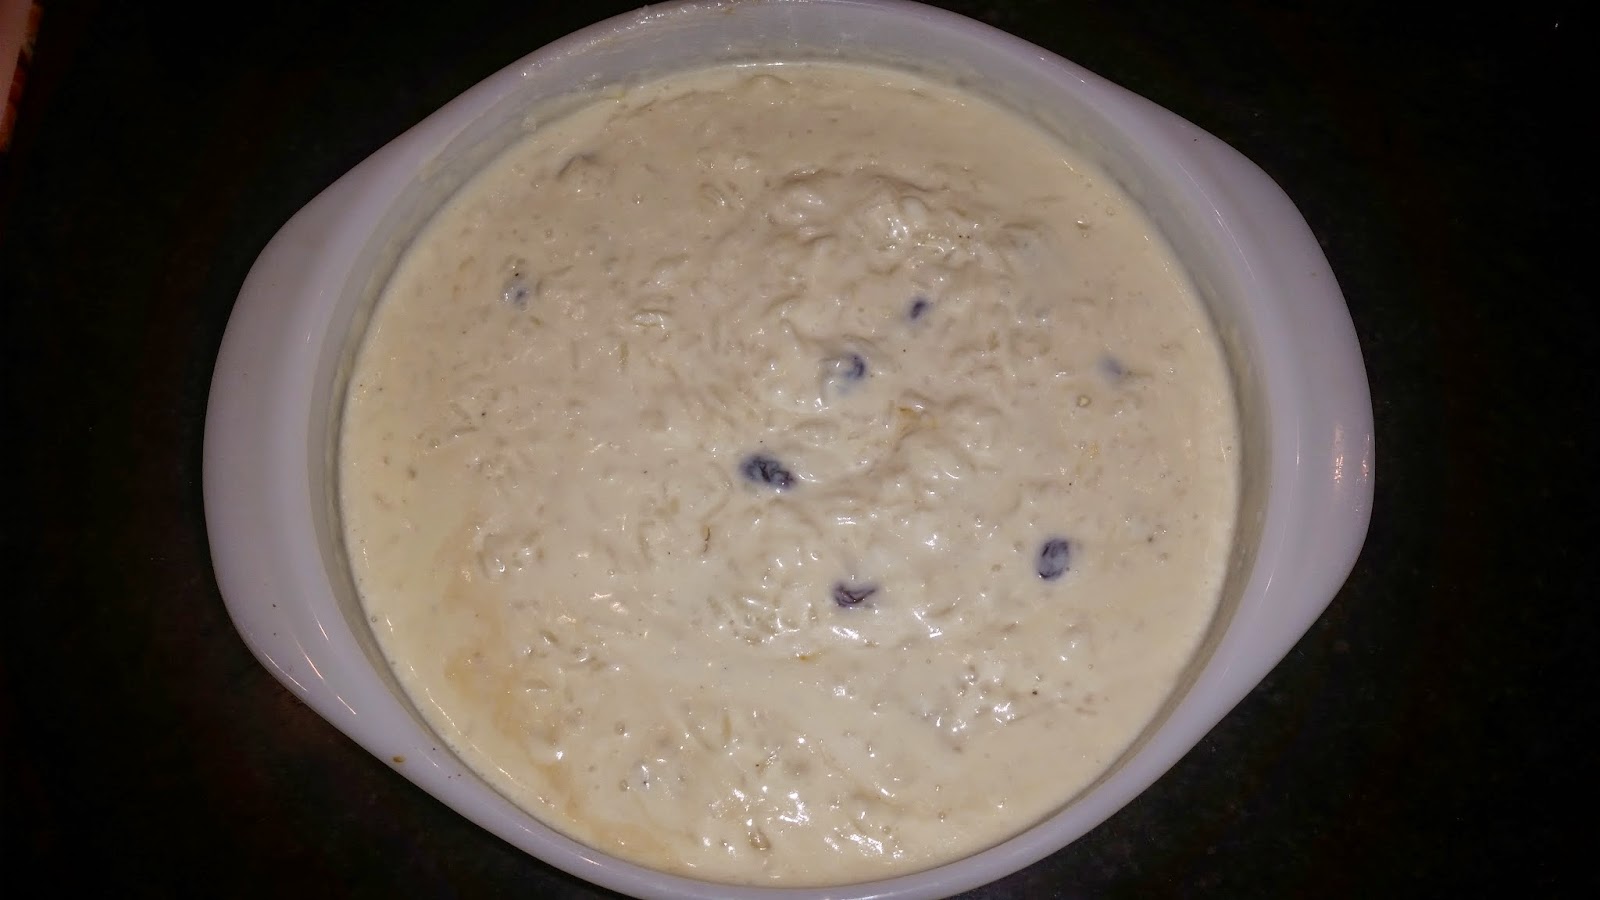
The rice pudding is on the stove.


1:30 pm

The rice pudding is still on the stove despite Ina Garten having said it would be done at 1.

Ina Garten's Rice Pudding
(my version)

INGREDIENTS:
3/4 cup raisins
2 tablespoons dark rum
3/4 cup white basmati rice
1/2 tsp kosher salt
4 cups milk 
1 cup cream
1 1/2 cup water
1/2 cup sugar
1 extra-large egg beaten
1 1/2 tsp pure vanilla extract

DIRECTIONS:
Put the raisin in a bowl and pour in the rum.  Put the rice in a pan with the 1 1/2 cups of water.  Bring to a bowl, then reduce to a simmer, and simmer covered 8-9 minutes, or until the liquid is absorbed. Stir in the milk and the sugar, bring to a boil and then reduce to a simmer again.  Simmer 25 minutes uncovered until the rice is soft.  Well, my rice was not soft and my pudding was really just milk with rice grains floating in it, so I can't sign off on this.  Maybe my simmer was too low, because I have a legit simmer burner?  At any rate, after 25 minutes of nothing, I moved the rice to the hotter burner, gave it another 15-20 minutes and it started to seem more like rice pudding.  Then add the beaten egg and cook for one more minute.  Remove from the heat; add the vanilla, the cup of cream and the raisins and any rum they may not have absorbed. I forgot to add the raisins.  No worries.  I stirred them in once I poured it into the bowl.  If I hadn't told you, you'd never have known.  Pour it into a bowl and pop it in the fridge.  Cover with plastic (right up against the pudding, to prevent a skin).


I

Friday, November 8, 2013

With Apologies to My Mother

It can be difficult for me to pick a dinner menu when my parents come to visit.  My father has Celiac Disease which means I generally stay away from dishes involving gluten (which rules out all pasta).  My husband won't eat red meat or pork (which is my normal life) but my father isn't overly fond of vegetarian.  Which means that unless I'm going to serve chicken every night, I'm going to have to make fish.  So the last time my parents were here, we were standing in Whole Foods and I said to my mother, "I'm going to get cod for supper."  My poor mother.  She is not overly fond of fish, especially when it tastes like fish (and not like teriyaki sauce or fried deliciousness or the like).  My father hates fish that does not taste like fish.  So it was with grim determination that my mother said "ok."  But.  This cod is tasty! Delicious even! I'm about as much of a fish fan as my mother (show me a crab, lobster, clam, shrimp, squid or octopus and I'm there, but fish? eh) and I like this!  But I did not waste my breath trying to convince her.  I simply made the cod, with a light fresh tomato and balsamic topping and let it do the convincing.  I think we may have won her over.

CRISPY COD WITH TOMATOES AND BALSAMIC

Equipment: You really do need a cast-iron skillet, large enough to fit your cod without touching.  A small pan will make this much harder to make and also, it will not turn out as well.  Why?  Well, you want your cod to be crisp (or at least kind of crisp) and the fish will give off moisture as it cooks.  Too many filets in your pan means too much moisture, means no crisping.  Also, you have to turn the fish over.  It can't just sit there.  And if you've crammed the pieces in, there is no room for the spatula.  Oh right, also, you need a spatula, and you'll be far happier with a fish spatula, you know the long narrow metal kind.

INGREDIENTS:
1/2 lb cod per person
1 tomato per person
1/2 T balsamic per person
fancy balsamic to finish - I have some aged orange balsamic that is amazing.
olive oil
salt and pepper

DIRECTIONS:
For the cod -
Make sure your cod is deboned.  I buy mine from Whole Foods and generally don't have any trouble with it, but you may have a few pinbones in there.  If you do, pull them out gently.  Pat your fish dry then, sprinkle it with salt and pepper.  Add about 2 T of olive oil to your cast iron pan.  Basically you want a very thin covering over the whole bottom of the pan, so don't try to undercut the amount, and don't pour a ton, you're not frying it.  Heat the pan on medium or until the oil looks a bit shimmery.  Then add the cod.  Reduce your heat to medium low (cast-iron keeps the heat) or even low if it seems out of control sizzle-y. Cook for 4 minutes.  It should come up easily for flipping.  Try nudging your spatula under one edge.  If it doesn't budge, you may have to let it go another minute.  If the fish flakes apart and you can't do a perfect turn, no worries, you can hide it under the tomato sauce.  Anyway, flip the fish over and cook it another 2-5 minutes.  The cod should be white and flaky.  Carefully transfer it to a plate.
For the tomatoes with balsamic - 
In a small pot or non-stick fry pan, pour about a teaspoon of olive oil.  Chop up the necessary tomatoes (I cored mine, then cut in a large dice) and toss in the pan over very low heat.  Add the balsamic.  Let cook while your cod is cooking, you should end up with the balsamic thick enough to coat a spoon.  Right before I pulled it off the heat, I added an extra tablespoon of my fancy balsamic (I served 4 people, so I guess that's a 1/4 tablespoon fancy balsamic per person).  If you are lacking in the fancy balsamic department, just add an extra tablespoon of the regular stuff at the start.  It will cook down just fine.

Spoon the tomatoes on top of the cod.  Please fish lovers and the fish neutral alike.

Tuesday, October 22, 2013

In Which a Miracle Occurs

I had a spectacular weekend.  My uncle and cousin came to visit, drawn in by the siren lure of an adorable baby.  I swear, if I'd known how much more often people would visit me, I would have had one years ago!  Ever the gracious hostess, I planned to take my guests out to dinner on Saturday and for Friday night, I expected them to cook for me.  Well, I expected my uncle to cook for me anyway.  He made an absolutely delicious roast chicken which I will try to replicate at some point, some lemony roast broccoli, but most miraculously, he made delicious eggplant.

My friends, there are exactly two vegetables I do not eat: zucchini and eggplant.  Zucchini is pretty much the food of the devil, but eggplant and I have a very touchy relationship.  I want to like it.  I really do.  I've never really minded the flavor, but for whatever reason, eggplant has always made me gag.  I've had it made in the Parmigiana style.  Nope, didn't work.  I've pureed it in pasta sauce, alas, a deep and thorough failure.  But the way my Uncle John made it was so tasty, I went back for a second piece.  That's right, I took seconds of my second most loathed vegetable.

Does that tell you everything you need to know about my uncle's cooking?  No?  You want the recipe too?  Okay!  I got it!  (Totally selfless I am, always thinking of you).

UNCLE JOHN'S EGGPLANT

INGREDIENTS:
2 eggplants
3/4 C extra virgin olive oil plus more for brushing
2 T red wine vinegar
2 cloves garlic, minced
2 T of capers with juice
1/4 of a small red onion (optional - Uncle John was not pleased with how it turned out using the red onion, I think I liked it, but will try it without next time)

DIRECTIONS:
Slice your two eggplants into 1/2" thick slices.  Set your oven to broil.  Lay out the eggplant slices on a cookie sheet and brush them with olive oil.  Flip them and brush the other side with olive oil.  Sprinkle both sides with salt and pepper. Put in the oven to broil for 10 minutes.  Flip them and let them broil for 10 minutes on the other side.  Whilst they are broiling, find yourself a large serving dish with sides.  We used my lasagna pan.  Mix together your olive oil and red wine vinegar.   In the bottom of the pan, pour about 1/4 C of olive oil and the red wine vinegar  and sort of swish it about so it's evenly distributed.  When the eggplant is done, lay it out in the dish.  Add the garlic, capers and onion (if you use it) to the remaining oil and vinegar.  Drizzle this over the eggplant layer.  Add another layer of eggplant and pour over more of the good stuff.  Continue until eggplant is used up and all topping has been poured out.


Let marinate at room temperature for 6 hours.  Ours only sat for 4 hours and was delicious, but don't try to cut it any closer than that.  Uncle John says it's great for dinner parties, because you can make it in advance, but also it takes up no room in your fridge!

Friday, August 30, 2013

Presto! Pesto!


I recently came into possession of a garden mess of weeds that once was a garden.  Very few things in this overgrowth are identifiable.  There are a few green tomatoes, yearning for the sun.  Some sad yellow cucumbers buried beneath the overgrowth.  But the basil* is standing tall and proud.  A veritable taunt to my basil-allergic husband.  Clearly this was a call to pesto.  I grabbed the baby and harvested about a cup of basil* leaves which was just enough for a half-recipe of my mom's pesto.  Of course, since I'm eating alone, a half recipe should be just fine.

*at least I hope it's basil.  Otherwise I just made a delicious and hopefully not poisonous weed pesto.


BASIL PESTO
Let's pretend you have enough basil for the full recipe, shall we?

INGREDIENTS:
2 C basil leaves
1/2 C olive oil
2 T walnuts 
2 cloves garlic
1 t salt
1/2 C freshly grated Parmesan
3 T softened butter

DIRECTIONS:
Put the basil, olive oil, walnuts, garlic and salt into your food processor.  Blend until it looks like pesto. Pour into a bowl and add the parm and the butter.  Stir.  Now you have pesto!  It will keep in the fridge for a week or so, but if you want to freeze it, you can do that before adding the cheese (no idea why it's BEFORE the cheese.  You'll have to ask my mom).


Sunday, June 2, 2013

Not Another Potato Salad...


Actually, yes, yes, another potato salad.  Why?  When I already have two recipes for potato salad, why would I possibly need a third?  I don't know.  Why do I need more than two pairs of shoes?  More than two colors of lipstick?  Is it greed?  Or is it just good old fashioned variety?

All I know is that this potato salad is delicious and was a huge hit at our Memorial Day gathering.  It was the perfect compromise between the traditional mayonnaise laden potato salad my mother and I prefer and the elegant if not somewhat austere green bean and red potato salad dressed in vinegar that satisfies Ryan's stringent no mayonnaise requirement.

This is tangy, but casual, rich, despite its lack of cream.  And so, yes, here I am, with another potato salad.  With hard-boiled eggs and bacon, it's plenty festive and feels indulgent.  The spicy brown mustard dressing, dotted with bits of jalapeño gives it a tangy kick without being fire-y in the least.

POTATO SALAD, TAKE  3

INGREDIENTS:
2 lbs red potatoes
6 slices of bacon
2 hard-boiled eggs
1/4 + 1/8 C extra virgin olive oil (you could possibly increase this to a half cup)
3 T apple cider vinegar
1.5 T spicy brown mustard (none of that high-faluting dijon here)
1 scallion minced (white and light green parts only - about a tablespoon)
1/2 a jarred jalapeño, minced
1 t salt (adjust to your liking)
pepper

DIRECTIONS:
Cook your bacon until crispy and set aside.  If your potatoes are large, quarter them.  If they're little, you can half them or if they're tiny, leave them whole.  Add them to a large pot of boiling water.  Cook at a boil for 10-15 minutes.  You want them to be able to be cut, but not mushy at all like you'd need for mashed potato.  Drain them and set aside until they're cool enough to handle.  At that point, you'll need to cut them into bite-sized (1-2") chunks. Place these in a large bowl, big enough to handle the potato salad.

Mix up your dressing.  I used a dressing mixer, but a whisk should do nicely.  You combine the olive oil, vinegar, mustard, salt and pepper, the jalapeño and the scallion.

Grab your large bowl of potatoes.  Pour the dressing over it and gently toss to coat.  Get your bacon and cut or crumble it into little pieces and toss it into the salad.  Peel and chop your hard-boiled eggs.  Add them to the salad as well.  Toss it all extremely gently, you don't want the eggs to disintegrate.  Taste and adjust the seasonings accordingly.

This is much better when it's had time to sit, because the potatoes need to absorb the dressing a bit.

Also, if you hate jalapeños or just want to make the whole thing more kid friendly, consider substituting chopped up baby gherkins.  Because who doesn't like little sweet pickles?

Saturday, May 11, 2013

Pretty Healthy


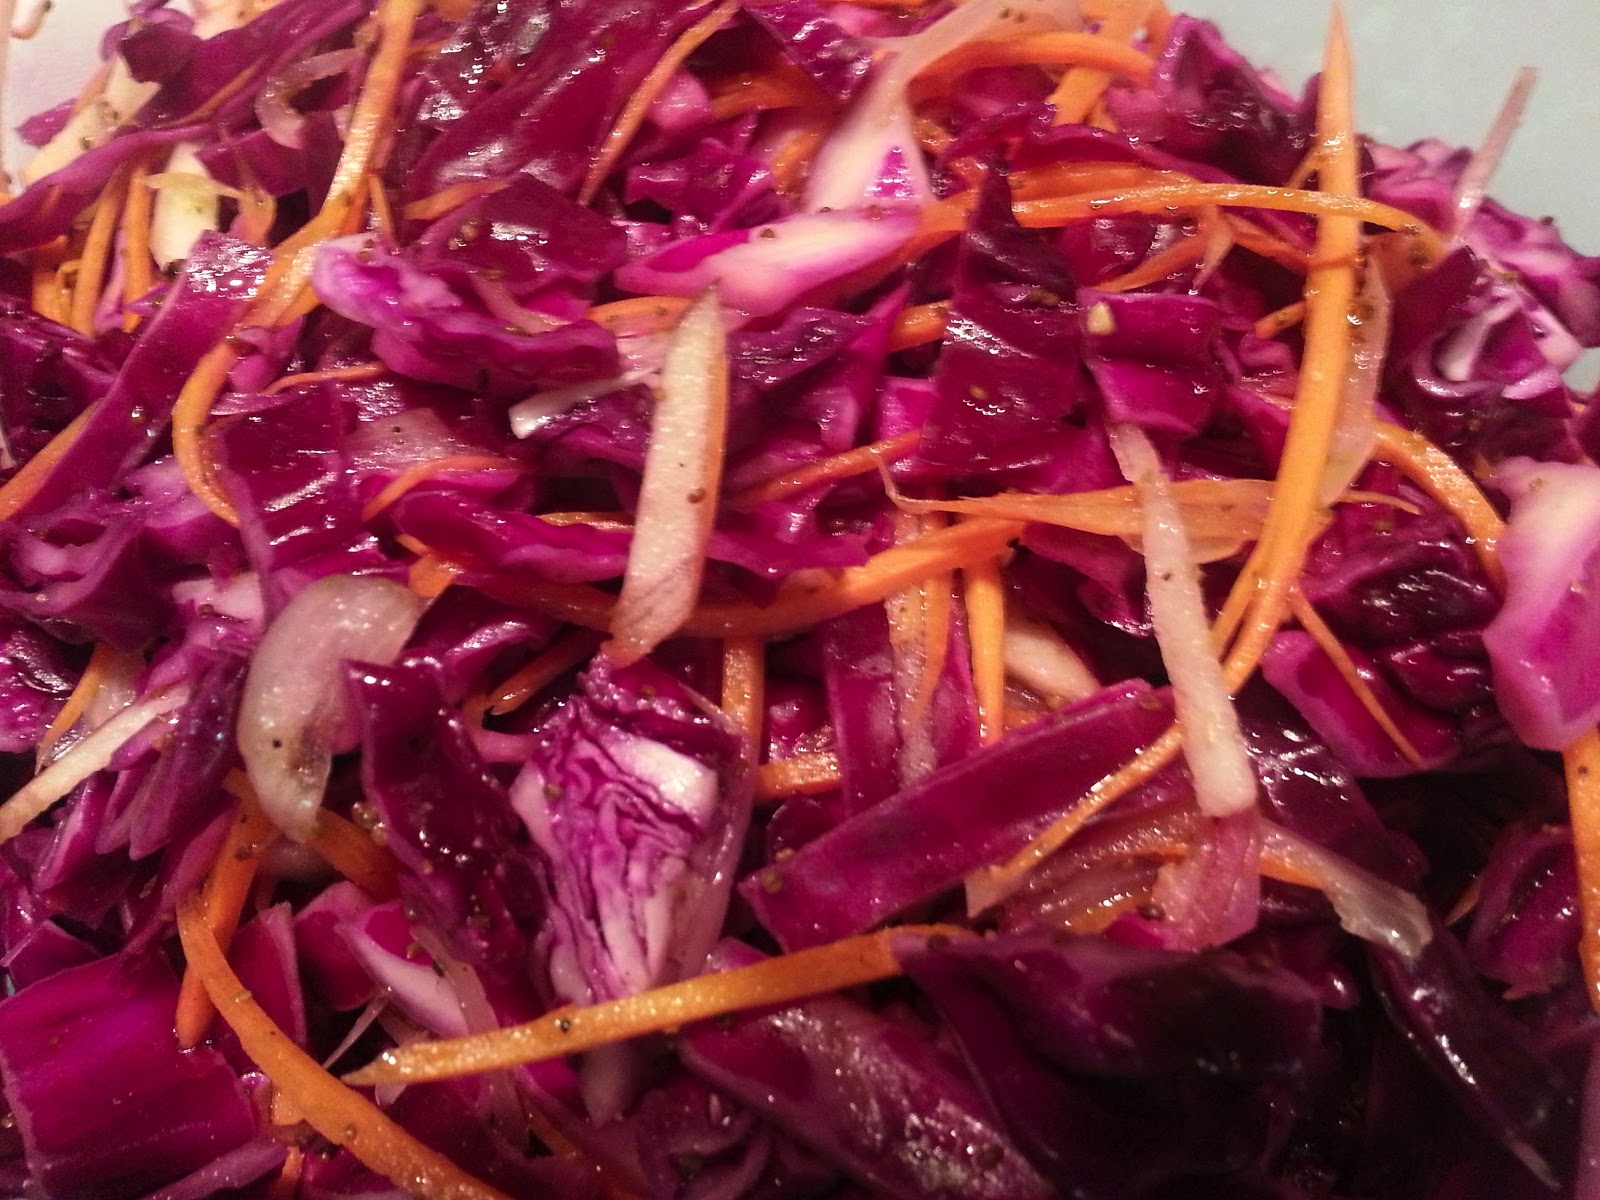
Generally speaking, I am not in charge of the vegetables.  I leave them to Ryan.  Sometimes, if he asks about them, I manage a slightly dismayed and mystified expression, as though I have somehow inexplicably forgotten.  That really, I'd planned for some but somehow it just slipped my mind.  I'm sure this stopped working years ago, but I still try.  It's not that I dislike vegetables exactly, it's more that I forget that I do like them.  At least, I like them certain ways.  And I definitely like them as red cabbage slaw.  It's tangy and crunchy and with the apple, just the slightest bit sweet.  Also, it's really pretty.  Ryan likes it because it is entirely mayonnaise free.  It's the perfect dish to master with summer right around the corner because it goes fabulously with bbq and fried chicken.

RED CABBAGE SLAW

1/2 head of red cabbage
3 carrots
1 apple, julienned (can you julienne apple?  I certainly tried)
1/2 C apple cider vinegar
1/4 C olive oil
1/4 C chopped shallot
2 t celery seed
1 t sugar
salt and pepper

DIRECTIONS:
Slice your red cabbage into bite sized pieces.  I like pieces on the longer side.  So basically I core the half and then slice down to make long strips and then cut those long strips in half.  Put all the cut cabbage into a strainer, rinse with water.  If you have time, you can sprinkle with salt and let sit (around 30-60 minutes) to remove some of the water, but if you don't it's not a big deal at all.  If you do salt it, rinse it again once you're ready to use it.  After you've rinsed the cabbage, pat it dry.

In a very large bowl, combine the apple cider vinegar, olive oil, celery seed, sugar and a healthy amount of black pepper.  Whisk them up.

Peel and grate your carrots.  I did mine using the mandolin, which made nice long uniform strips.  Use whatever kitchen tool you prefer.  Your goal is carrot strips.

Put the carrots, chopped shallot and cabbage into the large bowl with the dressing. Toss it well to coat and let sit at least 1 hour.  Add the apple.

This was still delicious several days after making, although it did accumulate more liquid at the bottom of the bowl.

Tuesday, April 23, 2013

For Boston

Today I read an article somewhere in the great internets about how the current generation is so self-absorbed that they tend to co-opt tragedy as their own.  They regale people with stories of how they could have been there at the site of the tragedy du jour.  There but for the grace of God...

This Boston tragedy was not mine.  It belonged to others, some near and dear to me who were at the scene of the bombings.  Others I've known and cared about over the years.  But it could not have happened to me.  I have been a long time gone from that city.  But in a time when the Yankees are playing Sweet Caroline to honor Boston, certainly I can say that in my heart of hearts, Boston you're my home.

And that my heart is breaking for all of those who have no need to co-opt tragedy, because it is their own.  Because it came right up to their doors and into their homes. Should you want to help, rather than retell your own plans to someday maybe run the marathon, check out charity navigator's advice on ways to donate.

And since you came here for food (you did come here for food, right?) rather than lectures on how to properly handle your reactions to crisis, how about a recipe from The New England Clam Shack Cookbook for some delicious scallops?  It's a much better way to feel like an honorary New Englander.

Verdict:  If I have any common sense, I'll get this in regular rotation in time for the summer.  Curing homesickness through cooking is something I definitely sign on for.


PAN-SEARED SCALLOPS
modified slightly from The New England Clam Shack Cookbook

INGREDIENTS:
1 lb sea scallops - select scallops that aren't sitting in a lot of liquid, scallops are better when dry.  Also pick ones that haven't started to separate
1/4  t salt
1/4 t sugar
1/2 t thyme
1/8 t garlic powder
1/8 t onion powder
olive oil
lemon wedges

DIRECTIONS:
Mix together the salt, sugar, thyme, garlic powder and onion powder.  Heat a cast-iron pan to medium high and add a bit of olive oil, just enough to cover the bottom of the pan (I used a paper towel to help smear it around and make sure I didn't have too much oil).  Pat your scallops dry and then sprinkle them top and bottom with the seasoning mix.  When the pan is hot, place the scallops in the pan, not touching.  Cook for 2-3 minutes on the first side, then if they are golden brown, flip and cook for 2-4 minutes on the other side.  Cooked scallops should be more opaque than when they started, firm to the touch and have those nice golden edges.  Garnish with lemon wedges (you know, so you can squeeze lemon on them).

Sunday, April 14, 2013

Best Quarter I Ever Spent


  A few years ago, I lived in Philadelphia, with access to its enormous and well-stocked library system.  Much as a supermarket seeds its checkout lanes with candy in order to inspire impulse buys, my local branch arranged a rack of books, recently removed from the collection right near the circulation desk.  So while you wait for the person in front of you to pay fines dating back to 1984 or argue that their adorable little cherub returned The Best of Barney DVD, at least, the nanny said she did, you would have something to browse, and hopefully purchase.  During one of these waits, I spied a copy of Sara's Secrets for Weeknight Meals for twenty-five cents.  An older edition than the one shown here, but nonetheless, a cookbook for a quarter?  That is a win, my friends.  It's been in use ever since, in fact, the falafel recipe and the Welsh rabbit recipe are both from the book.  But it had been a long time since I thumbed through it looking for something new.  Last week, spurred on by my recently neglected New Year's resolution I discovered Middle Eastern Meatball Sandwiches.  Mmmm.  They were ridiculously easy and completely delicious.

Verdict:  This cookbook is one of the MUST owns of my collection.  Also, I love Sara.

MIDDLE EASTERN MEATBALL SANDWICHES
adapted from Sara's Secrets for Weeknight Meals

INGREDIENTS:
1 recipe tzatziki  - you can use Sara's from here, I make mine up.  My edition of the cookbook is dated enough that it's called cucumber yogurt sauce.

1 lb ground turkey (or beef or lamb, but I used turkey)
1/2 C chopped onion
1 clove minced garlic
1 large egg slightly beaten
1/2 t or so oregano
salt and pepper

pita bread with pockets (warmed)
lettuce washed dried and cut into ribbons to stuff into the pita

Make it gluten-free: The pita is the only gluten containing component here, so serve these over rice or alongside a nice greek salad to enjoy the flavors without the wheat.

DIRECTIONS:
Mix the turkey, onion, garlic, egg, oregano, salt and pepper together.  Form these into oval patties, bigger than a meatball but smaller than a burger.  I divided my ground meat evenly into 8 sections and made each a patty and was quite pleased with the size.

Cook them.  Now, I found this a bit tricksy.  Sara says you can skewer, brush with olive oil and grill for 8 minutes a side, which sounds heavenly, but I am without a grill.  She also says you can broil for 8 minutes a side, which is what I tried, but perhaps my toaster oven's broiler is inferior, because after the first 8 minutes in the oven, I began to panic and the rare state of things and had to improvise.  I slid them into a hot non-stick pan for 4 minutes (with the side that had been touching the broiler pan into the pan first because it was RAW) and then flipped for 2 more minutes. They ended up with a nice little crust but still very moist.  I'd hesitate to do it all in the pan, lest they dry out.  I'll let you know if I hit upon a better method, but this was still pretty painless.

Cut each pita in half, stuff each half with some lettuce and one patty.  Generously drizzle with tzatziki.  Start planning when you're going to make them again.

Sunday, March 24, 2013

Ask and You Shall Receive...

My husband is many wonderful things, but he is not decisive when it comes to food.  In the interest of full disclosure, I'm not much better. Way back when we first started seriously dating and generally eating dinner together each night, choosing what we would make was an ordeal consisting largely of "I don't knows" on my side and "I don't feel likes" on his side.  This of course, leads to eating dinner at an ungodly hour. In a misguided attempt to solve our problem one day, I called him before he left work (this was back before texting was a thing) with some suggestions for dinner.  I guess I shouldn't have been surprised when he came back with "I can't choose.  I'm not hungry yet.  I won't know what I want until I'm hungry."  Needless to say, once we moved in together he pretty much lost all say in dinner entirely, and I just started cooking whatever I wanted.

Which is why last weekend when he suddenly developed a strong desire to have shrimp chowder for dinner, I was happy to oblige.  Not only was I thrilled that he was offering up a dinner suggestion, I just happened to have a recipe for shrimp chowder on hand that I wanted to try.  The recipe comes from a friend of my grandmother's. She hosted a lunch and my Nana thought the soup was so delicious that she got the recipe for me.  It had languished in my recipe file for awhile, but I'm glad Ryan gave me the motivation to finally try it.  It's definitely going into the rotation.

NAN JENSEN'S SHRIMP CHOWDER
altered slightly from the original

INGREDIENTS:
1 lb shrimp (peeled, deveined and chopped into bite sized pieces, but not too small!)
6 slices bacon (or turkey bacon)
1 1/2 C diced onion
2 celery ribs
2 medium baking potatoes, diced
3 bottles clam juice
1 C light cream
1 C milk
salt and pepper to taste

DIRECTIONS:
In a large heavy bottomed pot or dutch oven, cook your bacon.  You can do it as slices and crumble later, but I chopped mine ahead and then fished out the bits when they were crisp.  Crisping will take 5-7 minutes over medium heat.  Remove the bacon to paper towels and set aside until later.  Chop your celery, I do mine in a fine dice because Ryan hates celery, but you can gauge your chopping size however you please. Add the onion and the celery to the pan (no need for butter or oil if you have bacon drippings in the pan).  Cook for 7 minutes or until the onion is soft and translucent.  Then add the clam juice and the potatoes.  Bring to a boil, then reduce to a simmer and cover.  Let simmer 15-20 minutes until your potatoes are tender.  Add the milk and cream (you can add all cream, even all heavy cream if you want full decadence).  Then add your shrimp and simmer for 3 minutes until they are pink.
Be really careful throughout these last 2 steps because if the heat is too high the cream will kind of separate and get grainy.  It'll taste fine, but look yucky. Add your salt and pepper to taste.  Once the shrimp are cooked you can add the bacon.  I served first and then used the bacon as a pretty garnish, but you're more than welcome to just stir it into the soup.

Sunday, February 24, 2013

Variation on a Theme


It's a month later and yet I have to confess to you, I'm still hung up on mixing cruciferous vegetables with cheese product.  I can't help it.  I've always loved cheesy comforting foods, particularly during the winter doldrums, but the addition of some nice healthy crunch is currently irresistible to me.  It keeps the cheese from becoming too rich (I know, I don't know what's wrong with me either).  So basically, rather than making anything new and fascinating, I'm just messing about with old favorites.

For this recipe, I started with the risotto and cheese I posted way back here.

BROCCOLI AND CHEESE RISOTTO
INGREDIENTS:
1 T butter
1 leek, pale green and white parts only, minced and rinsed to be free of grit
1 1/2 C arborio rice
2 T dijon mustard
4-5 C veggie stock (Watch this carefully, I needed slightly under 4 cups this time, over 4 last time).
1/2 C grated cheddar cheese
1/2 C grated colby jack cheese (yes, just a cup of whatever cheese makes you happy will work fine)
2-3 C broccoli
salt and pepper as needed

DIRECTIONS:
Chop your broccoli into bite sized pieces.  Then steam your broccoli and set it aside. We do ours stovetop in a steamer. I think it takes around 5 minutes, but don't quote me on that. Put the butter and leek in a large pan with high sides. In a pot next to it, heat up the stock. Melt the butter and cook the leek 2-3 minutes until softened. Watch closely so it doesn't burn. Add the arborio rice and cook another 2 minutes or so, turning frequently so the rice gets coated in butter and toasts a bit. Add the mustard, this was sort of a mixing smearing process for me. Add the warm stock about a ladleful at a time. Stir the risotto after you add the stock until it is mostly absorbed (I wait until I can pull a spoon through the risotto without having liquid fill up the track I've made). Then add another ladleful or two. Keep doing this until the stock is gone and the rice is soft (not mushy) but still has some texture. It should take about 18-20 minutes. When the risotto is nearly done, add the cheese and stir. About a minute before you pull it off the stove, add the broccoli and mix well (but gently). Taste to see if it needs salt and pepper. It may not need salt depending on your chicken stock and your cheese, both of which can be salty.

Thursday, August 23, 2012

Happy Birthday Gene Kelly!


Earlier this month, my dearest friend had a dinner in honor of the 100th anniversary of Julia Child's birth.   You can read all about her celebration and her family's special relationship with Julia over at My Family Table.  Probably unsurprisingly, I couldn't get my act together to whip up a fancy french dinner in the heat of August.

But today is another hundredth birthday - that of one of my favorite childhood movie stars, Gene Kelly.  While everyone else my age was building up a common knowledge of popular 80's culture, I was watching old musicals.  One of my very favorites has always been On the Town, starring Gene Kelly.  The combination of sailors on shore leave and girls in amazing costumes taking in the sights of New York City made it irresistible to me.  (True confession: I currently own two dresses I love primarily because they remind me of the costumes in the movie. a gorgeous full skirted black and white plaid that looks like the trim on Ann Miller's costume and a black dress with a coral underskirt that makes me think of the stunning crinolines under Vera Ellen and Betty Garret's dresses.)  While it's probably not Kelly's best exhibition of dancing (except for a dream ballet sequence, he doesn't get to truly show his abilities), it's really worth watching if you at all go in for this kind of thing.  If nothing else, you'll get to see Frank Sinatra at the height of his popularity acting sheepish and awkward around girls.

In honor of Kelly's birthday, TCM is running his films all day, with On the Town showing at 6:15.  So why not make it dinner and a movie?  I'll admit, the meal comes solely from my imagination as the movie is almost entirely without food.  Sure, there are few mentions briefly in song, but despite the movie running through a full 24 hours, the only eating shown is when the boys manage to grab a few apples from a fruit stand.  So what would I serve sailors on leave?  Most certainly something they could not afford, a beautiful juicy steak.

It's a perfect New York treat for a perfect New York movie.

New York Strip Steak

INGREDIENTS:
A New York strip steak
salt and pepper
olive oil

DIRECTIONS:
Selecting the steak:  You want to buy a steak that is about 1.5 to 1.75 inches thick and has a nice amount of marbling throughout (marbling is the strands of fat that run through the meat which make it flavorful and delicious).  The thickness of the steak is recommended so that you have a good ration of nice juicy middle to crispy outside.  In my world you want a nice thin outside with a pink center, not a thin strip of pink between two chewy crusts.  Choose USDA prime for the best quality.

Equipment: You need a cast-iron pan.

Preparation:  Take the steak out of the fridge about 15 minutes before you want to cook it so that it can warm up.  Salt and pepper it generously (don't coat it or anything, just a nice sprinkling on each side).  With a few minutes to go, heat up your cast-iron pan.  Use a paper towel and pour a bit of olive oil on the towel.  Use tongs to press the oiled towel all over the cooking surface of the pan.  You want a nice even coating, but you don't want to just pour oil in there and make a pool.

Your pan should be over medium high heat and it will be ready for the steak when a drop of water placed in the pan sizzles.  Place the steak in the pan and cook it for 4-5 minutes.  Do not poke it or press it or anything once you put it down.  Just leave it alone.  After 4-5 minutes, turn it over and let it go for 3 more minutes.  You should have a beautifully cooked side facing up at you once you flip it.  Use a meat thermometer to check the temperature at both ends of the steak (I know, I know the juice will run out, be delicate, don't maul the things and when you get better at it maybe you won't need a thermometer).  You can pull the steak between 115 degrees and 118 degrees for medium-rare.  When you take it out of the pan, cover it with foil and let it sit a few minutes.  The temperature will go up a smidge more which is probably good and the juices will be less likely to pour out all over the place.

Serve your perfectly cooked steak with a good red wine (or if you're playing sailor, a mug of good beer) and don't forget to toast one of the greatest dancers of all time.

Monday, July 23, 2012

Pickle Grand Champion

I made that title up.  I have no idea what it would take to become an actual pickle grand champion, or if one can even BE a pickle grand champion.  But in my little contest of three pickles, this was the clear winner.  I would eat them in a boat and I would eat them with a goat.  (Deepest apologies to Dr. Seuss) Seriously.  I love these pickles.  They are tart and sweet and flavorful and easy to make.  I'm going to make another batch today.  The first ones went entirely too quickly.  Also, don't skimp on the onions and don't be afraid to eat them.  They are crunchy and delicious, not merely an agent for flavoring the pickles.

BEST PICKLES
I made this using stellacarolyn's recipe from My Family Table and Serious Eats's recipe for Bread and Butter pickles.
The recipe below DOES NOT MAKE ENOUGH PICKLES.  You might as well double it.  Otherwise you'll be lamenting lost pickles.

INGREDIENTS:
8.5 oz kirby cucumbers.
1/2 small vidalia onion
1 T sea salt
1 t mustard seed
1/2 t red pepper flakes
1/4 t celery seed
3/4 C white vinegar
1/2 C sugar

DIRECTIONS:
Slice your cucumbers in 3/8" slices (again, not a precise measure, totally guesstimated.) Slice your onion.  Put them in a small bowl and toss with the 1 T sea salt.  Refrigerate for 30 minutes.  Remove, rinse and pat dry.  Heat up the vinegar and add the sugar.  Stir to dissolve.  Add the mustard seed, red pepper flakes and celery seed.  Bring it all up to a boil, then turn off burner.  Fill a (clean, empty, dry) jar (I used a spaghetti sauce jar) with the cucumber and onion slices.  Pour over the pickling brine, leave it to cool on the counter a bit and then pop it in the fridge.  Pickle Perfection.

Thursday, July 19, 2012

First Runner Up: Dill Pickles

These dill spears were sort of obscenely easy and incredibly tasty.  I gave one to my father to try yesterday and immediately asked for a pastrami sandwich.  Sadly, I had none.  Just the pickles.  Want to make them?

DILL PICKLES
from food in jars

INGREDIENTS:
2 kirby pickles
1/2 C apple cider vinegar
1/2 C filtered water
2 smashed garlic cloves
1 t dill seed
2 t sea salt
1 scallion

DIRECTIONS:
Slice your pickles into spears.  In a small pan bring your vinegar and water and sea salt to a boil.  You'll need a single jar - again I used an empty, clean spaghetti sauce jar.  Put the garlic and dill seed into a jar, then carefully arrange your cucumber spears, taking care not to squish any.  When the liquid had boiled, pour it over the cucumbers.  Wait for it to cool and pop it in the fridge.  Wait at least a day and then locate your nearest pastrami sandwich (I'd settle for a Reuben) and enjoy!

Tuesday, July 17, 2012

Second Runner Up


Every contest has a loser and despite the pretty colors, this was not the star of the pickle party.  They were supposed to "asian" and honestly just tasted very vinegary.  I mean, of course pickles taste vinegary but these just didn't have any real dimension beyond that.  It's kind of my fault because I knew the recipe lacked a little something and I went ahead with it anyway, mostly because I was too lazy to get to the story to find anything that might improve it, like ginger.  I may try this recipe from Hogwash next time and see if it's any better.

Just in case you are dying to make mediocre pickles:

"ASIAN" PICKLES
inspired by a recipe posted on wyldethyme

INGREDIENTS:
8.5 oz kirby pickles (for me this was a pickle and a half)
2 carrots
3/4 C filtered water
3/4 C rice wine vinegar
1 t sea salt
2 scallions
1 clove of crushed garlic
1 t red pepper flakes

DIRECTIONS:
Cut off the ends of the pickles and discard.  Slice the remaining pickles into 3/8" slices.  That sounds really precise and I totally went and looked for a ruler so that I could be sure, but I could not find one.  So you'll have to deal with my highly technical estimates.  Anyway.  Slice the scallion, I used the white and light green parts.  Put the scallion, crushed garlic and red pepper flakes in a jar (I used a clean, empty, washed tomato sauce jar).  Stuff in the pickles and carrots.  I mean stuff figuratively, you really don't want to cram them in.  Gently layer.  In a pan, bring your water, vinegar and sea salt to a boil.  Pour this into the jar.  Let it cool for a while on the counter, pop in the fridge, wait a day.  Now you have pickles.

Friday, July 6, 2012

Grill Mooch


I have never owned a grill.  My parents have always had one, first a avocado green charcoal beast, most likely squatting over our gravel driveway, later a shiny gas number, lovingly ensconced on a new back porch.  The house where I lived  senior year in college had one.  I can't even remember what it looked like, I only remember the luxury of padding out onto the back porch and being handed a burger.  There is nothing more magical in college than food that appears before you, already cooked, particularly if it didn't come from a dining hall.  After college, my best friend set up house in Brookline, where her grandparents had lived.  In the same backyard she grew up playing in, she'd throw the perfect summer party:  tons of friends, floating around the pool and dragging yourself up to the deck for dinner off the grill.  I tended to ignore the ubiquitous burgers and dogs for her steak tips.  To this day, they are on my short list of ultimate summer grill foods and I beg for them each time I visit.  The fact of the matter is, I am a grill mooch.  I have not owned one, I cannot operate one, but sweet merciful heavens do I love what can come off one.  This Fourth of July, my father-in-law manned the grill.  I did  the prep, but in the end, there was more than a little mooching.  I'm also afraid that at least one recipe was largely improvisational.  Sorry!

GARLIC BREAD:
Take a loaf of day old bread, drizzle olive oil over it.  Peel a garlic clove and rub it against the surface of the bread.  Grill until it looks delicious (just like above.)  Unsurprisingly, the garlic bread portion of this post is NOT gluten-free.  The rest of the stuff is.

SHRIMP:
Have you made Mark Bittman's Spicy Shrimp? You really should.  They are dead easy, really delicious and can be made inside if you don't have a grill.  I made them in the oven just a few weeks ago, but they were even better on the grill. Oh, and did  I mention fast?  They're fast.  Just 2-3 minutes a side.  

AVOCADO, TOMATO AND CORN SALAD:
This was seriously delicious.  But I didn't measure anything.  I feel terrible. I promise to try it again with actual proportions because it was wonderful.  If you want to attempt it yourself, here's what I did...

INGREDIENTS(ISH):
2 ears of corn
2 very small avocados
2 tomatoes
freshly squeezed lemon juice
red wine vinegar
olive oil
less than a teaspoon of cumin
salt  and pepper
butter

DIRECTIONS(ISH):
Sprinkle the ears of corn with salt and pepper.  Rub them with a bit of butter.  Wrap them in foil and grill (I think he did them for 20 minutes, but don't hold me to that).  Remove and scrape the kernels off the corn into a large bowl.  They will be hot as all get out, so you can let them cool a bit, or handle them using an oven mitt, whatever works for you.  Also, if you don't have a grill, you could cook the corn however you usually do it (I usually bring a huge pot of water to a boil and toss them in for 5 minutes).  Chop the tomato and avocado into nice little bite sized bits.  Toss the tomato, avocado and corn together.  In a separate bowl, mix together the lemon juice (I know I didn't use more than half a lemon), the red wine vinegar (no idea how much) and some olive oil.  Add the cumin and some salt and pepper, then mix again.  Pour this all over the salad.  Taste and add more salt, lemon or cumin to taste. I added more salt (I didn't have access to Kosher, only table salt and had no idea how much I needed).  While the lemon may save the avocado from browning for a little while, I probably wouldn't really make this ahead, because I can't promise it would keep the avocado pretty for long.  Don't worry about leftovers, there were none.


Thursday, June 7, 2012

Move Beyond the Pint and Spoon

Once in a valiant effort to drown my sorrows I ate about a half gallon of Butter Pecan ice cream direct from the carton. I was sitting on the floor of my parents bedroom watching television from a distance that would have likely gotten me yelled at had my mother been home.  I figured that was better than eating ice cream in her bed.  I may have been depressed, but I still had scruples.  Eating ice cream in moments of misery is such a time honored tradition that it's become cliche.  Can you even count the chick flicks that feature a woman spurned and her trusty pint and spoon?  It's a lot and frankly, it's time to move on.  Don't look at me that way.  You know me better than that right?  Do I seem like the kind of person that would offer up fat-free yogurt to someone in pain?  Hell no.  I'm the kind of person who would bring you homemade chocolate mousse.  That's right, this is no health sermon, this is a straight up upgrade.  Step away from the the freezer burned pint of whatever the heck is.  Dip your spoon into the silky, creamy, dark chocolately goodness.  Whether or not you let a fruit sully your indulgence is entirely up to you.


SERIOUS CHOCOLATE MOUSSE
Desperate times call for desperate measures.  This is technically a 2/3 recipe.  The original is in
The Essence of Chocolate which you probably need to own anyway.  The original full recipe says it serves six.  I served 8 with the 2/3 recipe because it's that rich.  But I will NOT tell anyone if you eat the whole thing yourself.  Nor will I judge.

INGREDIENTS:
2 4 oz bars of chocolate - I used 1 bittersweet and 1 semisweet.  Modify this based on how dark you like your chocolate
3 egg yolks
2/3 C whole milk
2 T sugar
1/2 C heavy cream

DIRECTIONS:
Start by chopping up your chocolate, nice and fine.  Put it in a large bowl and put a strainer on top (you'll need this later) and put it near the stove, where you can grab it when things get going later.  Put the milk in a pan and heat it up to a simmer.  Once it's simmering, dissolve 1 Tablespoon of sugar into it.  While you're waiting for it to heat up you can whisk or stir your egg yolks so you have a nice eggy mess.  You're going to need to combine the warm milk with the cold eggs which is a nasty business, but it must be done.  Take the milk/sugar off the heat and very slowly pour it into the eggs.  You will need to continuously stir the eggs while doing this, because you don't want them to get too hot too fast.  That will result in a scrambled egg mousse which would be beyond gross.  Also, realize that if you're pouring the milk and stirring the eggs you officially have NO hands left to hold the bowl.  So don't use a flimsy one.  Use a nice solid well anchored one.  Once you've combined them, hopefully without any egg scrambling you'll need to pour them BACK into the saucepan and then put that back on the stove. Stir constantly with that spatula or wooden spoon until the custard is thick enough to coat the back of a spoon.  This should take 6-10 minutes, but if it's really thickening up fast, use your judgement.  You don't want it to get little curds in it.  If it does that it's heating up too fast, you want it to be one consistency throughout (and yes, I've had it mess up and get curds and yes it really was salvageable and once I did remake just the egg/milk part).  Take your pan off the heat and pour the custard into the strainer that's above the chocolate.  The general idea is that the lumps won't go through and the custard will begin melting your chocolate.  Once you've gotten the custard through, stir up your chocolate until it's all melted and is the same color and consistency throughout.  Set this aside and get out your heavy cream.  I prefer to whip cream with a hand mixer, my stand mixer can't quite reach the bottom it's own bowl to whip small amounts and my arm gets tired if I do it by hand.  Whip the cream until it is soft and fluffy and can hold a soft peak.  Once the cream is whipped add the other tablespoon of sugar and whip it in.  Don't whip it too much or you'll make butter.  The chocolate mixture needs to be room temperature so it doesn't melt all your beautiful whipped cream, so make sure before you start to fold in the whipped cream. You can fold in the cream gently until the chocolate is a uniform color.  This can be put in the fridge for cooling and setting in one giant bowl if you're a)an accomplished scooper and server or b)you plan on eating it all yourself direct from the bowl.  If you're sharing it (I know, it's a crazy idea) you might like to portion it into bowls or ramekins before refrigerating.  It should take a few hours to set up (the original recipe said four but mine was fine before that). 


Thursday, May 24, 2012

Cooking it Old School


Some recipes are passed-down-from-your-grandmother's-grandmother old.  Some recipes are original-Good-Housekeeping-Joy-of-Cooking-whatever-is-your-recipe-bible old.  Some recipes are just I-honestly-can't-remember-when-I-started-making-this-I-can't-remember-when-I-didn't-know-how old.  This is the latter.  I have a very dear (and sadly pretty empty) cookbook that my mother gave me.  In it she wrote some "recipes" and some recipes for things we a) made a lot and b)she thought I could actually cook.  This recipe isn't in there.  Instead I have a recipe card, presumably right out of her recipe box, possibly predating my cookbook.  It was one of the first dinners I could make that you could actually serve to people.  I have never once made it for a dinner party (true confession:  I have never in my life had a dinner party.  I think I'm depressed by that.  I should have a dinner party.  Why don't my friends live close enough for a dinner party?).  But close to 10 years ago, I did walk my dearest friend Lizzie through making it for a dinner party she was throwing.  This strikes me as pretty hilarious in retrospect.  It's not like I was a particularly accomplished chef back then, but Lizzie is the kind of person who needs to be told that garlic is not supposed to turn black when you saute it in butter.  But evidently I considered myself enough of an expert (at least in comparison to her) to play the part of Cyrano de Berger-chef.  Although this may seem like a nasty put down of my friend and a disturbing display of overconfidence on my part, there's really only one take away.  This recipe is obscenely easy.  It had to be. When I walked her through it, I was in San Francisco, at least 3000 miles from any recipes I possessed and I was not at a point when I could cook without a recipe. She had exactly the culinary chops listed above.  And yet, instant dinner party!

Can you remember back to the first thing you knew how to cook?  Was it simple or dinner party ready?  Share in the comments!

SHRIMP WITH FETA

INGREDIENTS:
1 1/2 C canned chopped tomatoes
1 lb raw shrimp (peeled and deveined)
3 T olive oil
1/4 C chopped onion
1/4 to 1/2 C dry white wine (or vermouth)
1/2 t oregano
2 oz feta, crumbled
salt and pepper to taste

DIRECTIONS:
In a large pan, heat your olive oil to medium low. Add the onions and cook for about 5 minutes, stirring periodically.  They shouldn't brown.   Stir in the tomatoes, wine, oregano, and bring to a boil.  Cook uncovered until it thickens to a light puree (probably around 5 minutes).  Add the shrimp and cook over moderate heat about 7-10 minutes or until the shrimp are pink and opaque.  The exact amount of time for the shrimp varies depending on whether you have a pound of little shrimp (which will cook more quickly) or a pound of big shrimp (which will cook more slowly).  Remove from the heat and crumble in the feta.  Give it a good mix. Serve over rice.  Pretend you know how to cook.


Monday, May 7, 2012

"Greek" Duckfat Potatoes

I quite willingly admit my ethnic cooking is largely inauthentic, even if it is tasty, hence the quote marks around "Greek."  I'm calling these "Greek" largely because of the spices I used on them and the fact that they are absolutely heavenly with tzatziki sauce.   So good.  It's entirely possible that this just serves as further illustration that everything goes with duck fat.  Clearly I'm not the only person to believe that though because there's a restaurant I'm just dying to go to in Portland, Maine called Duckfat.  They have duck fat poutine.  A pilgrimage must be made.  In the meanwhile however, I'll just keep finding new excuses to introduce potatoes and duck fat.

"GREEK" DUCKFAT POTATOES
inspired by my Uncle John

INGREDIENTS:
2 medium baking potatoes (organic if at all possible as you'll be eating the skin)
1/2 t salt
1/2 t dried dill
1/8 t garlic powder
~ 3 T duck fat

NB:  This cooks much, much better in a cast iron pan.  I tried a non-stick once just because it was a bigger pan and it did not brown them evenly at all.  Seriously, get out your cast iron.

DIRECTIONS:
Scrub your potatoes well, again because you'll be eating the skin.  Then stab them all over with a fork, you know, so they don't explode.  Then pop them in the microwave for 2 minutes.  After 2 minutes, turn them over and microwave them for 5 more minutes.  Use an oven mitt or other hand protection because "hot potato" isn't just a kids' game and take the potatoes out of the oven and place them on a plate.  Then wrap the plate with aluminum foil, closely sealing it around the edges so no steam escapes.  Set your timer for 7 minutes and just let them sit on the counter.  While they're getting ready, get out your cast iron and your duck fat so you can be ready to go.  You'll want to add the potatoes to a nice hot pan where you've melted 1-2 tablespoons of your duck fat.  Okay, so when then timer goes off, you slice the potatoes in rounds (probably 1/4 to 1/2 inch thick).  You'll need a sharp knife and again, something to protect your hand.  They may be almost falling apart, so a sharp knife will help, also the skin will help hold them together.  Lay the potatoes in the in pan and cook for five minutes.  When you go to flip them, feel free to add another tablespoon of duckfat.  While they are cooking, mix up your spices, the salt, dill and garlic powder.  You can sprinkle them once you've flipped them and then give another healthy sprinkle one they're done.  Serve with tzatziki for a special treat.

Sunday, February 5, 2012

Pretty Perky

In case you're stumbling in late from the New Year and have missed my month of woe-is-me wallowing, let's just say I needed a little pick me up. Having stopped at a local farm and departed with a softball sized beet, I was hopeful that a little bright color and salty sweet goodness would do the trick.  It's pretty messy to make, you may want to strip to your skivvies and then cover anything else you care about (floor, counters, pets, children) with a drop cloth, but when it's done you may just want a larger fork to get it to your mouth faster.  If it's enough to make me smile, it just might get you through the winter doldrums too.

SWEET POTATO AND BEET HASH
recipe from Melissa d'Arabian.  
Enough hash as a side for 2 with a smidge left over. If you wanted it to be the main event (maybe with some poached eggs) you could easily just increase the amounts.

INGREDIENTS:
1 softball sized beet (or 2 little beets)
1 large sweet potato (or 2 little sweet potatoes)
4-6 slices of bacon ( I had to make do with 3, of turkey bacon no less.  It was tragic.)
1/2 a large onion or a whole small onion, diced.
olive oil
salt and pepper

DIRECTIONS:
Preheat your oven to 400 F.  Cover a large baking sheet with tinfoil.  Remove any clothing items of value and cover what remains with an apron you're okay with ruining.  Consider putting on disposable gloves.  Attack the beet.  Peet it, cut off the stalk and end bits and then dice into 1/4 inch pieces.  Put on one side of the baking sheet.  Wash up and clean up all beet mess now, before it stains.  Peel the sweet potato and dice it to the same size as the beets, put the pieces on the other side of the baking sheet. I intermingled mine.  But you know the beets sort of bleed a bit, and they cook at slightly different rates (the potato is faster), so you might want a way to get the potatoes out earlier than the beets, which you could do if you haven't tossed them together.  Drizzle with olive oil, sprinkle with salt and pepper.  Gently toss each respective vegetable with only it's own kind.  Bake for 45 minutes. I started checking mine around 30 minutes, and I think I could have pulled the potatoes then, but for all the mixing.  With only about 15 minutes left on the timer, start your bacon.  In a large skillet, add 1/4 or 1/2 inch squares of bacon.  Cook on medium until crispy.  Using the rendered fat (pour off a bit if there's too much), add the diced onion.  Cook until sweet and translucent. It's okay if it's a bit crispy.  When the beet and sweet potato are soft, add them to the pan and toss everything together.  The beet will bleed a bit on everything, but that's okay.  Serve as a side or just get a fork and stand over the pan.

Saturday, January 14, 2012

New Year? No Thanks.

I'm one of those people that totally buys into the concept of a New Year.  There's something sort of magical about that tiptoe crossing out of one year and into something shiny, new, fresh unmarred by disappointments and pain.  I made it exactly eight days into 2012 before I wanted to give it back.  Crawl back to the familiar if somewhat worn 2011.  Unfortunately, unlike unwanted Christmas presents, you are unable to return unwanted years.  You're stuck with them.  You can hope that they get better (hey, we even get a whole extra day to try this year); you can hope that how they start is the opposite of how they'll end, but you can't really do anything else.  So when the only way out is through, I'm the kind of person who'd rather not eat.  I don't want to give a false impression, I'm a real believer in comfort food and the ability of delicious things to lift up your mood, but when things are really, really tough, my appetite goes missing.

This is a soup you can eat when you don't think you can force yourself to swallow one spoonful.  This is a soup you can cook when you don't think you can stand at the stove.

AVGOLEMONO
Adapted slightly from my mother's trusty Time-Life series. Serves two with some leftover.
I even messed up and kind of curdled the eggs, but it was still delicious.

INGREDIENTS:
1 boneless skinless chicken breast
6-8 C chicken stock
3 T freshly squeezed lemon juice (really, seriously, fresh juice, don't use bottled)
1/2 C rice
4 eggs
salt and pepper

DIRECTIONS:
In a large, heavy bottomed stockpot (I used my dutch oven), pour two-three cups of the chicken stock.  Rinse and dry your chicken breast and lightly salt and pepper the breast.  Heat the stock to a low simmer.  Add the chicken breast and cook 4-6 minutes a side until cooked through.  Tear the chicken into little bite sized bits.  Add the rest of the stock. I cook my rice separately because I am rice impaired.  I put the 1/2 C rice with the appropriate amount of chicken stock into my rice cooker and dealt with it that way. You can certainly cook it directly in the soup. I would add raw rice to the stock after removing the chicken and then cook it for 15 minutes or until tender.  Using cooked rice, I simply added it to the stock when it was done, along with the torn chicken.

In a small bowl, whisk the 4 eggs until light and frothy.  Then whisk in the lemon juice.  Stir in a quarter cup of the simmering stock, this will help keep the eggs from curdling.  Lower the heat under your soup because I felt like I couldn't get it low enough.  Slowly pour the egg/lemon juice/stock mixture into the soup pot, stirring constantly.  Cook over low heat for 3-5 minutes or until the soup thickens enough to coat the spoon lightly.  Do not let this boil or even bubble really because the eggs will curdle.  Add additional salt to taste.

LinkWithin

Related Posts with Thumbnails