Wednesday, October 30, 2013

Just in the Nick of Time

Ironically, while I cannot for the life of me come up with appropriate treats for Valentine's Day, the day when you express your love in the form of exquisitely decorated baked goods, I seem quite competent at it for Halloween, the day when you celebrate ghosts and witches and other possibly dead (or undead) things.  I don't really know what that says about me, but it can't be good.  In the past I've made Halloween sugar cookies but this year I needed to simplify.  I also needed to use up yogurt. So just in the nick of time, with a mere two days to go before Halloween and not a whole lot longer before the yogurt's expiration date (I know, I know, yogurt is immortal), I pulled together this happy chocolate cake.

The recipe for the chocolate cake part is here.  You're best off finding your own icing, because I winged it, trying to use up cream cheese and heavy cream.  I often go to Martha Stewart for things like that because her recipes usually work.

So here's your set of directions for a fast last minute Halloween cake:
1. Bake the cake.  Be very careful taking it out of the pan.  It sticks.  Also, it will stick to whatever you place it on once you remove it, so choose well.
2. While the cake is baking, whip up your icing.  You could even use canned. I won't tell.  Then add your food coloring.  My box of poison food coloring had very nice instructions on how many drops to add to make orange.
3. I make my life easier by frosting only the middle and top.  So basically I put the bottom of the cake on a plate, then slather on half the frosting, then press the next layer gently on top and slather on the other half of the frosting.  It's cool with this cake, because then you can see the layer of orange in between the dark brown cake layers and it looks more Halloween-y (shut up, it's a word) than just frosting the whole thing in orange.
4. Grab a few squares of chocolate.  I used 3 squares of Ghiradelli 60% cacao because that's all I had.  Use whatever you like.  Microwave it for 30 seconds, stir, check for melting.  Repeat until your chocolate is melted.
5. With a steady hand and a spoon, carefully draw a jack o' lantern on the orange surface.  Pumpkin lines are optional.
6. EAT.  Because of course, it's not like you'll have a slew of candy to contend with in the next few days or anything.

Sunday, October 27, 2013

Tasty!

It is entirely possible that my brains have been eaten by zombies.  It is awfully close to Thanksgiving * Halloween, after all and I'm told that creatures of the night are fond of the holiday.+ Unfortunately, this means that I am completely lacking adequate ability to describe food.  So I'll keep it simple.  I saw this recipe for a miso sweet potato broccoli bowl on SmittenKitchen and thought "that looks tasty".  But far more importantly, I thought, "that looks easy."  This is probably the driving force behind all of my cooking right now.  Easy.  So I gathered the necessary ingredients (I got the miso paste - the hardest to find ingredient, at Whole Foods), whirred some stuff up in a food processor, roasted some stuff up in the oven, pressed start on my rice cooker and warmed some beans in a skillet and then dumped it in the bowl.  And then I tasted it.  It is so incredibly delicious, roasty and sweet and salty with a bit of crunch. I want it all the time.  Always.  I am Sam I Am.  It is my Green Eggs and Ham.  (At the end of the book, when he's eating it every where.  With a fox. In a box.  You get the idea.)  Yum.

*I really did type Thanksgiving.  I thought I'd leave it so you could see exactly how brainless I am.
+I'm sure that there are some zombie/werewolf/vampire zealots out there that know all possible rules pertaining to these imaginary baddies who would love to advise me why I'm wrong in associating them with Halloween, but while I may have been kidding about the zombies eating my brains, I am certainly not kidding about my current mental capacity.

MISO SWEET POTATO AND BROCCOLI BOWL
Recipe on Smitten Kitchen

My notes:
1. I made brown rice in my rice cooker. It's not fancy, like her rices, but I had it in the house and it was easy.  I think the dish really benefits from having a non-white rice base, but white rice would work in a pinch.
2. I warmed up some canned (rinsed and drained) black beans in order to add a protein to the dish.  They were delicious and I would do it again, partially because I like keeping the dish vegetarian.
3. I think this would be delicious with beef or pork if you happen to live with someone *cough*myfather *cough* who doesn't think a meal is complete without meat.
4.  The dressing in insanely good.  I would put it on anything.  Everything.  You may feel the same way.  The good thing about this is that you will no longer second-guess your decision to drop $10 on miso paste.  Because you can now imagine running out of that huge jar, and soon.

Tuesday, October 22, 2013

In Which a Miracle Occurs

I had a spectacular weekend.  My uncle and cousin came to visit, drawn in by the siren lure of an adorable baby.  I swear, if I'd known how much more often people would visit me, I would have had one years ago!  Ever the gracious hostess, I planned to take my guests out to dinner on Saturday and for Friday night, I expected them to cook for me.  Well, I expected my uncle to cook for me anyway.  He made an absolutely delicious roast chicken which I will try to replicate at some point, some lemony roast broccoli, but most miraculously, he made delicious eggplant.

My friends, there are exactly two vegetables I do not eat: zucchini and eggplant.  Zucchini is pretty much the food of the devil, but eggplant and I have a very touchy relationship.  I want to like it.  I really do.  I've never really minded the flavor, but for whatever reason, eggplant has always made me gag.  I've had it made in the Parmigiana style.  Nope, didn't work.  I've pureed it in pasta sauce, alas, a deep and thorough failure.  But the way my Uncle John made it was so tasty, I went back for a second piece.  That's right, I took seconds of my second most loathed vegetable.

Does that tell you everything you need to know about my uncle's cooking?  No?  You want the recipe too?  Okay!  I got it!  (Totally selfless I am, always thinking of you).

UNCLE JOHN'S EGGPLANT

INGREDIENTS:
2 eggplants
3/4 C extra virgin olive oil plus more for brushing
2 T red wine vinegar
2 cloves garlic, minced
2 T of capers with juice
1/4 of a small red onion (optional - Uncle John was not pleased with how it turned out using the red onion, I think I liked it, but will try it without next time)

DIRECTIONS:
Slice your two eggplants into 1/2" thick slices.  Set your oven to broil.  Lay out the eggplant slices on a cookie sheet and brush them with olive oil.  Flip them and brush the other side with olive oil.  Sprinkle both sides with salt and pepper. Put in the oven to broil for 10 minutes.  Flip them and let them broil for 10 minutes on the other side.  Whilst they are broiling, find yourself a large serving dish with sides.  We used my lasagna pan.  Mix together your olive oil and red wine vinegar.   In the bottom of the pan, pour about 1/4 C of olive oil and the red wine vinegar  and sort of swish it about so it's evenly distributed.  When the eggplant is done, lay it out in the dish.  Add the garlic, capers and onion (if you use it) to the remaining oil and vinegar.  Drizzle this over the eggplant layer.  Add another layer of eggplant and pour over more of the good stuff.  Continue until eggplant is used up and all topping has been poured out.


Let marinate at room temperature for 6 hours.  Ours only sat for 4 hours and was delicious, but don't try to cut it any closer than that.  Uncle John says it's great for dinner parties, because you can make it in advance, but also it takes up no room in your fridge!

Tuesday, October 1, 2013

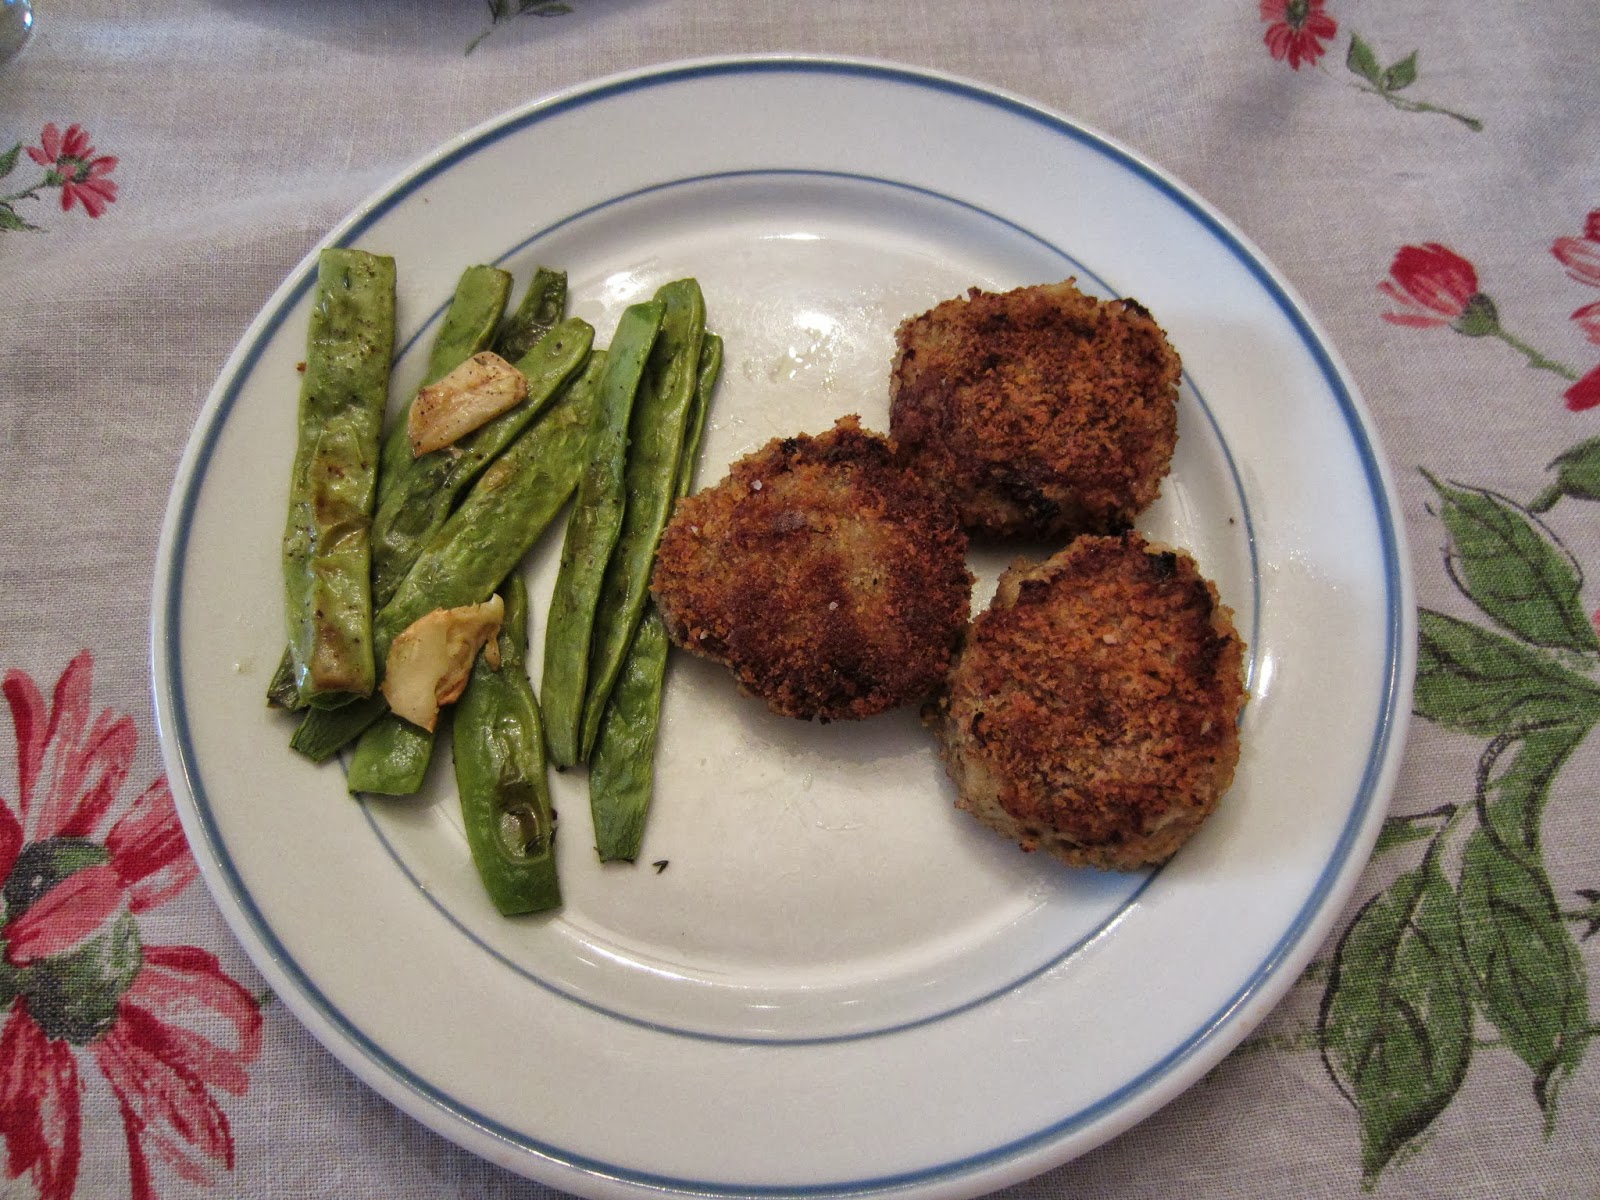
Chicken Croquettes


I have been cooking, I swear.  Almost every night I make dinner. I've even started baking again, some muffins, some scones, some cookies, a cake.  It's just that it's all been familiar.  Safe.  Easy.  And that can get just a little bit boring.  So last week I dragged a stack of cookbooks over to the sofa and started paging through them for something new to try.  I looked through three whole cookbooks. But honestly, I'd made up my mind the minute I saw these chicken croquettes.  Tasty nuggets of chickeny goodness?  Yes please!!  It's the very first thing I've made from Secrets of the Best Chefs: Recipes, Techniques, and Tricks from America's Greatest Cooks by Adam D. Roberts, which I got last Christmas.  Don't worry, I'm embarrassed about it too. On the upside, I will be using the cookbook again, whether for the croquettes or something that appears after 104 which is when my mind was officially poisoned against all other recipes.

Verdict: Delicious.

CHICKEN CROQUETTES
adapted from Secrets of the Best Chefs

INGREDIENTS:
1 lb ground chicken or turkey
8 oz mushrooms - I used baby bella, the recipe asked for shiitake
3 cloves garlic
3 T sun dried tomato, minced
3 T grated parmesan
1/4 C bread crumbs
2 large eggs
salt and pepper
vegetable oil for frying
1 T butter
1 C panko bread crumbs

DIRECTIONS:
Wash and roughly quarter your mushrooms.  Toss them in a food processor with the garlic cloves and give everything a good whir until it's small chunks.  Mine ended up more towards the paste end of the spectrum from using a teensy food processor, but I'd aim for the size you'd get if you'd minced everything.  Then melt the butter in a small saute pan.  Add the mushroom and garlic mixture, sprinkle with a bit of salt and pepper and cook for 3-5 minutes until mushrooms are tender.

Deal with your sun-dried tomatoes.  Mine were dried and needed to be reconstituted, which I did according to the package directions.  But yours might be jarred in oil.  Either way, chop them up until itty-bitty.

In a large bowl, combine your ground poultry, mushroom and garlic mixture, minced sun dried tomatoes, the grated parm, the bread crumbs, the eggs and a teaspoon of salt and a good sprinkle of black pepper.  Mix the whole thing up (use your hands) until well combined.  If you like to check your seasoning, you could fry up one little ball and then taste it, but otherwise, begin making your croquettes.  Form little patties (mine were about 2 inches in diameter) out of the meat mixture.

Pour the panko bread crumbs on a clean plate. Coat the patties with the panko and set them aside (you can leave them like this in the fridge for several hours if necessary).

In a large skillet, heat up your oil.  You want enough to coat the bottom of the pan, but you don't need any real depth to it.  Coat the bottom well, no skimping.  Heat it on medium heat and pop in your croquettes.  Cook them 3-4 minutes per side.  They are done when the middle is no longer pink.

Tuesday, September 17, 2013

The Best Hot Dog EVER?


While visiting with some family, I had the opportunity to go to Walter's Hot Dog Stand, which is shaped like a Pagoda and has some seriously old-school famous hot dogs.  They've been in business since 1919 and have a sort of cult-like following.  Evidently, the line for hot dogs is usually epic, but since I happened to go during the last two weeks in August, I only waited in a short line before getting my two dogs.  The menu is basic, no-frills, and frankly, a bit "my way or the highway".  There's no accommodating allergies or preferences here.  We took our dogs to a picnic bench under some shade trees (pleasant on a breezy August day) and dug in.

They were good.  Delicious even.  But at the end of the day, they were still hot dogs.  I think maybe I'm just not sure what the fuss is about.  I like hot dogs.  When at Fenway Park, I always order a Fenway Frank or two, which is probably about 90% pork byproduct and 10% water (I made that up.  I have no idea.  But needless to say, nothing fancy and plenty questionable).  Walter's is made up of a mix of beef, pork and veal.  Again, delicious.  Far superior to a boiled stick of who-knows-what.

But I was left asking, what if the best hot dog in the whole world still just wasn't all that impressive?

Would I go there again?  Sure, if the line was short, the dogs were cheap and tasty.  But I wouldn't stand forever for them.

What about you?  Have you had the best hot dog ever, either at Walter's or another famous hot dog stand?  Was it transcendent?

Monday, September 9, 2013

Nanny's Crescents

By all accounts, Ryan's grandmother was an excellent cook.  This means that when Ryan's father (who lives alone, in Alabama) comes to visit, he is an extremely appreciative audience.  He knows good home cooking, but he almost never gets it.  Since he was coming into town this weekend, I wanted to make sure to have some dessert on hand and proposed making cookies.  Ryan's mother suggested that I make his favorites, crescents.  She e-mailed his sister for his mom's recipe and in no time, we were mixing up a batch.  They are delicate and crumbly and sweet, even when slightly overdone (which is how Ryan's dad likes them).

NANNY'S CRESCENTS

INGREDIENTS:
2 C flour
1/2 lb butter
4 1/2 T powdered sugar (plus more for rolling)
1 t vanilla
1 t orange juice
1 t cold water
1/2 C chopped walnuts

DIRECTIONS:
Pre-heat your oven to 350 F.  Start by cutting the 2 sticks (that's usually how many are in a half pound) of butter into smaller bits.  Then, in your stand mixer, mix your butter until creamy and add the powdered sugar. Then add the orange juice, water and vanilla, continuing to mix.  Slowly add the flour while mixing on low until it is incorporated.  Finally add the walnuts.  Mix one last time to distribute the walnuts evenly.  Form into crescent shapes and set on an ungreased cookie sheet. Bake for 20-25 minutes or until done (mine were definitely done at 20 minutes, any longer would possibly have made them too brown even for Ryan's dad).  Take them out and toss them in powdered sugar and set to cool. Try to keep them in the house for more than a day.

Wednesday, September 4, 2013

Caution! The Perils of Baking Post-Partum...


For several days, Ryan and I had been lamenting the lack of dessert.  We'd eaten all available ice cream, blueberries and even granola cereal.  Things were getting dire.  Armed with an extremely cooperative baby and a thorough inventory of my nearly empty cupboards I set about to bake a cake.  I knew I had the ingredients for a basic yogurt cake, but I had next to nothing to put into it, nothing to make it more than just a plain yellow moist cake.  Finally, I was inspired!  I would make a bit of a chocolatey streusel to put in the middle.  And off I went.  I mixed up the batter, chopped, pinched and fluffed the streusel and carefully layered it all in my cake pan.  I say carefully, because boy howdy was my batter dense.  Really, sticky and dense.  I hadn't remembered this batter being dense, but I ignored the nagging feeling and popped it into the oven.  As I began to wipe off the counter and returned a recipe book to its home, I realized exactly what was wrong.  I hadn't added the vegetable oil.  I grabbed the cake out of the oven, placed a quick consult call to stellacarolyn and then, with a heavy heart, I mixed together that carefully layered streusel with the oil and undid all my planning and ended up with an entirely different cake than what I'd wanted.  Still tasty mind you, but not at all what I'd intended.  I think it will be far superior if you do as I say and not as I do.  Which is probably easier if you haven't recently had a baby and subsequently lost most of your brain function.

YOGURT CAKE WITH CHOCOLATE STREUSEL

INGREDIENTS:
for cake
2/3 C plain greek yogurt
1 C sugar
3 eggs
2 t vanilla
1/2 C vegetable oil
2 C flour
pinch of salt
1 t baking soda
for streusel
1/4 C packed brown sugar
1/2 C chopped walnuts
3/4 C chopped chocolate chips
2 t cocoa powder
2 T butter

DIRECTIONS:
Preheat your oven to 350 F and grease a 9" cake pan.

Mix together the greek yogurt, sugar, eggs, vanilla and vegetable oil.  You could do this in a stand mixer or with a hand mixer, or do it by hand.  In a separate bowl, mix together the flour, salt and baking soda.  Combine the wet with the dry and stir together well.

Make your streusel.  The butter should be a bit softened when you work.  Add all the ingredients listed under "for streusel" to a small bowl.  Use your fingers to smush it all together so it's in crumbly delicious bits.

Pour half the cake batter in your cake pan.  Sprinkle the streusel evenly over the whole top of the batter.  Use all of it.  Then carefully distribute the other half of the cake batter over top of the streusel in a single layer.

Bake for 35-45 minutes or until a knife inserted in the center comes out without any sticky bits on it.  Allow to cool for 10-15 minutes before removing from the pan.

In all honesty I have no idea how this would taste.  I'm betting good.  But since I forgot the oil, I scooped all of my carefully layered cake batter back into a bowl, mixed in the oil and then plopped it all unceremoniously back into the cake pan and shoved it into the oven spilling a bit on the way.

Friday, August 30, 2013

Presto! Pesto!


I recently came into possession of a garden mess of weeds that once was a garden.  Very few things in this overgrowth are identifiable.  There are a few green tomatoes, yearning for the sun.  Some sad yellow cucumbers buried beneath the overgrowth.  But the basil* is standing tall and proud.  A veritable taunt to my basil-allergic husband.  Clearly this was a call to pesto.  I grabbed the baby and harvested about a cup of basil* leaves which was just enough for a half-recipe of my mom's pesto.  Of course, since I'm eating alone, a half recipe should be just fine.

*at least I hope it's basil.  Otherwise I just made a delicious and hopefully not poisonous weed pesto.


BASIL PESTO
Let's pretend you have enough basil for the full recipe, shall we?

INGREDIENTS:
2 C basil leaves
1/2 C olive oil
2 T walnuts 
2 cloves garlic
1 t salt
1/2 C freshly grated Parmesan
3 T softened butter

DIRECTIONS:
Put the basil, olive oil, walnuts, garlic and salt into your food processor.  Blend until it looks like pesto. Pour into a bowl and add the parm and the butter.  Stir.  Now you have pesto!  It will keep in the fridge for a week or so, but if you want to freeze it, you can do that before adding the cheese (no idea why it's BEFORE the cheese.  You'll have to ask my mom).


Saturday, August 3, 2013

Kindness

My absence has in large part been due to our new arrival.  Our son was born three weeks ago, and needless to say, my cooking has suffered greatly. After returning home from the hospital we've only succumbed to takeout once, mainly because Ryan has been a whiz and cooked us delicious dinners from scratch.  But also, due to the incredible kindness of a work colleague.

My mother used to work with a very wise, very kind woman named Louise who had an expression that really she often used, "People are interesting."  This was about as damning as Louise would ever get, because she was someone who was kind to the bottom of her heart.  And so it's been Louise I've thought about in the days after I've had my son and paid close attention to people's actions rather than their words.

Some of the people I worked with that I considered myself to be quite friendly with have not so much as texted congratulations after being told of our new addition, while others have sent lovely cards and gifts which warmed my heart and another showed just how big her heart is.

Throughout my pregnancy, one work colleague was beyond generous with her advice, time, unwanted baby clothes (tags still on) and prenatal yoga DVDs.  And so when she drove up to visit me the other day, I shouldn't have been surprised to see her kindness extended even further, to bringing us a delicious meal.

A quiche, a salad and a delectable blueberry pie.  Can you ask for anything more?

Okay, fine, you could ask for me to actually update this blog more frequently - which hopefully will start in late August.  And you could ask for a picture of the little one - which I shall respectfully decline at this point.  Maybe later.


Monday, July 15, 2013

Experimentation

I don't usually write about things that are purely experiments, especially if I'm not really sure I'll ever make them again, but desperate times call for desperate measures.

My parents are currently inundated with fresh produce, because they've been given the CSA share of a neighbor who is away on vacation.  Their solution has been to pass on lots of delicious veggies to Ryan and I.  Last week we ended up with kale, radicchio, zucchini (clearly for Ryan only) and red leaf lettuce.  By the time I got around to the radicchio I wanted something that didn't seem like greens or salad, so started thinking about making a pasta.  Maybe something with some white beans.  Then serendipitously, I ran across this recipe. So I thought I could use radicchio instead of escarole, keep the white beans, add some garlic and parm and have something that would resemble dinner.  I also had this box of Kamut and Quinoa pasta that Ryan had gotten as a free sample.  It is a bit shameful to admit, but I've never eaten any type of whole grain pasta, much less something as exotic as this.  But honestly, the earthy taste (and yes, there is one, it's not going to just hide under tomato sauce) went really well with the greens and beans.  Plus, I love the idea of getting extra protein in when I have a vegetarian pasta dish.  So I definitely need to experiment with different kinds of pasta in the future.

RADICCHIO, WHITE BEANS AND GARLIC WITH WHOLE GRAIN PASTA

INGREDIENTS:
8 oz whole grain pasta, I used Kamut and Quinoa Twisted Pair
3-4 C radicchio (I only had 2 C and was sad)
4 cloves garlic, minced
2 T olive oil
1-2 t vinegar (I used red wine vinegar, but I think balsamic would have been a better match)
1 can white beans (reserve the bean liquid, but go ahead and drain the beans)
1/6 C bean juice
salt
red pepper flakes (1-2 t or more depending on how spicy you like things)
2 cups grated parmesan cheese

DIRECTIONS:
In a large pot, boil some water for the pasta and don't forget to salt the water.  This particular pasta said to cook for 10-12 minutes, but it was DONE at 6 minutes, I can't even fathom what disgusting mush it would have been if we'd let it go.

In a non-stick pan, heat up your olive oil, red pepper flakes and garlic on low heat, you want your garlic to release it's garlicky goodness, but not brown.  In 1-2 minutes when it is golden, go ahead and add the radicchio and let it wilt.  Radicchio can be extremely bitter.  So add some salt now, and a small hit of vinegar to combat that.  Definitely taste the radicchio to see if it's coming along nicely.  You want it to have a little bite (both texturally and flavor wise) but you shouldn't have to force down bitter greens.  A bit before you think the greens are done, add the white beans and some more salt.

When the pasta is done, drain it, reserving a bit of cooking water.  Add the pasta to the pan with the radicchio and beans.  Add a bit of the bean juice (I used 1/6 C) and a splash of pasta water to help it all be a bit of a sauce.  Add the parm and mix it all well to combine.  Recheck your salt, pepper and liquid, adding more of whatever it needs to become a normal dinner dish.

LinkWithin

Related Posts with Thumbnails