When I was a very little girl, Cape Cod was a lot less built up than it is today. In particular, nice restaurants (as opposed to tiny fried fish and clam shacks) were often quite far from my grandmother's home in quiet Falmouth. But the Barley Neck Inn* wasn't just a "nice" restaurant. It was truly fine dining, in a quintessential New England setting, a sea captain's house built in the late 1800s. Back in those days, you used to dress up for this sort of thing, and the Barley Neck was formal. I can still hear my grandfather complaining bitterly about wearing a tie, while my Nana would tell him to stop fussing with it. We would drive a solid hour out to Orleans; it was an occasion and I loved it. Going out to a fancy dinner was just about one of my favorite things. In truth, I was a precocious brat who would have been insulted if a place had a kid's menu, much less invited me to select from one. I don't remember too much about the specifics of the menu probably because when I was little I was a creature of habit, more even than I am now and I likely ordered the same thing every time. My favorite appetizer was artichoke hearts au gratin which came in its own little casserole dish and was completely heavenly. I'm fairly sure that the piece de resistance was Beef Wellington (sweet heavens how I love Beef Wellington). It was that kind of restaurant. Classic dishes, New England dishes, but never banal, the chef clearly knew how to innovate. (e.g. my grandfather's favorite was a cauliflower and clam chowder). While I could never tell you if they featured a shrimp (more likely lobster, considering New England's seafood supply) pot pie, it's certainly the kind of dish that would have fit in perfectly: elegant, rich, well-executed and with a classic Cape Cod spirit.
*Don't bother looking it up, the horror show currently bearing the name has no resemblance to the fine old institution.
SHRIMP POT PIE
This makes two hearty main dish portions.
INGREDIENTS:
puff pastry (I needed 1/3 of a sheet) - thawed
1 lb shrimp, cleaned, deveined and chopped into bite-sized pieces
3 T butter
3 T flour
1/2 C white or yellow onion chopped fine
1/2 C mushrooms (I used baby bella) chopped
2 t Old Bay Seasoning
2 T vermouth or dry white wine
1/3 C milk
salt and pepper to taste
DIRECTIONS:
Preheat your oven to 400 F.
Prepare a baking sheet by covering it with foil and placing the two oven safe dishes you plan on using on top of it. It will be much easier to pull a pan out of the oven instead of two smallish dishes. I used these Pyrex baking dishes of my Nana's that are marked 12 oz. They're smaller than a bowl, but bigger than a ramekin.
In a large skillet, melt your butter over low heat. Add the flour and whisk to make a thick paste. Allow this (the roux) to cook for 3-4 minutes until a nice warm goldeny-brown color. Add the onions and mushrooms and stir to incorporate them with the roux. Cook for 5-7 minutes over medium heat until they are soft. Add the shrimp and toss with the Old Bay Seasoning. Increase the heat for medium high. Cook for 1-2 minutes, stirring frequently. When the shrimp have lost their translucence (honestly, you're going to bake them later, they'll be cooked, don't worry about it) add the vermouth and continue to stir or whisk until the liquid is sort of absorbed to make a sauce. Then add the milk and continue stirring a bit. Give it a few minutes to thicken. Taste the sauce and add salt and pepper accordingly (mine needed quite a bit of salt).
On a well floured surface, roll out the puff pastry and cut two pieces that will fit the top of your baking dishes. Spoon your thickened pot pie mixture into the bowls, top with the puff pastry and place in the oven. Bake for 15-20 minutes. You want the top to be golden brown and puffed up. Serve immediately.
Saturday, September 29, 2012
Saturday, September 22, 2012
Tasting Fall
I can't help it. When the weather finally starts to turn and there's a chill in the air, I immediately think of New England. In my mind they are almost synonymous, so that when I think of fall, I picture the warm coppers and fiery oranges of the foliage in Connecticut. I can practically smell the leaves burning in Massachusetts yards. I can taste the crisp apples from Lyman Orchards*, the tart freshness of cranberries from the Cape Cod bogs. But if there's one flavor that New England has exclusive rights to, it might be maple walnut. No where else in the country does the maple have so much depth and richness. It's not the cloying bland impostor known as "pancake syrup", it's not a faint background sugary-ness. And the walnuts are never sad little bland bits of crunch. They are substantial with an earthy smoothness behind the chew. Now usually the combination is the star in cool, velvety ice cream, but these cookies will deliver all of the deliciousness in a form compatible with brisk evenings and warm cups of tea.
*More on Lyman Orchards in upcoming posts!
MAPLE WALNUT COOKIES
adapted from Cooking Light
Makes between 2-3 dozen small cookies
NB: If you're interested in baking with maple syrup you might want to invest in some Grade B syrup which is darker in color and deeper in flavor. It will stand up better in recipes than it's lighter pancake loving Grade A counterpart.
INGREDIENTS:
COOKIES
1 1/2 C all purpose flour
1/2 t baking soda
1/2 t ground ginger
1/2 t ground cinnamon
1/4 t salt
1/8 t ground nutmeg
3/4 C packed brown sugar
1/4 C softened butter
3 T maple syrup (if you use Grade B, you might get away with 2 T)
1 large egg
FROSTING
1 C powdered sugar
3 T maple syrup
1 T milk
2 T butter, softened
TOPPING
1/2 C chopped walnuts, toasted (toast by popping them on a sheet pan in a toaster oven or oven set to 350 for about 5 minute)
DIRECTIONS:
Preheat your oven to 350 F. In a stand mixer, combine the butter and brown sugar and beat until light and fluffy. Add the maple syrup and the egg and mix until combined. In a separate bowl, combine the flour, baking soda, ginger, cinnamon, salt and (which you can skip if you use salted butter), nutmeg. Stir well to combine thoroughly. Add the flour mixture to the wet ingredients and set the mixer on low until it comes together.
Use a spoon to help form small balls. I found that these are rather puffy if left in ball shape which makes them harder to glaze and top with walnuts. I sort of gently pressed down the tops once I placed them on the baking sheet to encourage a flatter shape. Arrange balls on the baking sheet, leaving space between (as I mentioned, mine didn't spread a ton, but you know, better safe than sorry). Bake at 350 until lightly browned. I started checking mine around 10 minutes. It averaged 10-12 minutes although the original recipe said 14, so know your oven. I was able to transfer them to a cooling rack pretty quickly.
Mix together the frosting by combining the maple syrup, milk and butter and then adding the powdered sugar. You can whisk or stir until smooth. Mine was a bit liquidy which resulted in the sort of rustic poured look you see above. The magazine had sort of perfectly round frosting spread on each cookie. That was not happening in my world. One you've frosted, press the walnuts on top quickly so they stick.
Enjoy autumn!
*More on Lyman Orchards in upcoming posts!
MAPLE WALNUT COOKIES
adapted from Cooking Light
Makes between 2-3 dozen small cookies
NB: If you're interested in baking with maple syrup you might want to invest in some Grade B syrup which is darker in color and deeper in flavor. It will stand up better in recipes than it's lighter pancake loving Grade A counterpart.
INGREDIENTS:
COOKIES
1 1/2 C all purpose flour
1/2 t baking soda
1/2 t ground ginger
1/2 t ground cinnamon
1/4 t salt
1/8 t ground nutmeg
3/4 C packed brown sugar
1/4 C softened butter
3 T maple syrup (if you use Grade B, you might get away with 2 T)
1 large egg
FROSTING
1 C powdered sugar
3 T maple syrup
1 T milk
2 T butter, softened
TOPPING
1/2 C chopped walnuts, toasted (toast by popping them on a sheet pan in a toaster oven or oven set to 350 for about 5 minute)
DIRECTIONS:
Preheat your oven to 350 F. In a stand mixer, combine the butter and brown sugar and beat until light and fluffy. Add the maple syrup and the egg and mix until combined. In a separate bowl, combine the flour, baking soda, ginger, cinnamon, salt and (which you can skip if you use salted butter), nutmeg. Stir well to combine thoroughly. Add the flour mixture to the wet ingredients and set the mixer on low until it comes together.
Use a spoon to help form small balls. I found that these are rather puffy if left in ball shape which makes them harder to glaze and top with walnuts. I sort of gently pressed down the tops once I placed them on the baking sheet to encourage a flatter shape. Arrange balls on the baking sheet, leaving space between (as I mentioned, mine didn't spread a ton, but you know, better safe than sorry). Bake at 350 until lightly browned. I started checking mine around 10 minutes. It averaged 10-12 minutes although the original recipe said 14, so know your oven. I was able to transfer them to a cooling rack pretty quickly.
Mix together the frosting by combining the maple syrup, milk and butter and then adding the powdered sugar. You can whisk or stir until smooth. Mine was a bit liquidy which resulted in the sort of rustic poured look you see above. The magazine had sort of perfectly round frosting spread on each cookie. That was not happening in my world. One you've frosted, press the walnuts on top quickly so they stick.
Enjoy autumn!
Labels:
cookies,
desserts,
my new england
Wednesday, September 12, 2012
Bad Wife
Ryan went to get his cholesterol checked last week and yesterday his numbers came back. They are all still borderline high. I feel terrible for him because he exercises and generally eats healthy food and has never smoked anything and yet he has this hanging over him. And what kind of wife am I? Do I cook healthy meals out of great concern for his well-being? Do make sure we have tons of vegetables and whatever else is good for your cholesterol? Do I even know what is good for your cholesterol? No. I do none of those things. I just fry up some chicken and pop it on a plate with some carbs. What can I say? Korean Fried Chicken just tastes good! It's light and crispy and spicy and savory. Next week I'll make something that won't kill him.
(Confidential to Dr. Who fans - Bad Wife? Bad Wolf? Am I leaving myself a message to remind myself to save my husband?)
KOREAN FRIED CHICKEN
INGREDIENTS
Package of 5-6 chicken drumsticks
3 cloves of garlic
1/2 t powdered ginger
2 T soy sauce
2 T gojujang (Korean chile paste)
1 T rice vinegar
1 T sesame oil
1 T honey
1/3 C cornstarch
vegetable oil for frying
DIRECTIONS:
In a food processor, combine the garlic, ginger powder, soy, gojujang, rice vinegar, sesame oil and honey. Blend until fully combined. Taste it. It is spicy, right? Not spicy enough? Add some more gojujang. Too spicy? Balance with a bit more honey. When you have it just right, pour it into a large bowl. You're going to toss the fried wings in the sauce, so make it a bowl that will let you do that.
In a large heavy bottomed pot, pour 1-2" of oil. Heat the oil to 350 degrees fahrenheit. Take your drumsticks and coat them in cornstarch, shaking off the excess. You can certainly use flour or a mix of cornstarch and flour. Cornstarch makes a very light coating, not a heavy crispy one. More of a light crackly one. When your drumsticks are coated, pop 2-3 at a time into the oil (how many you can fit depends on the size of your pot, don't overcrowd). Watch your oil temperature closely, you want to maintain around 350. Fry the drumsticks for 4 minutes on the first side, then using metal tongs, flip them and fry for another 4 minutes. Have a tray covered in paper towels waiting and when they're done, pull them out. Keep at it until all your drumsticks are fried. I checked to see if they're done by using a meat thermometer. You want an internal temperature of at least 165 degrees fahrenheit for poultry. Try to stick the thermometer into the meatiest part of the drumstick. My temperature was okay after the first frying, but when I put the probe into the chicken and pulled it out, red blood burbled out of the thing like something out of a horror movie. I'm not kidding. If you know why this is, PLEASE reveal in the comments. Anyway, the red blood creeped me right out so I threw those suckers right back into the oil and fried them for another 3 minutes per side. This time the temperature was way over 165, but there was no scary blood. Give them a minute or two to drain their oil onto paper towels and then toss them in the sauce until they are well coated.
Friday, August 31, 2012
Summer's Last Hurrah
I have wasted an hour an a half trying to come up with something interesting to say here. I've typed something and then read some gossip sites. I've deleted it, typed something else and then taken out the trash. I've stared at it, turned off the air conditioning, opened all the windows in a bid to make the still vaguely-weird-possibly-smokey smell leave my apartment. I've deleted what I've written again.
I DO NOT HAVE TIME FOR THIS. I have to work on Tuesday. This is my last actual day of vacation. The last day when everyone else is working but I'm on summer break. I need to be reading trashy novels, using up summer sale coupons that expire on the last day of August, watching HGTV and endlessly snacking. I cannot spend my time trying to find the exact right way to wax poetic on the subject of heirloom tomatoes.
And let's not even get into how the tomatoes deserve better than my paltry prose. Heirlooms are the crown jewels of summer. To heck with those perfectly round, perfectly red globes that try to convince you that they taste as good as they look (usually, with the exception of a Jersey summer tomato, they don't). Heirlooms may be lumpy and misshapen and have weird gray blemish looking cracks on them, but they are where the flavor is. One of my favorite little local farmer's markets, Sansone's, usually sets out an amazing tasting tray. There are tiny chunks of tomatoes, sweet juicy yellows, deep flavorful reds that are nearly purple, green striped tangy ones. Tomato stops being a single flavor and becomes a whole world of nuanced variety.
Heirlooms don't need recipes. Most of the time, you just drizzle a little extra virgin olive oil, sprinkle a little salt and you're done. But everyone once in awhile, you may find yourself with a bounty of heirlooms or you may need to whip up a vegetarian dish for a Labor Day celebration. This heirloom tomato tart will fit the bill. The tomatoes aren't cooked, so they'll still be juicy and the cheese is delicate and won't overpower the real star of the dish. So you go ahead and put together something delicious to eat for summer's last hurrah. I'll be here on the sofa reveling in my last day off.
HEIRLOOM TOMATO TART
inspired by epicurious and Food52
INGREDIENTS FOR BLACK PEPPER PARMESAN CRUST:
1 1/2 C flour
1 stick of butter (8 T) - chopped into small cubes and kept very cold
1/4 t black pepper
3 T parmesan
ice water
DIRECTIONS FOR THE CRUST:
In a food processor (I use a stand mixer because I don't have a big food processor, so you can do it in a stand mixer or by hand if you like), combine the flour and black pepper and parm. Then add the butter and mix until it's a sort of sandy consistency. Once it's reached that consistency, begin adding ice water about a tablespoon at a time. You want the dough to hold together but not get too wet. When you can form it into a ball, you're done. I shape it into a flattened disk and refrigerate it for awhile so it will be easier to work with later. I think I chilled it about a half an hour.
Preheat your oven to 400 degrees F. Roll out the dough on a well floured surface. I used a 10 1/2" pie dish for this pie. When the dough is large enough, drape it over the pie plate and press it into place. Then lay a piece of foil over it and add pie weights or dried beans or pennies to the center. You will be blind baking the pie. If you don't know what blind baking is, check out the Pie Maven's explanation. Bake the crust for 15 minutes, then remove and let cool. You're going to have a very damp filling, so if you want to try Pie Maven's tip for moisture proofing, that might be a good idea. I am definitely going to try it next summer. You just remove the pie weights and foil about 5 minutes before the end of baking and using a pastry brush, apply an egg wash to the bottom and a bit up the sides. An egg wash is simply an egg beaten with a bit of milk or water (usually around 1-2 t of the liquid per egg). Then you return the pie to the oven for the last 5 minutes of baking.
INGREDIENTS FOR THE FILLING:
heirloom tomatoes (1 used 1 1/2 large ones), sliced thinly
1 1/2 C mascarpone cheese
1/2 C grated Parmigiano Reggiano
fresh mozzarella (I used half of a small ball)
salt and pepper
lemon
1 t balsamic vinegar
DIRECTIONS FOR THE FILLING:
Slice the tomatoes around a half hour to hour in advance and set them on a rack (like you use to cool cookies). Under the rack, lay a few layers of paper towels (I usually put the paper towels and the rack all on top of a cookie sheet with an edge (sometimes called a jelly-roll pan) so that the liquid won't go anywhere). Anyway, your goal is to dry out those tomatoes a bit Feel free to remove the seeds and sprinkle them with salt before you let them sit. Then right before you use them, pat them dry.
Prepare your mascarpone. Take the cheese and mix in the parm plus some salt and pepper, a good pinch of each and some lemon. I didn't have a lemon, but I wished I did. Start with a teaspoon or so of freshly squeezed juice and then taste it. Mascarpone is creamy and delicate. You don't want to overpower it, but nor do you want it to be bland. It should taste yummy. Feel free to adjust the salt, pepper and parm as you see fit.
Slice your mozzarella very thin as well.
Time to assemble! Use around a third of the mascarpone to cover the bottom of the pie crush. Smooth it into an even layer. Lay down a layer of heirloom tomato slices, use the ugliest ones, these are getting buried. Seriously, ignore all those pictures online of beautiful tomato tarts. Real heirlooms are lumpy and bumpy and you'll be lucky if you get attractive slices at all. I used a combination of yellow and red heirlooms for mine, so my first layer was yellows. Then lay down a layer of mozzarella and drizzle over the balsamic vinegar. Then lay down a layer of red heirlooms. Then smooth down the rest of the mascarpone (I didn't quite have enough, so I increased the amount of mascarpone for this recipe so that you WILL have enough). Finally, using the prettiest tomato slices, create your top layer. Serve this soon! The sooner the better! The tomatoes will try to moisten up everything else, so just go for it. We had a lot left over, and it was fine, not too mushy and certainly not gross, but it wasn't all that pretty to look at.
Tuesday, August 28, 2012
In Which I Nearly Burn Down the House...
It wasn't a particularly great day yesterday, but I was really trying to turn things around. I had made it through a phone call I was dreading and figured I could at least get dinner out of the way. The chicken was cooked, the buns were ready to toast, the dishes were washed, the glaze was made and the red onions were caramelized. I just needed to take Dexter for a walk before Ryan got home. I turned off the heat under the onions and out we went. It was a nice evening, so we made it a leisurely stroll and even ran into Ryan on the way back in. As we got closer to the building, I could hear an alarm. I assumed it was the neighbors burglar alarm at first, but as we walked up the stairs, I broke into a run. When I threw open the door of our apartment, I knew. The air was dark and cloudy with smoke. The alarms shrieked. On the stove, bits of charred onion smoked heavily in the bottom of a pan whose handle was on fire.
Unlike the gas stoves I've always cooked on, electric stoves have knobs that can be turned either way. So in flicking it off, I must have over flicked and ended up on temperature 9, maximum heat. I blew on the handle which sort of shockingly stopped the fire and then rushed the pan outside. Ryan threw open the windows. Dexter barked desperately thinking we were idiots for staying anywhere that was bleeping so loudly. When the smoke cleared out enough the alarms finally stopped, the dog quieted down and I started making another batch of (highly supervised) onions.
The sandwich was delicious. The apartment still smells of smoke. I still feel like an idiot. I blame the stove.
I give you the recipe in good faith that you will watch your onions, but also that you will share with me, in the comments, any tips you may have about un-smoke-smelling my apartment. Please.
CHICKEN SANDWICHES WITH BALSAMIC GLAZE AND NOT BURNT RED ONIONS
adapted from Cooking Light
Warning: This recipe requires multi-tasking. If you cannot multi-task, you should adapt the recipe so that you will not set anything on fire.
INGREDIENTS:
for two sandwiches
1 boneless skinless chicken breast
2 rolls (I used buns because it's what I had, but you might like a real roll)
1/2 a small red onion
goat cheese
lettuce (you can use anything, fancy mixed greens, spicy arugula. I used half of a large romaine leaf)
tomato (a thin slice for each sandwich)
olive oil
salt and pepper
for the glaze:
1/4 C + 1/8 C balsamic vinegar
1 t worcestershire sauce
2 T brown sugar
DIRECTIONS:
You need two pans and a pot. A small pot for the glaze, a small pan for the onions and a large pan for the chicken. Set them all on the stove. In the small pot, combine the balsamic, worcestershire and brown sugar. Turn this on medium low and stir periodically (you may want to whisk it a bit to make sure the sugar all incorporates properly). You want the glaze thick enough that it will coat a spoon (or you know, your chicken breasts) and not just pour all over your plate. Slice your red onion nice and thin. Add a bit of olive oil to the small pan. Again, your heat should be medium low to low. Put the onion in the pan and add a small sprinkle of salt. You'll want to watch your onions. You want them to cook to caramelized, so while you want them to cook down, you are not looking for crispy. Any sizzling noises are to be carefully monitored. This will take the longest time, between 15-20 minutes. Then prepare your chicken breast (you only need 1 breast for 2 sandwiches). Trim the breast of any fat or icky bits and salt and pepper both sides. Add a tablespoon of olive oil to the large pan and turn the heat to high. You want the oil to sizzle a bit if you add a drop of water. Once the pan is hot, add the chicken. It will take about 4 minutes a side, a bit less for thin breasts, a bit more for super fat ones. Because you'll be slicing the chicken eventually this is a great recipe for beginners. You can cut into the breast to check for doneness, a nice slice through the fattest part. Chicken should be white and sort of opaque, not pink. You still want it too be moist. When your chicken is done, you can cover it with foil and let it rest while you finish up anything you may not have timed correctly. When you are ready to serve, slice the chicken breast on an angle. Assemble your sandwiches. I toasted the buns, and smeared goat cheese liberally on the top bun. Then on the bottom I placed my lettuce leaf, then my tomato. Then on top of the tomato I layered the chicken, drizzled the glaze on top and added the caramelized onions.
Unlike the gas stoves I've always cooked on, electric stoves have knobs that can be turned either way. So in flicking it off, I must have over flicked and ended up on temperature 9, maximum heat. I blew on the handle which sort of shockingly stopped the fire and then rushed the pan outside. Ryan threw open the windows. Dexter barked desperately thinking we were idiots for staying anywhere that was bleeping so loudly. When the smoke cleared out enough the alarms finally stopped, the dog quieted down and I started making another batch of (highly supervised) onions.
The sandwich was delicious. The apartment still smells of smoke. I still feel like an idiot. I blame the stove.
I give you the recipe in good faith that you will watch your onions, but also that you will share with me, in the comments, any tips you may have about un-smoke-smelling my apartment. Please.
CHICKEN SANDWICHES WITH BALSAMIC GLAZE AND NOT BURNT RED ONIONS
adapted from Cooking Light
Warning: This recipe requires multi-tasking. If you cannot multi-task, you should adapt the recipe so that you will not set anything on fire.
INGREDIENTS:
for two sandwiches
1 boneless skinless chicken breast
2 rolls (I used buns because it's what I had, but you might like a real roll)
1/2 a small red onion
goat cheese
lettuce (you can use anything, fancy mixed greens, spicy arugula. I used half of a large romaine leaf)
tomato (a thin slice for each sandwich)
olive oil
salt and pepper
for the glaze:
1/4 C + 1/8 C balsamic vinegar
1 t worcestershire sauce
2 T brown sugar
DIRECTIONS:
You need two pans and a pot. A small pot for the glaze, a small pan for the onions and a large pan for the chicken. Set them all on the stove. In the small pot, combine the balsamic, worcestershire and brown sugar. Turn this on medium low and stir periodically (you may want to whisk it a bit to make sure the sugar all incorporates properly). You want the glaze thick enough that it will coat a spoon (or you know, your chicken breasts) and not just pour all over your plate. Slice your red onion nice and thin. Add a bit of olive oil to the small pan. Again, your heat should be medium low to low. Put the onion in the pan and add a small sprinkle of salt. You'll want to watch your onions. You want them to cook to caramelized, so while you want them to cook down, you are not looking for crispy. Any sizzling noises are to be carefully monitored. This will take the longest time, between 15-20 minutes. Then prepare your chicken breast (you only need 1 breast for 2 sandwiches). Trim the breast of any fat or icky bits and salt and pepper both sides. Add a tablespoon of olive oil to the large pan and turn the heat to high. You want the oil to sizzle a bit if you add a drop of water. Once the pan is hot, add the chicken. It will take about 4 minutes a side, a bit less for thin breasts, a bit more for super fat ones. Because you'll be slicing the chicken eventually this is a great recipe for beginners. You can cut into the breast to check for doneness, a nice slice through the fattest part. Chicken should be white and sort of opaque, not pink. You still want it too be moist. When your chicken is done, you can cover it with foil and let it rest while you finish up anything you may not have timed correctly. When you are ready to serve, slice the chicken breast on an angle. Assemble your sandwiches. I toasted the buns, and smeared goat cheese liberally on the top bun. Then on the bottom I placed my lettuce leaf, then my tomato. Then on top of the tomato I layered the chicken, drizzled the glaze on top and added the caramelized onions.
Thursday, August 23, 2012
Happy Birthday Gene Kelly!
Earlier this month, my dearest friend had a dinner in honor of the 100th anniversary of Julia Child's birth. You can read all about her celebration and her family's special relationship with Julia over at My Family Table. Probably unsurprisingly, I couldn't get my act together to whip up a fancy french dinner in the heat of August.
But today is another hundredth birthday - that of one of my favorite childhood movie stars, Gene Kelly. While everyone else my age was building up a common knowledge of popular 80's culture, I was watching old musicals. One of my very favorites has always been On the Town, starring Gene Kelly. The combination of sailors on shore leave and girls in amazing costumes taking in the sights of New York City made it irresistible to me. (True confession: I currently own two dresses I love primarily because they remind me of the costumes in the movie. a gorgeous full skirted black and white plaid that looks like the trim on Ann Miller's costume and a black dress with a coral underskirt that makes me think of the stunning crinolines under Vera Ellen and Betty Garret's dresses.) While it's probably not Kelly's best exhibition of dancing (except for a dream ballet sequence, he doesn't get to truly show his abilities), it's really worth watching if you at all go in for this kind of thing. If nothing else, you'll get to see Frank Sinatra at the height of his popularity acting sheepish and awkward around girls.
In honor of Kelly's birthday, TCM is running his films all day, with On the Town showing at 6:15. So why not make it dinner and a movie? I'll admit, the meal comes solely from my imagination as the movie is almost entirely without food. Sure, there are few mentions briefly in song, but despite the movie running through a full 24 hours, the only eating shown is when the boys manage to grab a few apples from a fruit stand. So what would I serve sailors on leave? Most certainly something they could not afford, a beautiful juicy steak.
It's a perfect New York treat for a perfect New York movie.
New York Strip Steak
INGREDIENTS:
A New York strip steak
salt and pepper
olive oil
DIRECTIONS:
Selecting the steak: You want to buy a steak that is about 1.5 to 1.75 inches thick and has a nice amount of marbling throughout (marbling is the strands of fat that run through the meat which make it flavorful and delicious). The thickness of the steak is recommended so that you have a good ration of nice juicy middle to crispy outside. In my world you want a nice thin outside with a pink center, not a thin strip of pink between two chewy crusts. Choose USDA prime for the best quality.
Equipment: You need a cast-iron pan.
Preparation: Take the steak out of the fridge about 15 minutes before you want to cook it so that it can warm up. Salt and pepper it generously (don't coat it or anything, just a nice sprinkling on each side). With a few minutes to go, heat up your cast-iron pan. Use a paper towel and pour a bit of olive oil on the towel. Use tongs to press the oiled towel all over the cooking surface of the pan. You want a nice even coating, but you don't want to just pour oil in there and make a pool.
Your pan should be over medium high heat and it will be ready for the steak when a drop of water placed in the pan sizzles. Place the steak in the pan and cook it for 4-5 minutes. Do not poke it or press it or anything once you put it down. Just leave it alone. After 4-5 minutes, turn it over and let it go for 3 more minutes. You should have a beautifully cooked side facing up at you once you flip it. Use a meat thermometer to check the temperature at both ends of the steak (I know, I know the juice will run out, be delicate, don't maul the things and when you get better at it maybe you won't need a thermometer). You can pull the steak between 115 degrees and 118 degrees for medium-rare. When you take it out of the pan, cover it with foil and let it sit a few minutes. The temperature will go up a smidge more which is probably good and the juices will be less likely to pour out all over the place.
Serve your perfectly cooked steak with a good red wine (or if you're playing sailor, a mug of good beer) and don't forget to toast one of the greatest dancers of all time.
Labels:
beef,
company dinner,
dinner and a movie,
gluten-free,
main course
Sunday, August 12, 2012
What's Your Point of View?
If you watch any Food Network show, you'll know that having a point of view is a big deal to the network. Recently, a friend made an audition tape for Chopped and of course, we needed to discuss, in depth, what her point of view would be. As a food blogger who is ready pretty much only by family and close friends, I never particularly worried about what my point of view was. It's always been pretty obvious that I just don't have one.
This last season of Food Network star featured a contestant who felt he didn't need one. He was so good that he just should be allowed to cook and to heck with having a point of view. It did not work out well for him at all. But another contestant's point of view interested me far more than this man's utter lack of one.
Her concept was a show called "My New England," in which she would share her love of New England through cooking. The network worried a bit that it would be to narrow, and on camera at least, she was unable to really convince them that New England was more than a series of lighthouses, beach houses and fishing boats. I was not so secretly jealous. My New England. Now that is a point of view I could get behind.
My New England is Cape Cod where I spent weeks on end visiting my grandparents each summer, following every fried haddock dinner with a quest for the best ginger ice cream (my father's favorite). My New England is Connecticut's orchards nestled deep in the country surrounding my college town, hot lobster sandwiches along its shorelines and the Howard Johnson's in Mystic that always kept Peppermint Stick Ice Cream in stock because it was the manager's favorite. It's Newport, RI, both the restaurants and bars along the water catering to tourists and sailors and the Newport of a century ago. Not the mansions and elegance of the rich, but the house where my Portuguese great-grandmother raised 13 children with a backyard housing a goat and chickens, where my great-aunts fried malasadas at the stove. My New England is my Nana's French-Canadian mother making pork pie from leftover roasts and potatoes without ever touching a recipe. It's my walk through Boston's Italian North End to my first after college boyfriend's apartment, the air perfumed by tomato sauce, the windows festooned with fresh pasta. It is the tiny restaurant in Inman Square where I could find the tiny custard tarts I fell in love with when I visited Lisbon. My New England is my best friend's Passover table where she shares her grandmother's traditional recipes. I have so many recipes that are influenced by my years living in New England and my own family heritage. I have so many stories about how the food of that region has been important in my life.
How dare they think this part of the country couldn't carry a show! Southern cooking has long been considered worthy of its own programs and recipe books. New England certainly has a rich enough heritage to warrant a show. And in my imaginary world where I have a cooking show, that program would be all mine.
What's your culinary point of view? Do you have one?
This last season of Food Network star featured a contestant who felt he didn't need one. He was so good that he just should be allowed to cook and to heck with having a point of view. It did not work out well for him at all. But another contestant's point of view interested me far more than this man's utter lack of one.
Her concept was a show called "My New England," in which she would share her love of New England through cooking. The network worried a bit that it would be to narrow, and on camera at least, she was unable to really convince them that New England was more than a series of lighthouses, beach houses and fishing boats. I was not so secretly jealous. My New England. Now that is a point of view I could get behind.
My New England is Cape Cod where I spent weeks on end visiting my grandparents each summer, following every fried haddock dinner with a quest for the best ginger ice cream (my father's favorite). My New England is Connecticut's orchards nestled deep in the country surrounding my college town, hot lobster sandwiches along its shorelines and the Howard Johnson's in Mystic that always kept Peppermint Stick Ice Cream in stock because it was the manager's favorite. It's Newport, RI, both the restaurants and bars along the water catering to tourists and sailors and the Newport of a century ago. Not the mansions and elegance of the rich, but the house where my Portuguese great-grandmother raised 13 children with a backyard housing a goat and chickens, where my great-aunts fried malasadas at the stove. My New England is my Nana's French-Canadian mother making pork pie from leftover roasts and potatoes without ever touching a recipe. It's my walk through Boston's Italian North End to my first after college boyfriend's apartment, the air perfumed by tomato sauce, the windows festooned with fresh pasta. It is the tiny restaurant in Inman Square where I could find the tiny custard tarts I fell in love with when I visited Lisbon. My New England is my best friend's Passover table where she shares her grandmother's traditional recipes. I have so many recipes that are influenced by my years living in New England and my own family heritage. I have so many stories about how the food of that region has been important in my life.
How dare they think this part of the country couldn't carry a show! Southern cooking has long been considered worthy of its own programs and recipe books. New England certainly has a rich enough heritage to warrant a show. And in my imaginary world where I have a cooking show, that program would be all mine.
What's your culinary point of view? Do you have one?
Thursday, August 2, 2012
Pressing Pickle Update
I'm not even the only one schilling pickles on the internet these days. Evidently, refrigerator pickles are hot right now. Lady Gouda's making bread and butters. Emily Style is making dills. Clearly this means that they are the new, hot, in, thing. I'm never on trend. This might be a first. I shall revel in it.
Also, remember the poor forgettable loser in the pickle playoffs? The poor asian pickles? They know their audience. Understanding my natural procrastination instincts are especially strong when it comes to throwing out food, they lurked in the batch of my fridge for a week. I thought they were just peeking around the condiments feeling sorry for themselves, but really, they were gathering spice. Ryan was on a snack-seeking mission and poking around the back of the fridge and there they were. I don't know if it was desperation or optimism, but he popped a pickle. It was nice and fiery. Happy pickle. He finished the jar in a single sitting. I still wouldn't say they were the best pickle option, but if you like things hot, let a batch sit awhile, you won't be sorry.
Thursday, July 26, 2012
Other People's Food
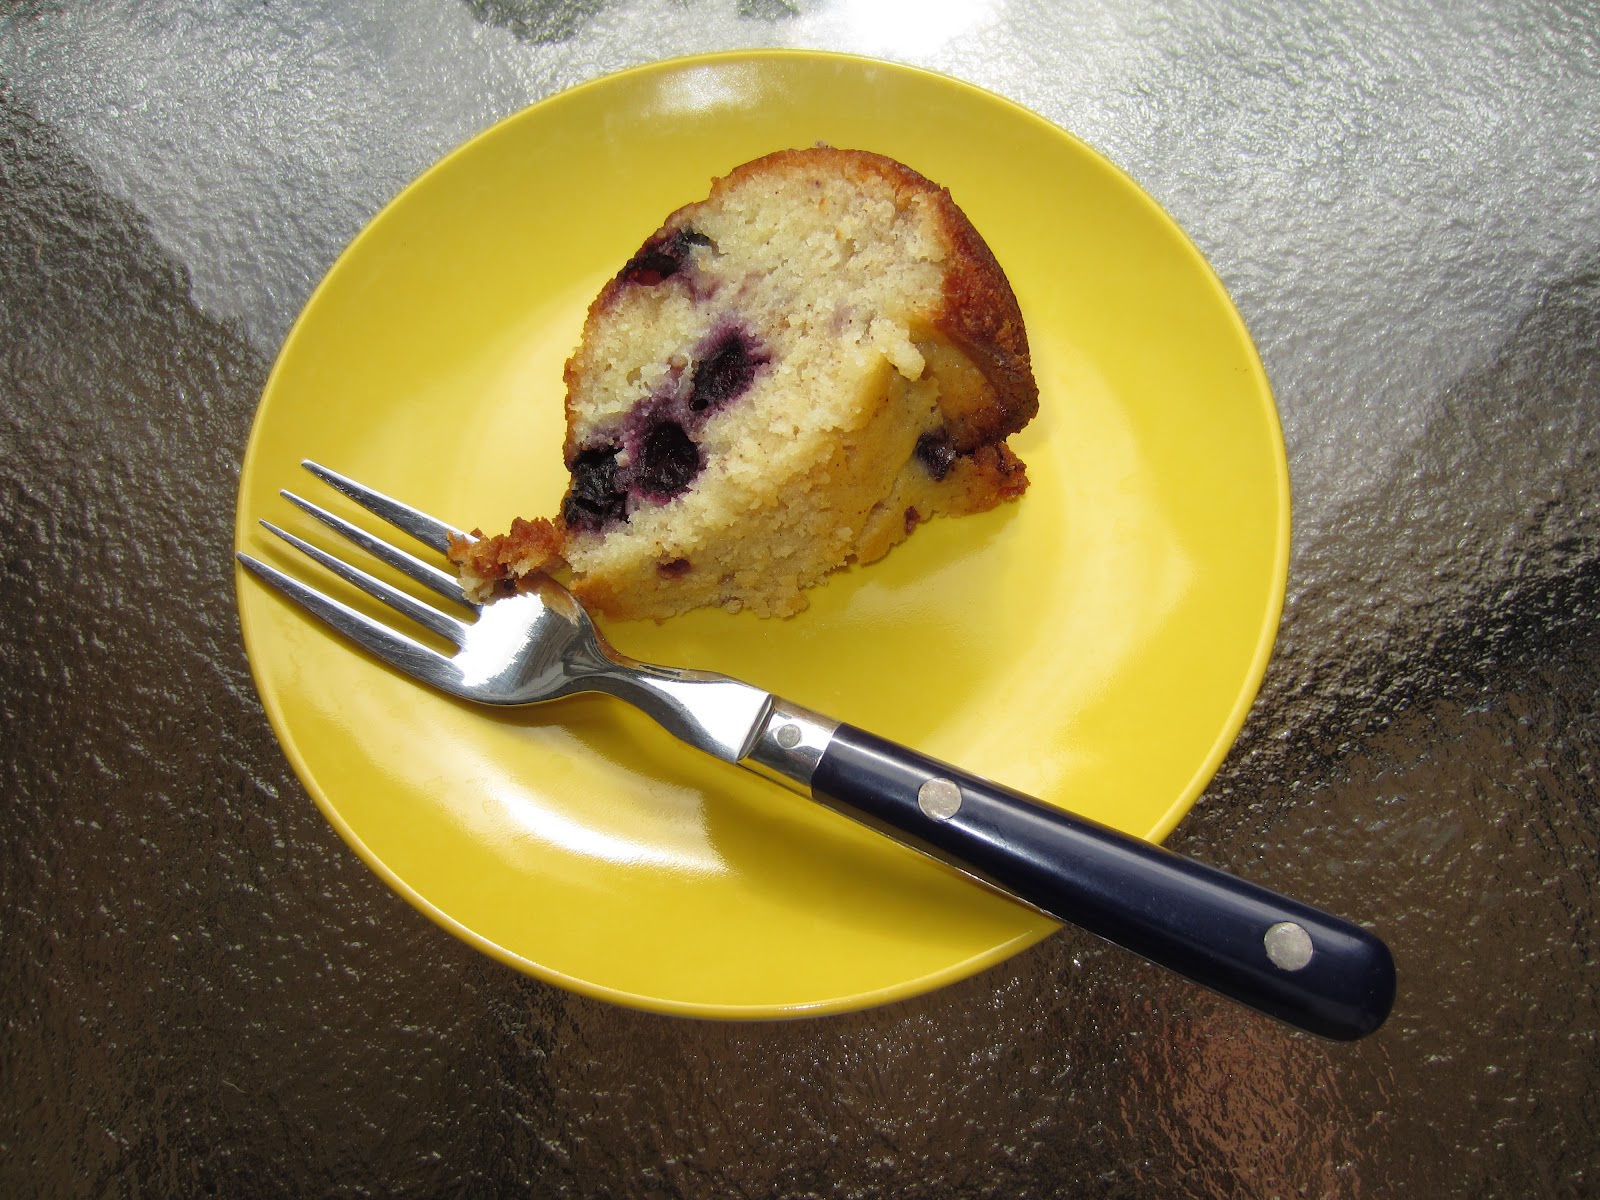
I'm not sure if my workplace is typical, but it seems to me that it requires an inordinate number of potlucks. Sometimes we have to bring things; sometimes things are brought to us. True confession: my team and I are terrible potluckers. We sign up for juice, as a group. It is not only the lazy person's way out, it is cheap. Once, we let a new girl buy juice and she spent over $20. On juice! Needless to say, we kicked her out of our little contribution group and she had to start bringing stuff on her own - expensive crap like store bought muffins. I feel only marginal guilt about bringing next to nothing, because in all honesty, I'll eat next to nothing. We've covered my fear and loathing of public eggs in the past, but food from questionable kitchens is right up there on the list of stuff I won't eat. I do not want to eat anything that may have come in contact with your cat's hair, your child's grimy hands or your can't-remember-the-last-time-you-wiped-it kitchen counter.* And on top of my rampant germophobia there's my fear that you** can't cook, so I'm also not eating anything that might not taste good. Which means that if I am particularly hungry I will hover near where people drop things off so I can see who brought each specific food product. LABELS people. Let's get with the program! Tell me what is in it and who made it for the love of Mike. This blueberry coffee cake was one such potluck exception, I knew the baker and felt confident her kitchen was clean. And it was SO good. I totally stalked potlucks looking for it. Finally she gave me the recipe. Which means I could totally make it and be a good potlucker, but that's not really my style. I'll stick to making it at home and leave the quality baking to someone else.
*Unless of course, I've just been petting the cat in question and you have a child who calls me Auntie in an adorable little voice and can sing along to Call Me Maybe, but that is a highly specific special case.
**I don't mean you person reading my blog. I'm sure you're a perfectly good cook. Unless you're not, in which case, no offense, but I don't want to eat what you've brought.
BLUEBERRY SOUR CREAM COFFEE CAKE
adapted rather liberally, the original calls for a brown sugar, chopped pecan and ground cinnamon streusel to be used after you've poured in half the batter and again when you've added all the batter. I was a) rather unsurprisingly lazy and b) shockingly short of pecans, so I improvised. Ryan's been calling it "Blueberry Muffin Cake".
INGREDIENTS:
1 C butter, softened
1 1/4 C granulated sugara
2 eggs
1 C sour cream
1 t vanilla extract
1 1/2 C all-purpose flour (make that 1/2 C a scant one okay?)
1t baking powder
pinch of salt
1.5 C fresh blueberries
1 T brown sugar
2 t cinnamon
2 T flour
DIRECTIONS:
Preheat your oven to 350 F (175 C). Grease and flour a bundt pan (I used that spray that comes with the flour in it - for when you care enough about your family to coat their food in chemicals). In your stand mixer, combine the sugar and butter and cream them together until light and fluffy. Beat in the eggs one at a time (I use the paddle attachment, it's fine). Then add the vanilla and the sour cream and give it one more good mix. In a separate bowl, mix the flour and baking powder and salt. Slowly add it to the mixer and then turn it on until it just incorporates. Rinse your blueberries and pat them dry. In another bowl, mix the 2 T of flour, the brown sugar and the cinnamon. Add the blueberries to this and mix them until coated, it's okay if it doesn't stick perfectly. Remove the bowl part of your stand mixer, because you'll want to add the berries by hand. Add them and fold them in gently using a spatula or wooden spoon. Make sure you get any left over brown sugar or cinnamon that's lurking in your bowl. Slowly pour all of this into your bundt pan and then pop it into the oven. Bake for 50-60 minutes or until a knife inserted into the cake comes out clean. Cool it in the pan on a wire rack and then remove it to a serving plate. I found this kept very well.
**I don't mean you person reading my blog. I'm sure you're a perfectly good cook. Unless you're not, in which case, no offense, but I don't want to eat what you've brought.
BLUEBERRY SOUR CREAM COFFEE CAKE
adapted rather liberally, the original calls for a brown sugar, chopped pecan and ground cinnamon streusel to be used after you've poured in half the batter and again when you've added all the batter. I was a) rather unsurprisingly lazy and b) shockingly short of pecans, so I improvised. Ryan's been calling it "Blueberry Muffin Cake".
INGREDIENTS:
1 C butter, softened
1 1/4 C granulated sugara
2 eggs
1 C sour cream
1 t vanilla extract
1 1/2 C all-purpose flour (make that 1/2 C a scant one okay?)
1t baking powder
pinch of salt
1.5 C fresh blueberries
1 T brown sugar
2 t cinnamon
2 T flour
DIRECTIONS:
Preheat your oven to 350 F (175 C). Grease and flour a bundt pan (I used that spray that comes with the flour in it - for when you care enough about your family to coat their food in chemicals). In your stand mixer, combine the sugar and butter and cream them together until light and fluffy. Beat in the eggs one at a time (I use the paddle attachment, it's fine). Then add the vanilla and the sour cream and give it one more good mix. In a separate bowl, mix the flour and baking powder and salt. Slowly add it to the mixer and then turn it on until it just incorporates. Rinse your blueberries and pat them dry. In another bowl, mix the 2 T of flour, the brown sugar and the cinnamon. Add the blueberries to this and mix them until coated, it's okay if it doesn't stick perfectly. Remove the bowl part of your stand mixer, because you'll want to add the berries by hand. Add them and fold them in gently using a spatula or wooden spoon. Make sure you get any left over brown sugar or cinnamon that's lurking in your bowl. Slowly pour all of this into your bundt pan and then pop it into the oven. Bake for 50-60 minutes or until a knife inserted into the cake comes out clean. Cool it in the pan on a wire rack and then remove it to a serving plate. I found this kept very well.
Monday, July 23, 2012
Pickle Grand Champion
I made that title up. I have no idea what it would take to become an actual pickle grand champion, or if one can even BE a pickle grand champion. But in my little contest of three pickles, this was the clear winner. I would eat them in a boat and I would eat them with a goat. (Deepest apologies to Dr. Seuss) Seriously. I love these pickles. They are tart and sweet and flavorful and easy to make. I'm going to make another batch today. The first ones went entirely too quickly. Also, don't skimp on the onions and don't be afraid to eat them. They are crunchy and delicious, not merely an agent for flavoring the pickles.
BEST PICKLES
I made this using stellacarolyn's recipe from My Family Table and Serious Eats's recipe for Bread and Butter pickles.
The recipe below DOES NOT MAKE ENOUGH PICKLES. You might as well double it. Otherwise you'll be lamenting lost pickles.
INGREDIENTS:
8.5 oz kirby cucumbers.
1/2 small vidalia onion
1 T sea salt
1 t mustard seed
1/2 t red pepper flakes
1/4 t celery seed
3/4 C white vinegar
1/2 C sugar
DIRECTIONS:
Slice your cucumbers in 3/8" slices (again, not a precise measure, totally guesstimated.) Slice your onion. Put them in a small bowl and toss with the 1 T sea salt. Refrigerate for 30 minutes. Remove, rinse and pat dry. Heat up the vinegar and add the sugar. Stir to dissolve. Add the mustard seed, red pepper flakes and celery seed. Bring it all up to a boil, then turn off burner. Fill a (clean, empty, dry) jar (I used a spaghetti sauce jar) with the cucumber and onion slices. Pour over the pickling brine, leave it to cool on the counter a bit and then pop it in the fridge. Pickle Perfection.
BEST PICKLES
I made this using stellacarolyn's recipe from My Family Table and Serious Eats's recipe for Bread and Butter pickles.
The recipe below DOES NOT MAKE ENOUGH PICKLES. You might as well double it. Otherwise you'll be lamenting lost pickles.
INGREDIENTS:
8.5 oz kirby cucumbers.
1/2 small vidalia onion
1 T sea salt
1 t mustard seed
1/2 t red pepper flakes
1/4 t celery seed
3/4 C white vinegar
1/2 C sugar
DIRECTIONS:
Slice your cucumbers in 3/8" slices (again, not a precise measure, totally guesstimated.) Slice your onion. Put them in a small bowl and toss with the 1 T sea salt. Refrigerate for 30 minutes. Remove, rinse and pat dry. Heat up the vinegar and add the sugar. Stir to dissolve. Add the mustard seed, red pepper flakes and celery seed. Bring it all up to a boil, then turn off burner. Fill a (clean, empty, dry) jar (I used a spaghetti sauce jar) with the cucumber and onion slices. Pour over the pickling brine, leave it to cool on the counter a bit and then pop it in the fridge. Pickle Perfection.
Labels:
gluten-free,
pickles,
side dish,
sides
Subscribe to:
Posts (Atom)