Wednesday, May 28, 2014

New Toy, New Troubles, New TASTY


We bought a grill, a Weber Spirt gas grill that is my new favorite cooking tool.  So far we have made wings (heavenly, but still perfecting our spice rub), burgers (standard issue), chicken (meh, should have used a better recipe) and pizza.  Mmmm. Pizza.  The dough was delicious beyond delicious, but I am yet a novice.  I went into pizza making with only the vaguest of recipes and the most cursory of looks on the internet.

Here is what I learned:
  • Brush your dough with olive oil, it helps with the sticking.
  • Having a grill that tells you how hot it is, is magnificently convenient and helpful.
  • Wet toppings = sad, so keep them dry so they don't interfere with the crust's crisping.
  • Keep your toppings warm.  Ours got a bit cold.  I think next time I'll put them on the raised rack in foil while we do the crust so they go on nice and hot.
  • Cheese next to the crust, it's the best way to melt it.
  • Smaller is better, because it's easier to remove
  • Thin crust is a nasty nasty thing to try to lay on the grill properly.  I will be rolling out my dough thicker next time.
  • Cooking on the grill is one billion times faster than doing it in the oven (actually, no, that is a gross exaggeration, but the oven takes 6-7 minutes for the crust and then another 5ish minutes for the toppings.  I think we went from dough on to topped pizza and off the grill in under five minutes.
Here is what I need to know:
  • How do you transfer your dough to the grill? It seems like it should be easy, but alas, it was terribly hard and resulted in some tears and much swearing.  
I promise to make many more pizzas this summer and let you know when I have hit level win.

If you have mastered the art of pizza-on-grill please, please, please share your tricks, tips and techniques in the comments.  

Wednesday, May 21, 2014

Yet Another Grilled Cheese


It is entirely possible that I have never met a grilled cheese I didn't like.  But this grilled cheese is one that I didn't eat.  Not because I had anything against it, mind you, simply because I made myself a different one.  Mine was tasty, true, but since my mother-in-law proclaimed this to be the best grilled cheese she'd ever eaten, I figured I might as well share.  Now, my mother-in-law may have been exaggerating slightly as she is often overly generous with her praise of my cooking (not a bad trait at all, I must say) but my husband did confirm that it was a damn good sandwich.

GRILLED CHEESE WITH CHEDDAR, HORSERADISH, ONIONS AND APPLES

INGREDIENTS:
2 slices of bread per person - I used multigrain, it's all I had, but I think a nice deli rye would be ideal
3 slices of bacon per person, cooked up to a crispy goodness
onions, carmelized by cooking on low heat until golden, silky and sweet
red horseradish (seriously, my husband WILL NOT with the white stuff)
grated cheddar cheese - a nice sharp cheddar, and a decent amount per person, no skimping
a tart apple (maybe half an apple per person, how much do you like apples?) like a Northern Spy or Granny Smith, sliced and sauteed until soft and juicy but not mush
Butter

ASSEMBLY INSTRUCTIONS:
Begin with the bread.  Smear one side with a thin but even layer of horseradish.  Get it all the way to the edges (doing things to the edges is key with a good grilled cheese).  Mix together your onions and apples and then carefully layer them on top of the horseradish.  Top it with half of your grated cheddar cheese.  Then apply the slices of bacon.  Top with another layer of cheddar.  Finally add the top slice of bread.

DIRECTIONS:
Heat up a pan to medium high (a cast iron would be lovely).  Melt a healthy pat of butter in the pan.   Plop the sandwich in the pan.  Cook until the cheese starts to melt and the bread is toasty.  Using a spatula, carefully slide from the pan.  Melt another healthy pat of putter in the pan.  Carefully flip the raw side of the sandwich so it's touching the pan.  Cook until the cheese is completely melty and the sandwich is golden on the other side as well.  Cut.  Munch.  Mmmmm.

Monday, May 12, 2014

Turnips are Terrific?

Do you eat turnips? I mean ever.  Have you ever tasted a turnip?  There is a serious anti-turnip bias in this world. This winter, I ended up with one. One turnip.  Not one anti-turnip bias.  I don't know why.  Maybe it was cheap.  Maybe it was for the baby.  Maybe my mom's neighbor got it in his CSA and gave it to her and then she gave it to me thinking I would eat it.  That seems the most likely.  So what's a girl to do?  I hate waste, so I cooked the thing. Turns out, turnips are quite tasty and subsequently I went and purchased more turnips with the intention of eating them.  My only problem is that literally every single time I make turnips, someone will start whining about it before they have even taken a bit. That someone is never the baby, who scarfs the things down without complaint.  It is usually a grown person who should know that I would not repeatedly serve something that tastes bad and should also be mature enough to not whine.  So just in case you've got a few lurking at the bottom of your vegetable drawer, waiting to be used up, here's how to make turnips taste terrific.*+

*no promises. If you think beets taste like dirt, I have no clue what you'll think of turnips.  I find turnips to be somewhere between a potato, a radish and an apple, three foods that do not initially seem to have much in common.  If cooked well, they can be starchy and slightly sweet.

+I said taste terrific, not smell.  Turnips smell…like turnips.  It is not the best food smell I know, so let's leave it at that.

TURNIPS:
INGREDIENTS:
3 C Turnips
3-5 T butter
1/4 C water + 1 t Better than Bullion (Chicken Flavor)
salt and pepper

DIRECTIONS:
Cut your turnips up nice and small, I think I did a 1/4" dice (or would have if my dicing were accurate like that).  Melt your butter over medium low heat.  Add the cut up turnips.  Let them sit for about 5 minutes, they should develop some color.  Then turn them and let them cook for another 5 minutes (more color!).  Finally, add your liquid.  I bet you could use a quarter cup of chicken stock, but I think the water + bullion is more concentrated in flavor?  Anyway.  Let the turnips cook another 5-10 minutes.  You don't want them to be mushy, but they shouldn't be hard.  Add salt and pepper at the end, because your stock/bullion/whathaveyou may be saltier than you think!

Monday, May 5, 2014

A Taste of Spring


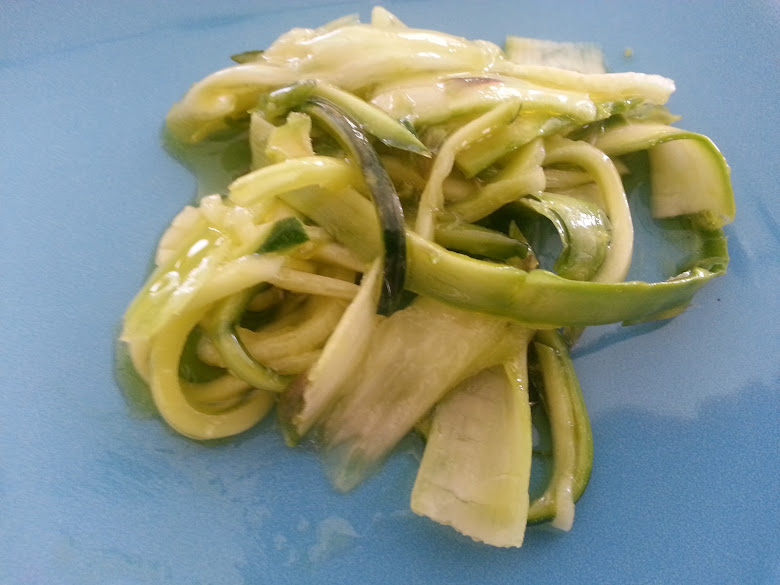
As the calendar turns from April to May, I can only hope the torrential rains go the way of the proverbial showers and bring plenty of beautiful flowers.  I can't quite stomach any more rains or the hearty dinners I crave when the weather is nasty.  I want bright, sharp, crisp spring tastes!  But I never would have expected to love this particular spring salad.  It has zucchini in it and I think I've made it abundantly clear how I feel about zucchini.  But my Uncle John was visiting and he seems to have made it a personal quest to get me to love the few vegetables I despise, and so he turned out this perfect spring salad.  As I helped myself to another serving, he modestly asked if I was eating it just to be polite.  It was my fourth serving.  I do not do fourths just to be polite.  If your palate is craving spring as much as you're craving the sunshine, definitely try this.  And have fourths, if you want. I won't judge.

INGREDIENTS:
1 bunch asparagus
1 zucchini
1 lemon
1/4 C olive oil
salt to taste

DIRECTIONS:
Wash your produce and locate a large serving platter.  Cut off your asparagus below the bottom knuckle, you don't want that overly woody tough bottom bit.  Then using a peeler, slowly, carefully, create long fettucini like slices of your asparagus.  Work top, then bottom and you'll end up with a long slightly thicker bit in the middle, but that's okay, once it's marinated it will be as tender as your other bits.  Then using a mandolin (or your knife if you're skilled like that), julienne your zucchini. My uncle used the outer sections, leaving a core of about a quarter inch cube.  Arrange the zucchini and asparagus on your platter, tossed gently and allowed to twist and turn over itself.  Zest and juice one lemon.  Mix the lemon juice with 1/4 C of olive oil and pour all over your zucchini and asparagus salad.  Then sprinkle the zest over the top.  Allow it to marinate a bit before eating if you can.  I think ours sat for about an hour, but I'm sure it would be delicious even with a shorter wait time.

LinkWithin

Related Posts with Thumbnails